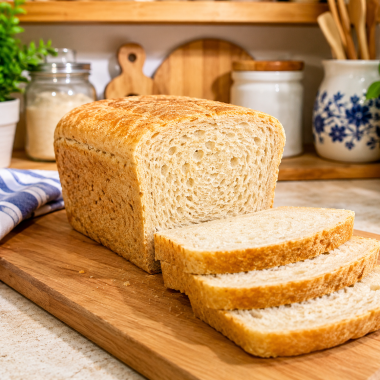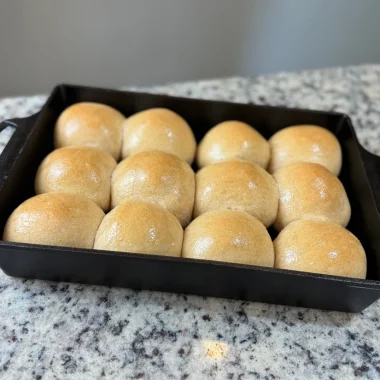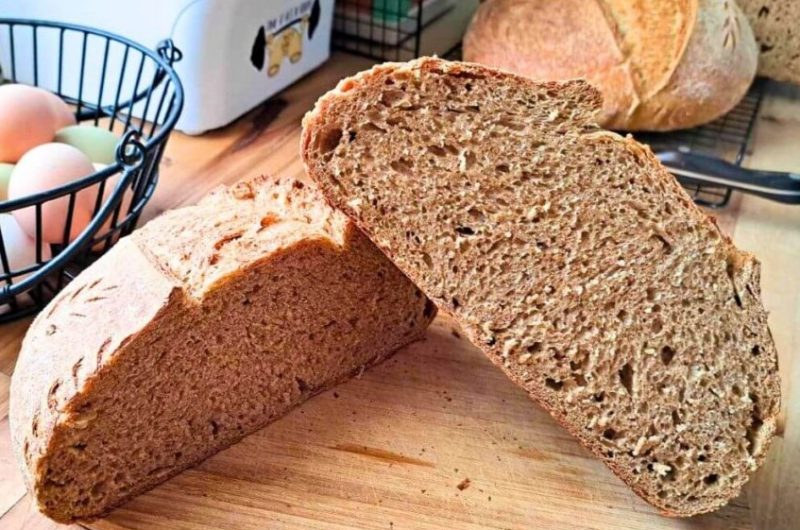
Sourdough Bread Made with 100% Fresh Milled Flour is one of the most wholesome and rewarding breads you can bake at home. Combining the natural goodness of freshly milled whole grains with the traditional process of sourdough fermentation creates a loaf that is flavorful, hearty, and packed with nutrition. Unlike many commercial breads that contain preservatives, additives, and refined flour, this homemade sourdough is made using simple ingredients that allow the natural taste of the grain to shine. Every slice has a rich, slightly nutty flavor, a chewy crumb, and a crisp golden crust that makes homemade sourdough truly special.
Baking with fresh milled flour has become increasingly popular among home bakers because it preserves the entire grain, including the bran, germ, and endosperm. This means the flour retains its natural fiber, vitamins, minerals, healthy oils, and antioxidants. When paired with a naturally fermented sourdough starter, the result is a loaf that many people find easier to digest while offering a deeper and more complex flavor than conventional yeast breads.
Why We Prefer This Recipe
This recipe combines traditional artisan bread-making techniques with the nutritional benefits of freshly ground whole grains. The slow fermentation process develops incredible flavor while improving the texture of the bread. Every loaf has a beautifully crisp crust, a moist and chewy interior, and the satisfying aroma that only homemade sourdough can provide.
Although sourdough requires patience, it does not require complicated techniques. Once you understand the basic process of mixing, folding, fermenting, shaping, and baking, making homemade sourdough becomes an enjoyable and relaxing baking experience. Whether you are an experienced baker or trying sourdough for the first time, this recipe offers an excellent way to enjoy authentic artisan bread using wholesome ingredients.
Why Milled Flour Makes Better Bread
Freshly milled flour is significantly different from commercially processed flour. When wheat berries are ground immediately before baking, they retain their natural nutrients and oils that are often reduced during commercial milling and storage.
Fresh milled flour also contributes a fuller wheat flavor with subtle nutty notes that cannot easily be replicated using packaged flour. Because the flour contains the complete grain, it absorbs more water during mixing. This creates dough that feels softer and stickier, but it also produces bread with excellent moisture and a pleasantly chewy texture after baking.
Many home bakers find that once they begin baking with fresh milled flour, they appreciate both the improved flavor and the nutritional advantages it provides.
Understanding Milled Whole Wheat Flour
Whole Grain Nutrition
Fresh milled whole wheat flour includes every part of the wheat berry. Unlike refined flour, nothing is removed during milling, allowing the bread to naturally contain dietary fiber, B vitamins, vitamin E, iron, magnesium, zinc, and many other valuable nutrients.
Because the germ remains in the flour, freshly milled bread often has a richer aroma and deeper flavor than bread made from refined flour.
Increased Water Absorption
One of the first things bakers notice is that fresh milled flour absorbs considerably more water.
This is completely normal.
The bran particles naturally hold additional moisture, resulting in dough that appears softer than traditional white bread dough.
Avoid adding excessive flour simply because the dough feels sticky. Proper hydration produces a softer crumb after baking.
What Makes Sourdough Different
Traditional sourdough bread rises without commercial yeast. Instead, it uses a sourdough starter, which is a living culture of naturally occurring wild yeast and beneficial bacteria.
As the dough ferments slowly, these natural microorganisms consume the flour and produce gases that allow the bread to rise. During fermentation, they also create the characteristic tangy sourdough flavor that makes artisan bread so distinctive.
Unlike quick breads made with instant yeast, sourdough develops far more complex flavors because fermentation occurs gradually over many hours.
The Importance of an Active Starter
Healthy Fermentation
Your sourdough starter should be active, bubbly, and recently fed before mixing the dough.
A healthy starter provides consistent fermentation and good oven spring while helping create an open crumb structure.
Better Flavor Development
An active starter also contributes balanced acidity that enhances the flavor of the whole wheat flour without making the bread overly sour.
If the starter appears weak or sluggish, feeding it once or twice before baking usually improves its activity.
Ingredient Overview
Every ingredient in this recipe has an important purpose despite the short ingredient list.
Fresh Milled Whole Wheat Flour
This is the foundation of the bread.
Fresh flour provides exceptional flavor, nutrition, and moisture while creating the hearty character that defines traditional whole grain sourdough.
Water
Water hydrates the flour and allows gluten development.
Because fresh milled flour absorbs additional moisture, the amount of water may vary slightly depending on the wheat variety and milling consistency.
Active Sourdough Starter
The starter replaces commercial yeast.
It provides natural fermentation, leavening, and the unique flavor that distinguishes authentic sourdough bread.
Salt
Salt strengthens gluten development while enhancing flavor.
It also helps regulate fermentation, allowing the dough to rise steadily rather than too quickly.
Why Autolyse Is an Important Step
One of the most valuable techniques in artisan bread baking is the autolyse.
During this step, only the flour and water are mixed together before the starter and salt are added.
Allowing the dough to rest for 30–45 minutes gives the flour time to absorb moisture fully.
This process naturally begins gluten development while making the dough smoother, stronger, and easier to handle later.
With fresh milled flour, autolyse is especially beneficial because the bran requires additional time to hydrate completely.
Stretch and Fold Instead of Traditional Kneading
Unlike many sandwich bread recipes, artisan sourdough does not require intensive kneading.
Instead, strength develops gradually through a series of gentle stretch and fold sessions.
During each fold:
- Wet your hands.
- Lift one side of the dough.
- Stretch it upward.
- Fold it over the center.
- Rotate the bowl.
- Repeat on all four sides.
This gentle process builds gluten while preserving the gases developing during fermentation.
It also creates the beautiful open crumb that sourdough bakers seek.
Why Slow Fermentation Improves Bread
One of the greatest strengths of sourdough is its long fermentation time.
As the dough slowly ferments, flavor compounds continue developing while gluten becomes more organized.
Cold overnight fermentation inside the refrigerator further improves both flavor and crust color.
Many experienced bakers believe that the final loaf tastes noticeably richer after an overnight proof because the extended fermentation allows the grain’s natural sweetness and complexity to develop fully.
Baking Perfect Milled Sourdough
Making artisan sourdough bread is a rewarding process that combines simple ingredients with time and patience. While the fermentation takes several hours, the hands-on work is surprisingly minimal. Each stage contributes to the final texture, flavor, and appearance of the loaf. By following these steps carefully, you can consistently bake a beautiful loaf with a crisp crust, tender crumb, and deep whole-grain flavor.
Step 1: Mix the Flour and Water
Place the fresh milled whole wheat flour into a large mixing bowl.
Gradually pour in the water while mixing with a wooden spoon or your hands until no dry flour remains.
The dough will appear rough, sticky, and shaggy. This is completely normal because freshly milled flour absorbs moisture differently than refined flour.
Cover the bowl and allow the dough to rest for 30–45 minutes. This resting period is called the autolyse, which hydrates the flour and begins natural gluten development.
Step 2: Add the Starter and Salt
After the autolyse, add:
- Active sourdough starter
- Salt
Mix thoroughly until both ingredients are evenly distributed throughout the dough.
The dough will become smoother as you continue mixing.
Although sticky, it should feel elastic and cohesive rather than dry.
Step 3: Perform Stretch and Fold Sessions
Instead of kneading, strengthen the dough through the stretch and fold method.
Wet your hands to prevent sticking.
Lift one side of the dough, gently stretch it upward, and fold it toward the center.
Rotate the bowl and repeat until all four sides have been folded.
Repeat this process every 30 minutes for approximately 2–3 hours, completing 4–6 sets.
Each fold gradually builds gluten strength while maintaining the airy structure developing during fermentation.
Step 4: Bulk Fermentation
After completing the stretch and folds, cover the bowl and allow the dough to ferment at room temperature.
Bulk fermentation usually takes 4–6 hours, although timing depends on room temperature and starter activity.
The dough should become:
- Puffy
- Smooth
- Slightly domed
- Filled with small air bubbles
Avoid relying only on time. Instead, observe how the dough looks and feels.
Step 5: Shape the Dough
Lightly flour your work surface.
Carefully turn the dough onto the surface without pressing out all of the air.
Shape it into either:
- A round boule
- An oval bâtard
Use gentle tension while shaping to create a smooth outer surface.
Place the shaped loaf seam-side up into a well-floured proofing basket or bowl lined with a floured towel.
Step 6: Final Proof
Cover the dough.
Choose one of two proofing methods:
Room Temperature Proof
Allow the loaf to rise for 2–3 hours.
Cold Fermentation
Refrigerate the dough overnight for 8–12 hours.
Cold fermentation develops deeper flavor, improves crust color, and makes scoring easier before baking.
Step 7: Prepare the Dutch Oven
Approximately 45 minutes before baking, place a Dutch oven with its lid inside your oven.
Preheat the oven to:
450°F (230°C)
A thoroughly heated Dutch oven creates steam during baking, helping produce excellent oven spring and a beautifully crisp crust.
Step 8: Score the Dough
Carefully transfer the dough onto parchment paper.
Using a bread lame or sharp knife, score the top approximately ½ inch deep.
Scoring controls how the loaf expands during baking while creating an attractive artisan appearance.
Step 9: Bake
Transfer the dough, along with the parchment paper, into the hot Dutch oven.
Cover with the lid.
Bake:
- 20 minutes covered
- Remove the lid
- Continue baking 20–25 minutes uncovered
The finished loaf should have:
- Deep golden brown color
- Crisp crust
- Hollow sound when tapped
The internal temperature should reach approximately 205–210°F (96–99°C).
Step 10: Cool Completely
Transfer the baked bread to a cooling rack.
Allow it to cool for at least 1 hour before slicing.
Although it is tempting to cut into warm bread, cooling allows the crumb to finish setting and prevents a gummy texture.
Flavor Variations
This recipe serves as an excellent foundation for many artisan bread variations.
Multigrain Sourdough
Mix additional grains such as:
- Rye
- Spelt
- Einkorn
These grains create deeper flavor and additional complexity.
Seeded Artisan Loaf
Fold into the dough:
- Pumpkin seeds
- Sunflower seeds
- Flax seeds
- Sesame seeds
They provide extra crunch and nutritional value.
Herb Sourdough
Incorporate herbs including:
- Rosemary
- Thyme
- Oregano
These create wonderful savory aroma.
Garlic Parmesan Sourdough
Add roasted garlic and grated Parmesan cheese during the final folding stage.
This produces a rich artisan loaf ideal for pasta dinners.
Common Mistakes to Avoid
Avoiding a few common errors greatly improves the final loaf.
Using a Weak Starter
An inactive starter produces poor rise and dense bread.
Always feed the starter before baking.
Under-Fermentation
Insufficient fermentation creates tight crumb and limited oven spring.
Wait until the dough becomes noticeably airy before shaping.
Over-Fermentation
Too much fermentation weakens gluten and makes shaping difficult.
Watch the dough rather than relying only on the clock.
Adding Too Much Flour
Fresh milled flour naturally creates softer dough.
Adding excessive flour produces heavy bread.
Cutting Too Soon
Fresh bread continues setting while cooling.
Waiting one hour improves texture significantly.
Serving Suggestions
Fresh Milled Sourdough Bread is delicious served:
- With butter
- With olive oil and herbs
- Alongside soups
- With hearty stews
- For grilled cheese sandwiches
- As avocado toast
- With smoked salmon
- For artisan sandwiches
- With homemade jam
- As breakfast toast
Storage Instructions
Store cooled bread inside a bread bag or paper bag at room temperature for 2–3 days.
Avoid refrigeration because it accelerates staling.
For longer storage:
- Slice the loaf.
- Wrap well.
- Freeze for up to 3 months.
Toast frozen slices directly without thawing.
Nutrition Benefits
This artisan sourdough provides the nutritional advantages of whole grains combined with natural fermentation. Fresh milled whole wheat flour contributes dietary fiber, B vitamins, iron, magnesium, zinc, antioxidants, and healthy plant compounds. The slow fermentation process may also improve mineral availability and contributes the characteristic sourdough flavor while producing a satisfying, hearty loaf suitable for everyday meals.
Notes
Always use an active, recently fed sourdough starter for the best rise. Fresh milled flour absorbs more water than commercial flour, so expect the dough to remain softer throughout the process. Overnight cold fermentation develops the richest flavor and produces excellent crust color. Baking inside a preheated Dutch oven creates professional-quality oven spring and crisp crust. Allow the loaf to cool completely before slicing for the best crumb texture. This Fresh Milled Sourdough Bread is perfect for artisan sandwiches, toast, breakfast, soups, holiday meals, meal prep, and everyday homemade baking.
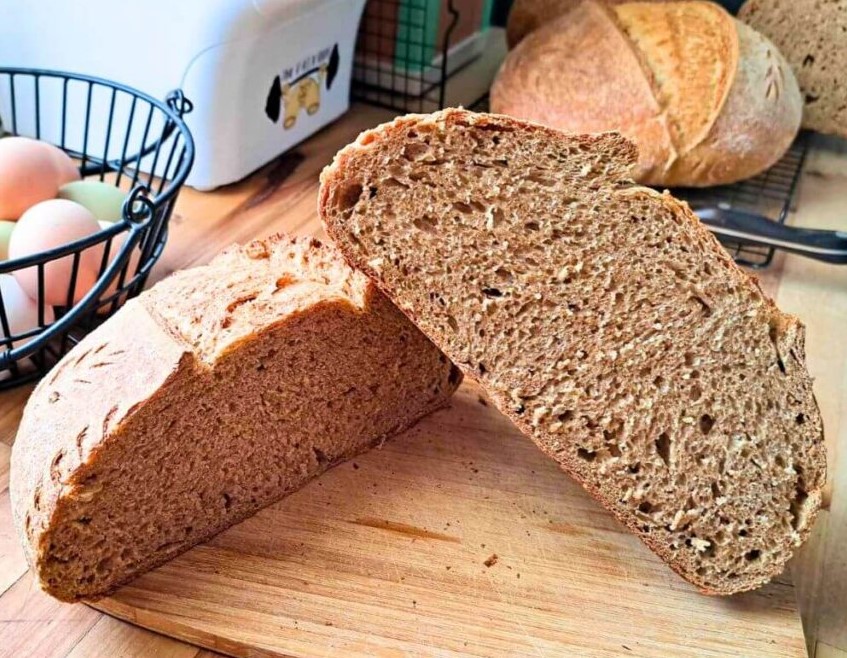
Sourdough Bread Made With 100% Fresh Milled Flour
This Sourdough Bread Made With 100% Fresh Milled Flour is a wholesome artisan loaf made with freshly ground whole wheat flour, an active sourdough starter, water, and salt. Naturally fermented for exceptional flavor, this bread has a crisp golden crust, a chewy crumb, and a rich, nutty taste.
10
servings30
minutes45
minutes2-3
hours4-6
hours2-3
hours45
minutes10
hoursIngredients
- For the Dough
500g fresh milled whole wheat flour
350–400ml water (adjust as needed)
100g active sourdough starter
10g salt
Directions
- Prepare the Autolyse
In a large mixing bowl, combine:
Fresh milled whole wheat flour
Water
Mix until no dry flour remains.
Cover and allow the dough to rest for 30–45 minutes. - Add the Starter and Salt
Add:
Active sourdough starter
Salt
Mix thoroughly until everything is fully incorporated.
The dough should feel soft and slightly sticky. - Stretch and Fold
Using wet hands, gently stretch one side of the dough upward and fold it over itself.
Rotate the bowl and repeat on all four sides.
Perform one set of stretch and folds every 30 minutes for 2–3 hours, completing 4–6 sets. - Bulk Fermentation
Cover the bowl and allow the dough to ferment at room temperature for 4–6 hours.
The dough should become airy, puffy, and noticeably larger. - Shape the Dough
Transfer the dough to a lightly floured surface.
Shape it into either:
A round loaf (boule), or
An oval loaf (bâtard)
Place it seam-side up into a floured proofing basket or bowl. - Final Proof
Choose one of the following methods:
Proof at room temperature for 2–3 hours, or
Refrigerate overnight for improved flavor and texture. - Preheat the Oven
Place a Dutch oven inside the oven.
Preheat to:
450°F (230°C)
Allow the Dutch oven to heat completely before baking. - Score the Dough
Transfer the dough onto parchment paper.
Using a bread lame or sharp knife, score the top of the loaf with one deep slash or your preferred decorative pattern. - Bake
Carefully place the dough into the hot Dutch oven.
Bake:
20 minutes covered
20–25 minutes uncovered
The loaf should develop a deep golden-brown crust and sound hollow when tapped. - Cool
Transfer the bread to a wire cooling rack.
Allow it to cool for at least 1 hour before slicing.
Nutrition Facts
10 servings per container
- Amount Per ServingCalories150
- % Daily Value *
- Total Fat
1g
2%
- Total Carbohydrate
30g
11%
- Total Sugars 0g
- Protein 5g 10%
* The % Daily Value tells you how much a nutrient in a serving of food contributes to a daily diet. 2,000 calories a day is used for general nutrition advice.