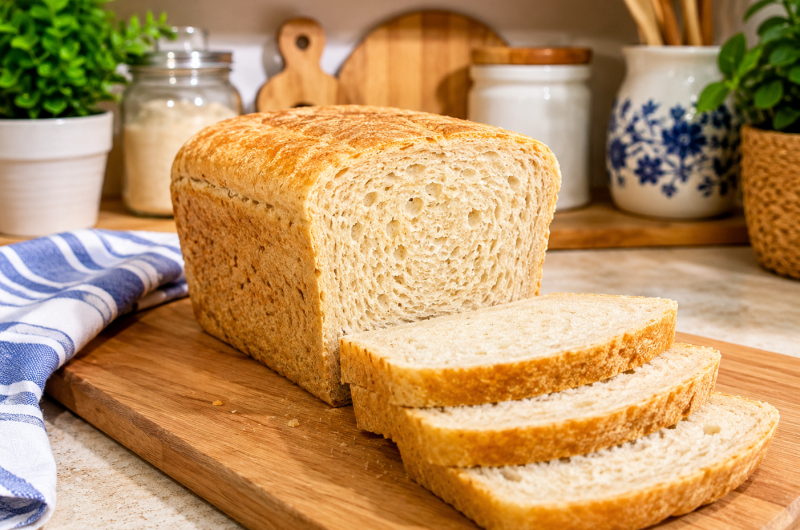
Gluten-Free Sandwich Bread is a staple recipe for anyone following a gluten-free lifestyle or looking for a homemade alternative to store-bought bread. Unlike many commercial gluten-free loaves that can be dry, crumbly, or overly dense, this homemade version is soft, light, and sturdy enough for sandwiches, toast, grilled cheese, or everyday meals. With the right flour blend and a few simple baking techniques, you can create a loaf that slices beautifully and stays fresh for several days.
One of the greatest benefits of baking gluten-free bread at home is having complete control over the ingredients. You can avoid unnecessary preservatives, artificial flavors, and additives commonly found in packaged gluten-free bread while enjoying a fresher and more flavorful loaf. This recipe uses everyday pantry ingredients, making it suitable for beginners as well as experienced home bakers.
Why You Prefer This Recipe
This homemade gluten-free bread offers everything people expect from a classic sandwich loaf. It has a tender crumb, a soft crust, and enough structure to hold fillings without falling apart. Whether you’re preparing breakfast toast, lunch sandwiches, or evening snacks, this bread performs wonderfully in every situation.
Unlike many gluten-free recipes that require complicated ingredients, this loaf uses a straightforward combination of gluten-free flour, yeast, eggs, and milk to produce reliable results. The batter comes together quickly, rises beautifully, and bakes into a loaf that tastes fresh, wholesome, and satisfying.
Because it freezes well, this bread is also an excellent choice for meal preparation. Simply slice the loaf after cooling and freeze individual slices for convenient use throughout the week.
Understanding Gluten-Free Bread
Traditional bread relies on gluten to create elasticity and structure. Gluten traps gases produced by yeast, allowing dough to rise while developing a soft and airy texture.
Gluten-free bread works differently.
Instead of forming an elastic dough, gluten-free mixtures create a thick batter. This is completely normal and should not be mistaken for a problem. Trying to make the batter resemble traditional wheat dough by adding extra flour often results in dense, dry bread.
Accepting the naturally softer consistency is one of the most important steps toward successful gluten-free baking.
Why Homemade Gluten-Free Bread Is Better
Many store-bought gluten-free breads are designed for a long shelf life rather than excellent texture or flavor. Homemade bread, however, delivers freshness that is difficult to match.
Baking at home also allows you to:
- Control ingredient quality
- Adjust sweetness
- Avoid unnecessary preservatives
- Customize flavors
- Add nutritious seeds or grains
- Bake fresh whenever needed
The aroma of freshly baked gluten-free bread filling your kitchen is another wonderful benefit that packaged bread simply cannot provide.
Ingredient Overview
Each ingredient plays a specific role in creating soft, flavorful sandwich bread.
Gluten-Free All-Purpose Flour
A high-quality gluten-free all-purpose flour blend containing xanthan gum provides the structure needed for the loaf.
Many blends combine rice flour, potato starch, and tapioca starch to create balanced texture.
Always check that xanthan gum is already included. If not, additional xanthan gum may be required according to the flour manufacturer’s recommendations.
Warm Milk
Warm milk hydrates the flour while adding richness and softness.
Dairy-free alternatives such as almond milk, oat milk, or soy milk can also be used successfully.
The liquid should feel warm rather than hot to avoid damaging the yeast.
Instant Yeast
Instant yeast allows the bread to rise efficiently without requiring lengthy preparation.
Fresh active yeast produces a lighter loaf with improved texture.
Sugar or Honey
A small amount of sugar or honey feeds the yeast during rising while contributing gentle sweetness and beautiful crust color.
Either option works equally well without significantly affecting the overall flavor.
Salt
Salt strengthens the bread structure while enhancing every other ingredient.
Even a small amount dramatically improves the finished loaf.
Eggs
Eggs provide structure, moisture, and stability.
They also help the loaf slice neatly after baking.
Using room-temperature eggs helps them blend more smoothly into the batter.
Oil or Melted Butter
Fat keeps the bread moist while producing a softer crumb.
Butter contributes richer flavor, while vegetable oil creates an equally tender loaf.
Apple Cider Vinegar
Although only a teaspoon is used, apple cider vinegar helps improve yeast activity while supporting the overall texture of the bread.
Its flavor disappears during baking.
Why Proper Batter Consistency Matters
One of the biggest differences between wheat bread and gluten-free bread is consistency.
Traditional bread forms a smooth, elastic dough.
Gluten-free bread forms a thick batter.
This batter should remain soft, sticky, and spreadable.
Many first-time bakers mistakenly believe they need additional flour because the batter feels wetter than expected.
Resist this temptation.
Soft batter produces soft bread.
Adding too much flour usually creates dry, crumbly slices.
The Importance of Yeast Activation
Although instant yeast is reliable, activating it before mixing provides confidence that it is fresh and active.
After combining the warm milk with the sugar or honey, sprinkle the yeast over the surface.
Within 5–10 minutes, the mixture should become bubbly and foamy.
This simple step confirms that the yeast is healthy and capable of producing a beautifully risen loaf.
Choosing the Right Loaf Pan
Using the proper loaf pan helps produce evenly baked bread with attractive slices.
A standard 9 × 5-inch loaf pan works well for this recipe.
Lining the pan with parchment paper makes removal easier while preventing sticking.
After transferring the batter into the pan, smooth the top gently using a damp spatula.
This creates an attractive finished loaf with an even surface after baking.
Perfect for Everyday Meals
This Gluten-Free Sandwich Bread is incredibly versatile and fits almost every meal.
Enjoy it as:
- Breakfast toast
- Peanut butter sandwiches
- Grilled cheese
- Club sandwiches
- Avocado toast
- French toast
- Garlic bread
- Soup accompaniment
- Healthy snacks
Its soft texture and mild flavor make it suitable for both sweet and savory toppings, making it one of the most useful gluten-free bread recipes every home baker should master.
How To Make Perfect Gluten-Free Sandwich Bread
Making homemade gluten-free bread is easier than many people think. Unlike traditional bread dough that requires kneading, gluten-free bread comes together as a thick batter that is mixed thoroughly before rising. Following each stage carefully helps produce a loaf with a soft crumb, an even texture, and slices that hold together beautifully for sandwiches and toast.
Step 1: Activate the Yeast
Pour the warm milk into a mixing bowl.
Add the sugar or honey and stir until dissolved.
Sprinkle the instant yeast over the surface.
Allow the mixture to rest for 5–10 minutes until it becomes foamy.
The bubbles indicate that the yeast is active and ready to help the bread rise.
Step 2: Combine the Dry Ingredients
In a separate large bowl, combine:
- Gluten-free all-purpose flour
- Salt
Whisk thoroughly to distribute the ingredients evenly.
This simple step helps prevent uneven pockets of salt throughout the loaf.
Step 3: Mix the Wet Ingredients
Add the following ingredients to the flour mixture:
- Eggs
- Oil or melted butter
- Apple cider vinegar
- Activated yeast mixture
Using a wooden spoon, hand mixer, or stand mixer, mix until everything is completely incorporated.
The mixture will resemble a thick batter instead of traditional bread dough.
This consistency is exactly what you want.
Step 4: First Rise
Cover the bowl with plastic wrap or a clean kitchen towel.
Place it in a warm, draft-free location.
Allow the batter to rise for approximately 45–60 minutes.
During this time, the yeast produces air bubbles that create a lighter loaf after baking.
The batter should noticeably increase in volume.
Step 5: Prepare the Loaf Pan
Grease a standard loaf pan.
Line it with parchment paper if desired for easier removal.
Transfer the risen batter into the prepared pan.
Using a damp spatula, smooth the surface evenly.
This helps produce an attractive loaf with a level top.
Step 6: Second Rise
Cover the loaf pan loosely.
Allow the batter to rise for another 20–30 minutes.
This second rise gives the bread additional volume while creating a lighter interior.
Avoid allowing it to overproof, as excessive rising may cause the loaf to collapse during baking.
Step 7: Bake
Preheat the oven to:
350°F (180°C)
Bake the bread for approximately 35–40 minutes.
The crust should become lightly golden brown.
If available, use an instant-read thermometer.
The center should reach approximately 205°F (96°C) when fully baked.
Step 8: Cool Completely
Remove the loaf from the oven.
Allow it to cool inside the pan for about 10 minutes.
Carefully transfer it to a wire rack.
Cool completely before slicing.
Although warm bread smells tempting, slicing too early can compress the crumb and create uneven slices.
Flavor Variations
This versatile recipe can easily be customized.
Seeded Sandwich Bread
Add nutritious seeds such as:
- Sunflower seeds
- Chia seeds
- Flax seeds
- Pumpkin seeds
They provide additional texture and nutritional value.
Herb Bread
Mix dried herbs into the batter, including:
- Rosemary
- Oregano
- Thyme
- Basil
These herbs pair wonderfully with soups and savory meals.
Cheese Bread
Fold shredded cheddar or Parmesan cheese into the batter before baking.
This creates rich flavor throughout the loaf.
Cinnamon Raisin Bread
For a sweeter variation, add cinnamon and raisins to create a breakfast-friendly loaf.
Common Mistakes to Avoid
Avoiding a few simple mistakes will help produce consistently excellent gluten-free bread.
Adding Too Much Flour
The batter should remain thick and sticky.
Additional flour often creates dry, crumbly bread.
Using Cold Ingredients
Room-temperature eggs and warm milk combine more smoothly and encourage better yeast activity.
Skipping the Second Rise
The second rise contributes to improved volume and softer texture.
Cutting While Warm
Fresh bread continues setting as it cools.
Waiting until completely cool helps create cleaner slices.
Serving Suggestions
This Gluten-Free Sandwich Bread is delicious served in many ways:
- Toasted with butter
- Peanut butter and jam sandwiches
- Grilled cheese
- Turkey sandwiches
- Chicken salad sandwiches
- Avocado toast
- French toast
- Garlic toast
- Breakfast sandwiches
- Soup accompaniment
Its soft texture makes it suitable for both sweet and savory meals.
Storage Instructions
Store completely cooled bread inside an airtight container at room temperature for 2–3 days.
For longer freshness, refrigerate for up to 5 days.
To freeze:
- Slice the loaf.
- Place parchment paper between slices if desired.
- Store in a freezer-safe bag for up to 3 months.
Toast frozen slices directly without thawing.
Nutrition Benefits
Homemade Gluten-Free Sandwich Bread provides carbohydrates for energy along with protein from the eggs and healthy fats from the oil or butter. Using a quality gluten-free flour blend enriched with vitamins and minerals helps create a balanced loaf suitable for individuals avoiding gluten. Optional additions such as chia, flax, or sunflower seeds can further increase the fiber, healthy fats, and micronutrient content.
Notes
Always use a high-quality gluten-free flour blend that contains xanthan gum for the best texture and structure. Keep the batter soft and avoid adding extra flour, as gluten-free bread requires a wetter consistency than traditional bread. Allow the loaf to cool completely before slicing to maintain its shape. Fresh bread can be stored at room temperature for 2–3 days, refrigerated for up to 5 days, or frozen for up to 3 months. This Gluten-Free Sandwich Bread is perfect for sandwiches, toast, breakfast, grilled cheese, French toast, meal prep, lunch boxes, and everyday homemade baking.
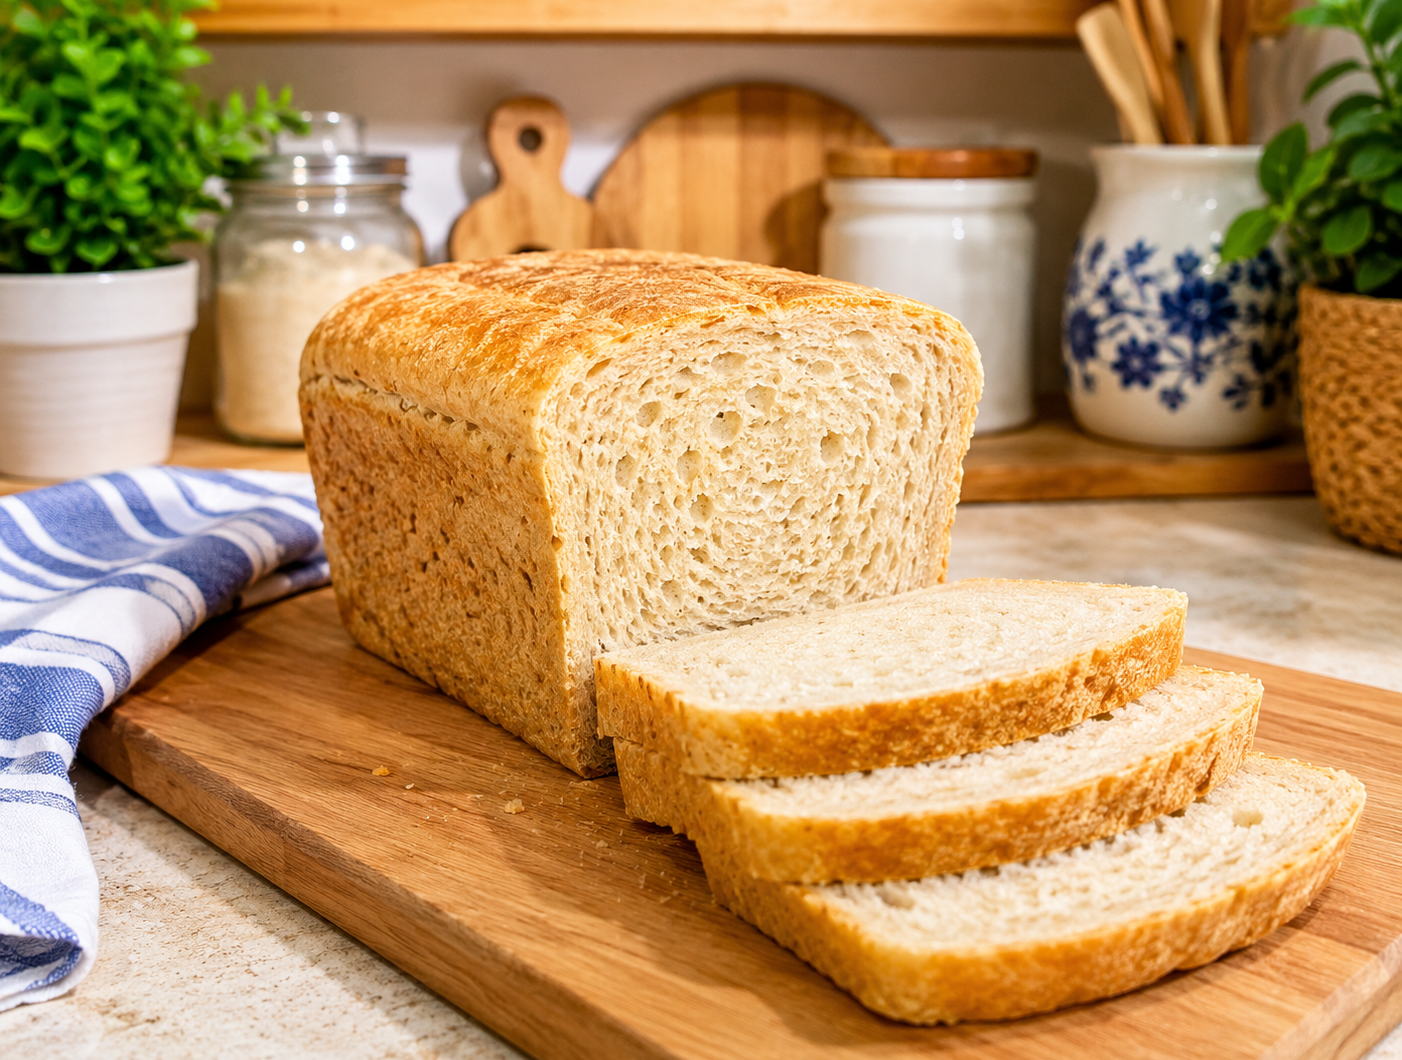
Gluten-Free Sandwich Bread
This Gluten-Free Sandwich Bread is soft, fluffy, and perfect for everyday sandwiches, toast, breakfast, or snacks. Made with a gluten-free all-purpose flour blend, this homemade loaf has a tender crumb and slices beautifully without becoming dry or crumbly.
10
servings1
hour30
minutes180
kcal40
minutes2
hours10
minutesIngredients
- For the Bread
3 cups gluten-free all-purpose flour (with xanthan gum)
1½ cups warm milk (or dairy-free milk)
2 teaspoons instant yeast
2 tablespoons sugar or honey
2 tablespoons sugar or honey
1 teaspoon salt
2 eggs (room temperature)
¼ cup oil or melted butter
1 teaspoon apple cider vinegar
Directions
- Activate the Yeast
Combine the warm milk, sugar (or honey), and instant yeast in a bowl.
Stir gently and allow the mixture to rest for 5–10 minutes until it becomes foamy. - Prepare the Dry Ingredients
In a large mixing bowl, whisk together:
Gluten-free all-purpose flour
Salt
Mix until evenly combined. - Mix the Batter
Add the following ingredients to the flour mixture:
Eggs
Oil or melted butter
Apple cider vinegar
Activated yeast mixture
Mix thoroughly using a spoon, hand mixer, or stand mixer until a thick, smooth batter forms. - First Rise
Cover the bowl with plastic wrap or a clean kitchen towel.
Let the batter rise in a warm place for 45–60 minutes until noticeably puffy. - Prepare the Loaf Pan
Lightly grease a standard loaf pan and line it with parchment paper if desired.
Transfer the batter into the prepared pan.
Smooth the top evenly with a damp spatula. - Second Rise
Cover the loaf pan loosely.
Allow the batter to rise for 20–30 minutes until slightly higher. - Bake
Preheat the oven to:
350°F (180°C)
Bake the bread for 35–40 minutes, or until the top is golden brown and the loaf is fully cooked. - Cool
Remove the bread from the oven.
Let it cool in the pan for 10 minutes.
Transfer to a wire rack and cool completely before slicing.
Nutrition Facts
- % Daily Value *
* The % Daily Value tells you how much a nutrient in a serving of food contributes to a daily diet. 2,000 calories a day is used for general nutrition advice.
Nutrition Facts
10 servings per container
- Amount Per ServingCalories180
- % Daily Value *
- Total Fat
6g
8%
- Total Carbohydrate
28g
11%
- Total Sugars 3g
- Protein 4g 8%
* The % Daily Value tells you how much a nutrient in a serving of food contributes to a daily diet. 2,000 calories a day is used for general nutrition advice.