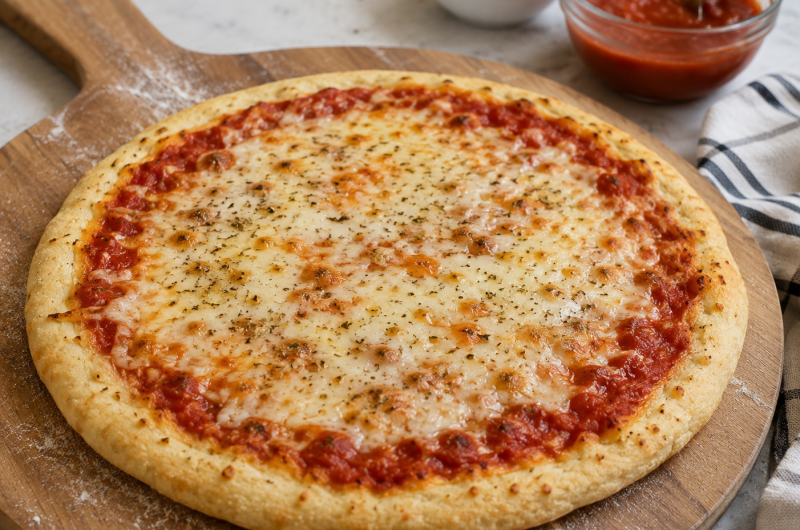
Nothing compares to the taste of freshly baked homemade pizza, and this Gluten-Free Pizza Crust makes it easy to enjoy a delicious pizza without wheat flour. Made with only a handful of pantry ingredients, this recipe creates a pizza base that is lightly crisp around the edges while remaining soft and tender in the center. Whether you are preparing a classic cheese pizza or loading it with your favorite toppings, this homemade gluten-free crust provides the perfect foundation for every slice.
Designed for both beginners and experienced home cooks, this recipe is simple to prepare and requires no kneading. The dough comes together quickly, spreads easily by hand, and bakes into a flavorful crust that rivals many restaurant-style gluten-free pizzas. Best of all, it is vegan, freezer-friendly, and perfect for family pizza nights.
Importance Of This Recipe
Homemade gluten-free pizza often has a reputation for being difficult to prepare, but this recipe proves otherwise. The dough mixes together in just a few minutes and requires only basic ingredients that are easy to find. There is no complicated kneading, no special equipment, and no advanced baking skills required.
The finished crust offers the perfect balance of textures. The edges become lightly crisp and golden, while the center stays soft enough to support generous layers of sauce, cheese, and toppings. It is a dependable recipe that delivers consistent results every time.
What Makes This Pizza Crust Different?
Unlike many gluten-free pizza recipes that become dry or crumbly after baking, this dough is formulated to remain soft while still developing a crisp exterior. A short pre-bake strengthens the crust before toppings are added, helping it hold sauces and cheese without becoming soggy.
Because the dough spreads easily by hand, shaping the pizza is simple even for beginners. You can prepare one large pizza for the family or divide the dough into two smaller pizzas depending on your needs.
The Secret to a Perfect Gluten-Free Pizza Base
Creating an excellent gluten-free pizza crust depends on using the right combination of ingredients and following a few simple techniques.
A Balanced Gluten-Free Flour Blend
A well-balanced flour blend provides both structure and tenderness. Different gluten-free flours contribute unique qualities, allowing the finished crust to remain stable while still feeling light and enjoyable to eat.
The recommended flour blend combines rice flour with tapioca flour, creating a dough that spreads easily and bakes evenly. This combination helps produce a crust with a pleasant chew while avoiding the dense texture often associated with gluten-free baking.
Baking Powder for Extra Lift
Adding a small amount of baking powder works alongside the yeast to improve the texture of the crust. While yeast creates flavor and air pockets during rising, baking powder provides additional lift during baking, resulting in a lighter and softer pizza base.
Why Activating the Yeast Matters
Properly activating the yeast is one of the most important steps in making homemade pizza dough. Mixing the yeast with warm water gives it time to become active before it is added to the flour mixture. Within a few minutes, the mixture should become foamy, indicating that the yeast is healthy and ready for baking.
Using water that is too hot can damage the yeast, while cold water slows activation. Warm water creates the ideal environment for successful fermentation and helps the dough rise properly during baking.
Simple Ingredients with Great Flavor
One of the reasons this recipe works so well is its uncomplicated ingredient list. Every ingredient has a specific purpose, creating a pizza crust that is flavorful without being overly complicated.
The gluten-free flour blend forms the structure of the dough, yeast develops flavor and lightness, olive oil adds tenderness, baking powder improves texture, salt enhances flavor, and sugar helps activate the yeast while encouraging beautiful browning during baking.
Making the Dough
Preparing the dough takes only a few minutes and requires no kneading. Once the wet ingredients are added to the flour mixture, everything is stirred together until smooth. Unlike traditional wheat dough, gluten-free pizza dough remains softer and slightly stickier, which is completely normal.
Resist the temptation to add excessive flour. A softer dough spreads much more easily and produces a lighter pizza crust after baking.
Shaping the Pizza
One of the best features of this dough is how easily it can be shaped. Simply transfer it to a lightly greased baking tray or pizza stone and gently press it outward using your hands. Start from the center and gradually work toward the edges to create an even thickness throughout the crust.
If the dough sticks to your fingers, lightly dust your hands with brown rice flour instead of mixing additional flour directly into the dough. Keeping the crust under one-quarter inch thick helps achieve the ideal balance between crisp edges and a soft center.
Why Pre-Baking Is Important
Pre-baking is a simple step that greatly improves the finished pizza. Baking the crust before adding toppings allows the surface to firm up, preventing moisture from sauces and vegetables from soaking into the dough.
As the crust pre-bakes, the surface becomes slightly dry and small cracks may appear. This is completely normal and indicates that the dough is ready to support your favorite pizza toppings without becoming soggy.
Choosing the Best Pizza Toppings
One of the greatest advantages of homemade gluten-free pizza is the freedom to customize every slice. Once the crust has been pre-baked, it becomes the perfect base for a wide variety of sauces, cheeses, vegetables, and proteins. Whether you prefer a classic cheese pizza or enjoy creating gourmet combinations, this crust pairs well with almost any topping.
Traditional tomato sauce, fresh mozzarella, mushrooms, onions, olives, peppers, spinach, and fresh basil are always popular choices. If you enjoy heartier pizzas, grilled chicken, pepperoni, sausage, or roasted vegetables also work wonderfully. Since the crust is sturdy after pre-baking, it easily supports generous toppings without becoming soft.
Why Homemade Pizza Tastes Better
Making pizza from scratch allows complete control over both the ingredients and the final flavor. Unlike many frozen or store-bought gluten-free pizzas, homemade pizza contains fresh ingredients without unnecessary preservatives or artificial additives. You can adjust the toppings, cheese, and seasoning to match your family’s preferences while enjoying the satisfaction of freshly baked pizza.
Preparing pizza at home also allows you to experiment with different flavor combinations. From traditional Italian-inspired recipes to creative vegetable-loaded pizzas, this versatile crust provides endless possibilities.
Perfect for Family Pizza Night
Homemade pizza is one of the easiest ways to bring family and friends together. This gluten-free pizza dough can be shaped into one large pizza for sharing or divided into two smaller crusts so everyone can personalize their own toppings. Children especially enjoy helping spread the sauce, sprinkle cheese, and decorate their pizzas before baking.
Because the recipe is simple and dependable, it makes pizza night more enjoyable without requiring advanced baking experience. It is also a fun activity for weekends, birthdays, and casual gatherings.
Make Ahead for Convenience
One of the most practical features of this recipe is how easily it fits into busy schedules. The dough can be prepared one or two days in advance and stored in the refrigerator until ready to use. This makes homemade pizza much quicker to prepare on busy evenings.
Another convenient option is to pre-bake the crust ahead of time. Once cooled, the crust can be wrapped well and refrigerated or frozen until needed. Simply add sauce and toppings before the final bake for an almost instant homemade pizza.
Freezing the Pizza Crust
Freezing homemade gluten-free pizza crust is an excellent way to save time. After the crust has been partially baked and cooled completely, wrap it tightly in plastic wrap or aluminum foil before placing it in a freezer-safe bag or airtight container.
The frozen crust stays fresh for up to one month. When ready to use, there is no need to thaw completely. Simply add your preferred toppings and bake until the cheese is melted and the crust is golden brown.
Storage and Reheating
Leftover pizza stores well and remains delicious the following day. Place cooled slices in an airtight container and refrigerate for up to three days. For the best texture, reheat the pizza in the oven or air fryer until the crust becomes crisp again.
Although the microwave can also be used, oven reheating usually produces a much better texture by restoring the crisp edges while warming the toppings evenly.
Common Mistakes to Avoid
Even though this recipe is beginner-friendly, a few simple techniques help ensure excellent results every time. Using water that is too hot may damage the yeast and reduce the dough’s ability to rise. On the other hand, water that is too cool slows yeast activation.
Another common mistake is skipping the pre-bake. Baking the crust before adding toppings creates a stronger base that supports sauce and cheese without becoming soggy. Finally, avoid making the crust too thick, as thinner dough develops a better balance between crispness and tenderness.
Notes
Use the Recommended Flour Blend
A balanced gluten-free flour blend creates the best texture and makes the dough easier to handle. While other blends may work, the recommended combination provides consistent results.
Dust with Brown Rice Flour
If the dough feels sticky while shaping, lightly dust your hands with brown rice flour instead of adding extra flour directly into the dough.
Prepare the Dough Ahead
The dough can be refrigerated for one to two days before baking, making meal preparation easier during busy weeks.
Freeze for Later
For longer storage, pre-bake the crust, cool completely, and freeze for up to one month before adding toppings.
Customize Your Pizza
Use your favorite pizza sauce, vegetables, cheeses, herbs, or protein toppings to create endless flavor combinations that suit your family’s taste.
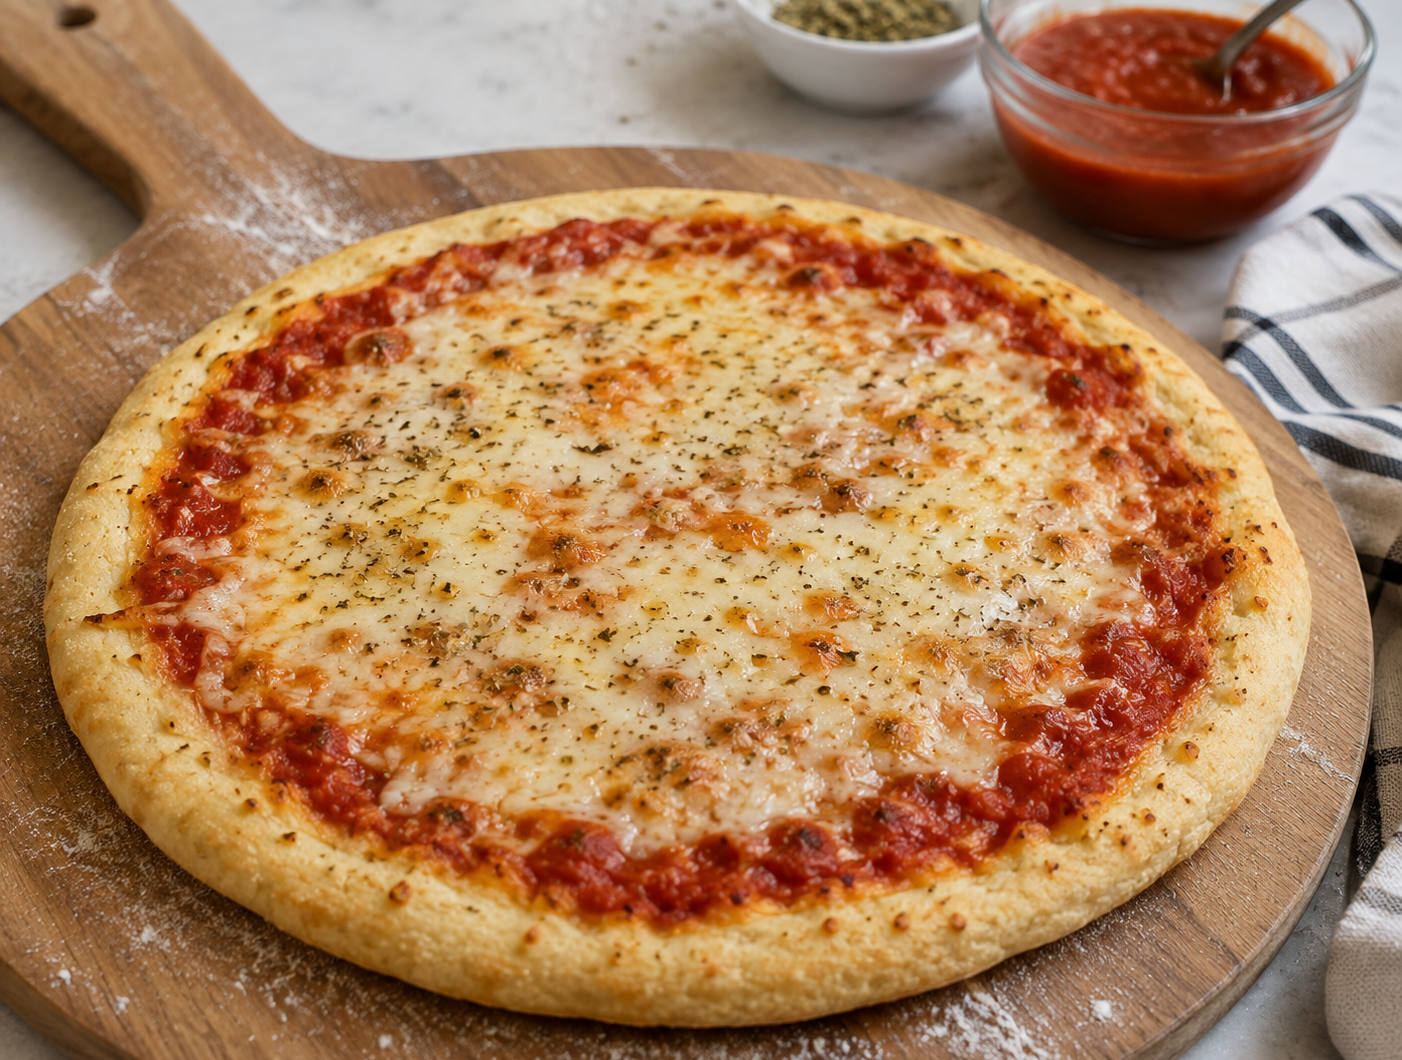
Gluten-Free Pizza Crust
This Gluten-Free Pizza Crust is easy to make, vegan, and perfect for homemade pizza nights. It bakes with crispy golden edges and a soft, tender center, making it an ideal base for your favorite pizza sauce and toppings.
1
servings15
minutes45
minutes170
kcal1
hourIngredients
1 Tbsp dry active yeast
1¼ cups warm water, divided
2–3 Tbsp sugar, divided
3 cups gluten-free flour blend
1 tsp salt
½ tsp baking powder
1 Tbsp olive oil
Directions
- Activate the Yeast
Preheat the oven to 350°F (176°C).
Mix yeast with ¾ cup warm water.
Let stand for 5 minutes.
Stir in 1 Tbsp sugar. - Mix the Dough
Combine flour, salt, baking powder, and remaining sugar.
Add the yeast mixture, olive oil, and remaining ½ cup water.
Stir until smooth. - Shape the Crust
Spread the dough on a greased baking sheet or pizza stone.
Press into a crust less than ¼ inch thick. - Pre-Bake
Bake for 20–25 minutes.
Remove when the surface looks dry. - Add Toppings
Spread with pizza sauce.
Add cheese and preferred toppings. - Finish Baking
Bake for another 15–25 minutes.
Remove when the edges are golden. - Serve
Slice and serve hot.
Nutrition Facts
1 servings per container
- Amount Per ServingCalories170
- % Daily Value *
- Total Fat
2g
3%
- Total Carbohydrate
35g
13%
- Protein 3g 6%
* The % Daily Value tells you how much a nutrient in a serving of food contributes to a daily diet. 2,000 calories a day is used for general nutrition advice.