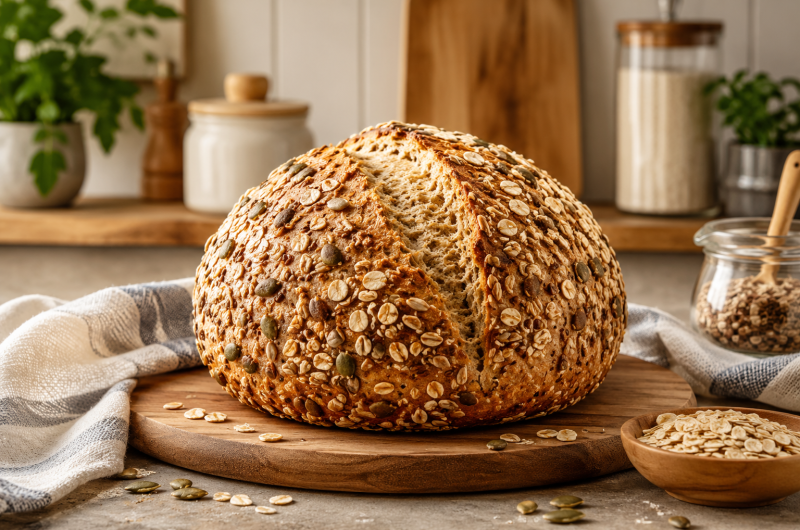
Gluten-Free Seeded Oat Bread is a wholesome artisan-style loaf that combines a soft, chewy interior with a beautifully crisp crust. Packed with hearty oats and nutritious seeds, this homemade bread offers a satisfying texture and rich flavor without using wheat flour. Whether you are following a gluten-free lifestyle because of dietary needs or simply looking to enjoy a healthier homemade loaf, this recipe delivers excellent results with simple ingredients and an easy preparation method.
The combination of gluten-free flour, oats, pumpkin seeds, sunflower seeds, flax seeds, and psyllium husk creates a bread that is both delicious and versatile, making it perfect for breakfast, sandwiches, soups, or everyday meals.
Why Gluten-Free Seeded Oat Bread Is So Popular
Homemade gluten-free bread has become increasingly popular because many people want a loaf that tastes fresh, has a pleasant texture, and slices well without crumbling. This seeded oat bread stands out because it combines the comforting qualities of artisan bread with the nutritional benefits of seeds and certified gluten-free oats.
Unlike many store-bought gluten-free loaves that can feel dry or dense, this recipe produces a loaf with a soft crumb and a crusty exterior. The slow fermentation process in the refrigerator also develops deeper flavor, giving the bread a more traditional bakery-style taste.
Why You’ll Love This Recipe
This bread offers everything that many home bakers look for in a gluten-free recipe. It is simple to prepare, requires no complicated kneading techniques, and develops excellent flavor during its overnight rest. The hearty oats provide tenderness, while the pumpkin, sunflower, and flax seeds contribute a satisfying crunch in every slice. Because the loaf works equally well for toast, sandwiches, soups, or snacks, it becomes a practical recipe to keep in your regular baking routine. It is also an excellent make-ahead recipe since the dough can rest in the refrigerator for several days before baking.
A Homemade Bread That Fits Many Occasions
Freshly baked bread has a special place in every kitchen, and this Gluten-Free Seeded Oat Bread is suitable for nearly every meal of the day. Toast a slice for breakfast, prepare healthy sandwiches for lunch, or serve it alongside warm soup during dinner.
The hearty texture also makes it an excellent addition to brunch tables, holiday meals, or family gatherings. Because the loaf stays soft inside while developing a crisp crust, it delivers a satisfying bite whether served plain or topped with your favorite spreads.
The Secret to Soft Gluten-Free Bread
One of the biggest challenges when baking gluten-free bread is achieving a soft texture without the elasticity provided by gluten. This recipe overcomes that challenge by combining a balanced gluten-free flour blend with psyllium husk, which helps create structure and improves moisture retention. The oats contribute tenderness, while the slow resting period allows the ingredients to hydrate fully. These simple techniques produce bread that slices cleanly, remains pleasantly chewy, and stays softer for longer than many traditional gluten-free loaves.
Ingredient Overview
Although the ingredient list is straightforward, every component contributes to the overall flavor, texture, and appearance of the finished loaf. Choosing quality ingredients helps ensure consistently excellent baking results.
Gluten-Free Bread Flour Blend
A high-quality gluten-free bread flour blend forms the foundation of this recipe. Blends containing rice flour, tapioca starch, and potato starch generally provide the best balance of structure and softness. Since different gluten-free flour blends behave differently, using one designed specifically for bread baking often produces superior results.
Psyllium Husk
Psyllium husk is one of the most important ingredients in gluten-free bread baking. It helps replace some of the elasticity normally provided by gluten, allowing the dough to hold together more effectively. It also improves moisture retention, resulting in bread that remains softer and less crumbly after baking.
Certified Gluten-Free Oats
Rolled oats contribute tenderness, mild flavor, and hearty texture. Always choose certified gluten-free oats to prevent cross-contamination with wheat during processing. Their gentle oat flavor complements the seeds beautifully while helping create a satisfying artisan-style loaf.
Pumpkin Seeds
Pumpkin seeds, also known as pepitas, add pleasant crunch and a rich nutty flavor. Their attractive green color also enhances the appearance of both the dough and the finished loaf. They blend naturally with the oats while contributing additional texture to every slice.
Sunflower Seeds
Sunflower seeds provide another layer of crunch and mild nuttiness. Their slightly buttery flavor pairs well with the pumpkin seeds and oats, creating a balanced combination that makes each bite more enjoyable.
Flax Seeds
Flax seeds contribute texture and a subtle earthy flavor while complementing the other seeds in the recipe. They also help create the rustic appearance that makes artisan seeded bread so appealing.
Honey
Honey provides a touch of natural sweetness that balances the hearty ingredients without making the bread sweet. It also helps activate the yeast and contributes to the beautiful golden-brown crust that develops during baking.
Warm Water
Warm water activates the yeast and hydrates the gluten-free flour blend. Maintaining the recommended temperature helps create ideal conditions for proper fermentation and dough development. Water that is too hot may damage the yeast, while water that is too cool may slow the rising process.
Why Overnight Refrigeration Improves the Bread
One of the most valuable techniques used in this recipe is the extended refrigeration period. After the dough has completed its initial rise, chilling it for at least twelve hours allows the flavors to develop much more deeply than they would during a shorter fermentation. This slow resting period also improves the texture of the dough, making the finished bread softer inside while helping create a crisp, artisan-style crust. Although waiting requires patience, the improvement in flavor and overall quality makes the extra time worthwhile.
A Rustic Bread with Excellent Versatility
This Gluten-Free Seeded Oat Bread is much more than an everyday loaf. Its hearty texture and rich flavor make it suitable for countless serving options. It can be toasted until crisp for breakfast, sliced thickly for sandwiches, served with soups and stews, or paired with cheese and fresh vegetables for simple lunches. Because the flavor is mild and balanced, it complements both savory and slightly sweet toppings equally well, making it one of the most versatile gluten-free breads you can prepare at home.
Fresh Ingredients Create Better Bread
The quality of the ingredients has a significant impact on the finished loaf. Fresh yeast encourages strong fermentation, while high-quality gluten-free flour provides consistent structure. Fresh oats and seeds maintain their natural flavor and crunch, and properly measured water creates the correct dough consistency. Paying attention to ingredient freshness and accurate measurements helps produce homemade Gluten-Free Seeded Oat Bread that is soft, flavorful, beautifully textured, and enjoyable from the first slice to the last.
Step-by-Step Preparation Guide
Preparing Gluten-Free Seeded Oat Bread is straightforward and rewarding, even if you are new to gluten-free baking. Unlike traditional wheat bread, this dough does not require extensive kneading because there is no gluten to develop. Instead, the ingredients are mixed thoroughly, allowed to rise, and then refrigerated for slow fermentation. This process creates an artisan-style loaf with a crisp crust, soft interior, and excellent flavor. Following each step carefully will help you achieve a loaf that slices beautifully and stays pleasantly chewy.
Step 1: Mix the Dry Ingredients
Begin by placing the gluten-free bread flour blend into a large mixing bowl. Add the instant yeast, certified gluten-free rolled oats, pumpkin seeds, sunflower seeds, flax seeds, psyllium husk, and coarse sea salt. Whisk everything together until the ingredients are evenly distributed throughout the flour. Proper mixing at this stage helps ensure the yeast, seeds, and psyllium are spread consistently, resulting in even texture and flavor throughout the finished loaf.
Step 2: Add the Honey and Warm Water
In a measuring jug or small bowl, stir the honey into the warm water until it dissolves completely. Slowly pour this liquid into the bowl of dry ingredients. Using a sturdy wooden spoon or silicone spatula, mix until every bit of flour has been moistened. The dough will appear sticky, thick, and slightly shaggy. This consistency is completely normal for gluten-free bread and should not be corrected by adding extra flour.
Step 3: Shape the Dough
Using the spoon or lightly moistened hands, gently gather the dough into a rough ball inside the bowl. Unlike traditional bread dough, gluten-free dough does not benefit from heavy kneading. Simply shaping it lightly is enough to help the ingredients come together. The dough will remain soft and sticky, but this moisture is necessary for producing a tender loaf after baking.
Step 4: Allow the First Rise
Cover the bowl tightly with plastic wrap, foil, or a reusable lid and leave it at room temperature for approximately 3 hours. During this time, the yeast becomes active, creating small air pockets that help the bread rise. As the dough ferments, it becomes lighter in texture and develops the structure needed for baking.
Step 5: Refrigerate the Dough
After the first rise, transfer the covered bowl to the refrigerator for at least 12 hours or up to 3 days. This slow fermentation is one of the most important steps in the recipe. It deepens the flavor, strengthens the dough, and contributes to a crisp artisan-style crust after baking. Although the dough may not appear dramatically larger, the extended resting period significantly improves the finished bread.
Step 6: Prepare the Baking Surface
Lightly dust a baking tray with gluten-free flour or cornmeal to prevent sticking. If using parchment paper, ensure it is suitable for high oven temperatures. Preparing the baking surface before removing the dough from the refrigerator makes shaping much easier.
Step 7: Shape the Loaf
Using lightly floured hands, carefully transfer the chilled dough onto the prepared baking tray. Gently shape it into a round loaf without pressing out the air that has developed during fermentation. The dough will still feel sticky, but resist the temptation to add large amounts of extra flour. Keeping the dough moist helps produce a softer crumb after baking.
Step 8: Add the Seed Topping
In a small bowl, combine the gluten-free rolled oats, pumpkin seeds, sunflower seeds, and flax seeds reserved for the topping. Sprinkle the mixture evenly over the shaped loaf and gently press it into the surface so the seeds adhere during baking. This topping creates a beautiful rustic appearance while adding extra crunch and flavor.
Step 9: Final Rest
Loosely cover the shaped loaf with a clean kitchen towel or plastic wrap and allow it to rest for 45 minutes. This final proof gives the dough time to relax before baking and encourages a lighter texture in the finished bread.
Step 10: Preheat the Oven
While the loaf completes its final rest, preheat the oven to 425°F (218°C). A thoroughly preheated oven is essential for producing good oven spring and creating a crisp, golden crust.
Step 11: Score the Dough
Using a sharp knife or bread lame, cut a slash or an “X” approximately ½ inch deep across the top of the loaf. Scoring allows steam to escape in a controlled way during baking and encourages the bread to expand evenly while creating an attractive artisan appearance.
Step 12: Optional Steam Method
For an even crispier crust, place a metal baking pan on the lower oven rack while the oven preheats. Just before placing the bread into the oven, carefully pour 3 to 4 cups of boiling water into the hot pan. The steam generated during the first part of baking helps develop a beautifully crisp crust while keeping the interior soft.
Step 13: Bake the Bread
Place the loaf on the center oven rack and bake for approximately 40 minutes. As the bread bakes, it should develop a rich golden-brown crust while remaining firm on the outside. When tapped on the bottom, the loaf should produce a slightly hollow sound. For the most accurate result, the internal temperature should reach approximately 195°F (90°C).
Step 14: Cool Before Slicing
Remove the bread from the oven and place it on a wire cooling rack. Allow it to cool for at least 15 to 20 minutes before slicing. This cooling period allows the crumb to finish setting and prevents the inside from becoming gummy. Although it may be tempting to cut into warm bread immediately, waiting produces much cleaner slices.
Common Mistakes to Avoid
Even experienced bakers can encounter challenges when making gluten-free bread. Avoiding these common mistakes helps ensure consistently excellent results.
Adding Too Much Flour
Sticky dough is expected when working with gluten-free bread. Adding extra flour to make it resemble wheat dough often produces a dense, dry loaf.
Skipping Psyllium Husk
Psyllium husk plays an essential role in providing elasticity and structure. Omitting it may result in bread that crumbles easily after baking.
Underbaking the Bread
Gluten-free bread requires sufficient baking time to fully set. Removing the loaf too early can leave the center undercooked and overly moist.
Slicing Too Soon
Freshly baked bread continues to set as it cools. Cutting it while still very hot may compress the crumb and create a gummy texture.
Serving Suggestions
This Gluten-Free Seeded Oat Bread is wonderfully versatile and complements many meals. Toast slices and spread them with butter for breakfast, or enjoy them with honey, jam, or cream cheese. The hearty texture makes excellent sandwiches, while thicker slices pair beautifully with soups, stews, salads, and vegetable dishes. It also serves well as part of a cheese board or alongside roasted vegetables for a wholesome meal.
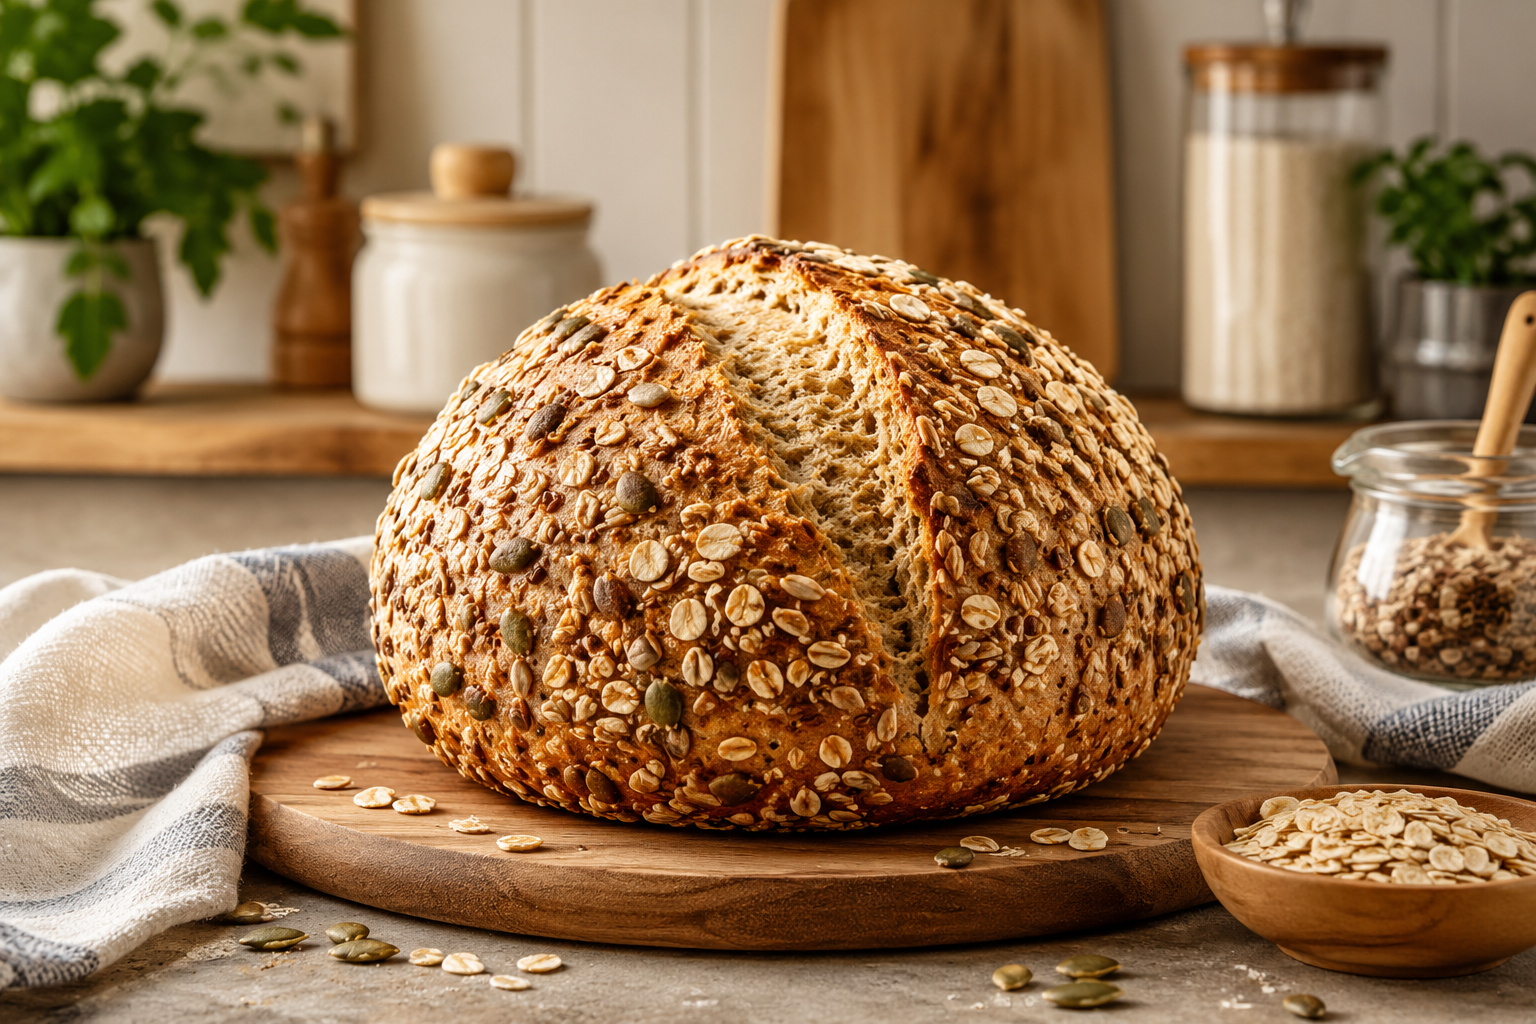
Gluten-Free Seeded Oat Bread
This Gluten-Free Seeded Oat Bread is a soft, chewy, artisan-style loaf with a crisp golden crust and a hearty blend of gluten-free oats and nutritious seeds
12
servings20
minutes3
hours12
hour45
minutes40
minutes16
hoursIngredients
- For the Dough
3 cups gluten-free bread flour blend
2 teaspoons instant yeast
1 cup certified gluten-free rolled oats
1/4 cup pumpkin seeds (pepitas)
1/4 cup sunflower seeds
2 tablespoons flax seeds
2 teaspoons coarse sea salt
2 tablespoons honey
1 1/2 cups warm water (95°F / 35°C)
1 tablespoon psyllium husk (recommended for improved texture)
- For the Topping
1 tablespoon certified gluten-free rolled oats
1 tablespoon pumpkin seeds
1 tablespoon sunflower seeds
1 teaspoon flax seeds
Directions
- Prepare the Dry Ingredients
In a large mixing bowl, combine:
Gluten-free bread flour blend
Instant yeast
Gluten-free rolled oats
Pumpkin seeds
Sunflower seeds
Flax seeds
Psyllium husk
Coarse sea salt
Whisk until evenly mixed. - Add the Wet Ingredients
Stir the honey into the warm water until dissolved.
Pour the mixture into the dry ingredients.
Using a wooden spoon or silicone spatula, mix until all the flour is fully moistened.
The dough should appear sticky and shaggy. - Shape the Dough
Using lightly wet hands or a spoon, gently gather the dough into a rough ball.
Do not knead the dough heavily. - First Rise
Cover the bowl tightly with plastic wrap or foil.
Allow the dough to rise at room temperature for 3 hours. - Refrigerate
Transfer the covered bowl to the refrigerator.
Chill for at least 12 hours or for up to 3 days to improve flavor and texture. - Prepare the Baking Surface
Lightly dust a baking tray with gluten-free flour or cornmeal.
Alternatively, line the tray with high-heat-safe parchment paper. - Shape the Loaf
Remove the chilled dough from the refrigerator.
Using lightly floured hands, shape it into a round loaf.
Place it onto the prepared baking tray. - Add the Topping
Mix together:
Gluten-free rolled oats
Pumpkin seeds
Sunflower seeds
Flax seeds
Sprinkle evenly over the loaf and gently press the topping into the surface. - Final Proof
Cover loosely and allow the loaf to rest for 45 minutes. - Preheat the Oven
Preheat the oven to 425°F (218°C). - Score the Dough
Using a sharp knife or bread lame, cut a slash or an “X” approximately ½ inch deep across the top of the loaf. - Optional Steam Method
For an extra crisp crust:
Place a metal baking pan on the lower oven rack.
Carefully pour 3 to 4 cups of boiling water into the pan immediately before baking. - Bake
Bake the bread on the center rack for approximately 40 minutes.
The loaf is ready when:
The crust is golden brown.
The exterior feels firm.
The bottom sounds hollow when tapped.
The internal temperature reaches 195°F (90°C). - Cool
Transfer the bread to a wire cooling rack.
Allow it to cool for 15–20 minutes before slicing.
Nutrition Facts
12 servings per container
- Amount Per ServingCalories185
- % Daily Value *
- Total Fat
5g
7%
- Total Carbohydrate
30g
11%
- Protein 6g 12%
* The % Daily Value tells you how much a nutrient in a serving of food contributes to a daily diet. 2,000 calories a day is used for general nutrition advice.