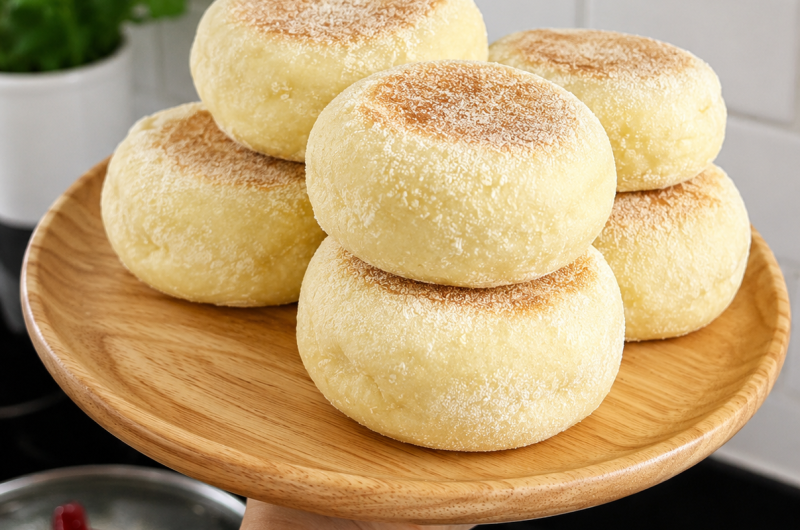
Homemade Gluten-Free English Muffins are a practical way to enjoy soft, bread-like muffins with a lightly browned exterior and the traditional textured interior that works so well with butter, jam, eggs, or other breakfast toppings. Unlike many gluten-free bread recipes, these English muffins do not need to be baked in the oven. They are shaped from a soft yeast dough and cooked directly in a skillet until golden brown on both sides.
This gluten-free English muffin recipe uses all-purpose gluten-free flour, sugar, salt, instant yeast, warm whole milk, melted butter, and cornmeal. Xanthan gum is also included when the chosen gluten-free flour blend does not already contain it. After mixing, the dough is given enough time to rise, shaped into round muffins, proofed again, and then cooked on the stovetop. The complete process takes about three hours, but most of that time is devoted to rising rather than active preparation.
Why You Prefer This Recipe
One of the biggest advantages of this recipe is its familiar bread-like texture. Gluten-free baking can sometimes produce breads that are dry, crumbly, or difficult to shape, but this recipe is designed around a soft dough that can be rolled and cut into rounds. Once cooked and cooled, the muffins can be fork-split to create the uneven interior commonly associated with classic English muffins.
Another benefit is that no oven is required. A skillet or griddle provides all the heat needed to cook the muffins. This makes the recipe particularly convenient when you do not want to heat the oven or when the oven is being used for something else. The stovetop method also produces a nicely browned exterior that becomes even more appealing after the muffin is split and toasted.
What Makes These English Muffins Gluten-Free?
Traditional English muffins are normally made with wheat flour, which contains gluten. This recipe replaces wheat flour with all-purpose gluten-free flour. A suitable gluten-free flour blend provides the starches and flours needed to create the basic structure of the dough while keeping the recipe free from conventional wheat flour.
Because gluten-free flour does not behave exactly like wheat flour, xanthan gum can play an important structural role. However, many commercial all-purpose gluten-free flour blends already contain xanthan gum. The recipe therefore instructs you to add the specified xanthan gum only when the flour blend you are using does not already include it. Checking the flour package before mixing the dough is an important first step.
Soft Gluten-Free Yeast Dough
These homemade English muffins are made from a yeast-raised dough rather than a loose batter. This distinction affects both the preparation method and the finished texture. The dough is soft and fairly wet after mixing, but it develops enough structure during rising to be rolled and cut into individual rounds.
The source recipe specifically uses instant yeast. Warm milk helps provide the liquid needed to hydrate the flour and creates an appropriate environment for the yeast. The dough is allowed to rise for two hours before shaping, followed by another 30-minute rise after the muffins have been cut. These proofing stages help create a lighter texture in the finished muffins.
Gluten-Free English Muffins vs. Crumpets
English muffins and crumpets can look somewhat similar, but their preparation is different. This recipe uses a soft but shapeable bread dough. After the first rise, the dough is rolled approximately half an inch thick and cut into circles. Those rounds then rise again before being cooked in a skillet.
Crumpets are generally associated with a looser batter that is cooked in molds or rings. Their characteristic open holes and spongy structure come from that batter-style preparation. These gluten-free English muffins instead follow a shaped-dough method, giving them a bread-like interior that can later be fork-split, toasted, and topped just like traditional English muffins.
Understanding the Gluten-Free Flour
The main ingredient in this recipe is three cups of all-purpose gluten-free flour. A general-purpose blend intended to replace wheat flour in baking is the appropriate choice. The source particularly recommends rice-flour-based blends for a lighter and airier result.
Different gluten-free flour blends can behave somewhat differently because their combinations of rice flour, starches, binders, and other ingredients vary. This is why it is useful to select a blend intended for general baking rather than using a single gluten-free flour such as almond flour or coconut flour. The original recipe was developed around an all-purpose gluten-free flour blend, so that type should be maintained for predictable results.
When to Add Xanthan Gum
Xanthan gum helps provide structure and elasticity in many gluten-free doughs. Without gluten, bread dough does not have the same natural network that wheat-based dough develops during mixing. A binder such as xanthan gum can help the dough hold together and maintain its shape.
The important point in this recipe is that xanthan gum should not automatically be added. The ingredient list specifies 1½ teaspoons only when the gluten-free flour blend does not already contain it. Many popular 1:1 gluten-free baking blends include xanthan gum, so always read the package. Adding unnecessary extra xanthan gum can affect the consistency of the dough.
Why Instant Yeast Is Important
The recipe uses two teaspoons of instant yeast. Yeast is responsible for helping the dough rise during the two proofing periods. The first rise lasts approximately two hours, allowing the dough to increase significantly in volume before it is rolled and cut.
The second rise takes approximately 30 minutes after shaping. This gives the individual rounds additional time to become lighter before they reach the hot skillet. The source recipe was developed using instant yeast, so replacing it with another type of yeast may require different handling or timing and is not part of the original method.
The Role of Warm Whole Milk
Two cups of warm whole milk provide the primary liquid for the dough. Milk helps hydrate the gluten-free flour while also contributing to the soft texture of the finished English muffins. The source guidance recommends warming the milk to approximately 105°F, which is slightly warmer than body temperature.
The milk should be comfortably warm rather than very hot. Excessive heat can interfere with yeast activity, while cold milk may slow the rising process. Combining appropriately warmed milk with instant yeast and sufficient proofing time helps the dough develop the volume required for soft homemade gluten-free English muffins.
Why Melted Butter Is Used
Melted butter adds richness and flavor to the dough. Gluten-free flour blends themselves can have relatively mild flavors, so ingredients such as butter, salt, and sugar help create a more rounded bread flavor.
The butter is mixed into the dough together with the warm milk. Because it is melted, it can distribute evenly through the wet dough during mixing. Butter is also useful when preparing the skillet, although the ingredient quantity listed in the recipe itself is specifically the amount intended for the dough. The finished muffins develop additional flavor when toasted before serving.
What Cornmeal Does
Cornmeal is an important part of the classic English muffin preparation. In this recipe, the dough rounds are placed on wax paper sprinkled with cornmeal, and more cornmeal is scattered over their tops before the second rise. Cornmeal is also used on the cooking surface.
Besides helping reduce sticking, the coarse texture of cornmeal gives the outside of the English muffins a familiar appearance and slight textural contrast. The recipe lists ¼ cup of cornmeal, or more as needed, because the exact amount required can vary depending on the size of the working surface and how heavily the muffins are dusted.
Equipment Needed for Gluten-Free English Muffins
The equipment for this recipe is straightforward. A large mixing bowl is needed for combining the ingredients, while a whisk or spoon can be used initially for the dry ingredients. The dough itself is mixed with a hand mixer fitted with dough hook beaters or with a stand mixer until everything comes together.
You will also need a rolling pin, round cookie or biscuit cutter, sheet pan, wax paper, skillet or griddle, spatula, and cooling rack. A round drinking glass can replace a dedicated biscuit cutter if necessary. None of these tools is particularly specialized, which makes the recipe accessible to home cooks without professional bread-making equipment.
How to Mix Gluten-Free English Muffin Dough
Begin by placing the all-purpose gluten-free flour, granulated sugar, salt, and instant yeast in a large bowl. If your chosen flour blend does not already contain xanthan gum, include the required xanthan gum as well. Mix the dry ingredients thoroughly so the yeast, sugar, and salt are distributed evenly throughout the flour.
Next, add the warm whole milk and melted butter. Beat the mixture with a mixer fitted with dough hooks for approximately five minutes, or until the dough comes together and looks uniform. Do not expect it to feel exactly like traditional wheat bread dough. The recipe describes the mixture as fairly wet, which is the intended consistency at this stage.
Why the Dough Is Fairly Wet
A wet gluten-free dough can initially seem unusual if you are accustomed to working with wheat bread. Traditional bread dough can often be kneaded by hand until smooth and elastic, but gluten-free bread recipes behave differently because they do not contain the gluten network responsible for that familiar stretch.
For these English muffins, the wetter consistency helps prevent the finished bread from becoming excessively dry or dense. Avoid adding large amounts of additional flour simply because the dough seems softer than conventional bread dough. Following the intended consistency gives the flour time to hydrate and allows the yeast to work during the long first rise.
The First Two-Hour Rise
After mixing, transfer the dough to a well-greased bowl. Cover it with a clean kitchen towel and place it in a warm area for approximately two hours. During this time, the yeast becomes active and the dough should expand significantly.
The source recipe indicates that the dough should double in size before shaping. Rising times can sometimes vary slightly depending on room temperature, but the two-hour period provides the main proofing stage for this recipe. Avoid placing the bowl in an excessively hot location. A comfortably warm environment is enough to encourage yeast activity without exposing the dough to damaging heat.
Rolling the Gluten-Free Dough
Once the dough has completed its first rise and approximately doubled in size, move it onto a lightly floured work surface. Use a rolling pin to gently roll the dough until it is approximately half an inch thick.
Try to maintain reasonably even thickness across the dough because this helps the English muffins cook at a similar rate. If some rounds are much thicker than others, their centers may take longer to cook. Use only enough flour on the work surface to manage the dough without unnecessarily changing its consistency.
Cutting the English Muffins
Use a round cookie cutter, biscuit cutter, or drinking glass to cut circles from the rolled dough. Press straight down to create clean rounds. After the first set of circles has been removed, the remaining scraps can be gently brought together and used to cut additional muffins.
The recipe produces six English muffins. Keeping the rounds close to the same diameter and thickness makes cooking easier because they can brown and cook through at roughly the same pace. Handle the shaped pieces gently so you do not unnecessarily compress the dough after its first long rise.
Preparing the Muffins for the Second Rise
Line a sheet pan with wax paper and sprinkle some of the cornmeal over the surface. Place the shaped dough rounds on top, leaving enough room between them for slight expansion. Sprinkle additional cornmeal over the tops of the muffins.
Cover the tray and allow the rounds to rise for another 30 minutes. This second proofing period is shorter than the first but still important. The dough has been handled and rolled during shaping, so giving the muffins additional resting time helps them regain some volume before cooking.
Cooking Gluten-Free English Muffins on the Stovetop
Heat a large skillet or griddle over medium heat. Lightly grease the cooking surface and sprinkle it with cornmeal before adding the muffins. A cast-iron skillet is particularly suitable because it holds heat well, but another dependable skillet or griddle can also be used.
Place the risen muffins into the hot pan without overcrowding them. Cook for approximately five to seven minutes on the first side, waiting until it is nicely golden before flipping. Cook the second side for another five to seven minutes or until both sides are browned and the muffins are cooked through.
Why Medium Heat Works Best
English muffins are relatively thick compared with pancakes, so they need enough time for heat to reach the center. Cooking over excessively high heat may brown the exterior quickly while leaving the middle insufficiently cooked. Medium heat allows the surface to become golden more gradually while the interior cooks.
Avoid flipping the muffins too early. Allow the first side to develop proper color before turning each muffin with a spatula. Maintaining steady heat throughout the process is more effective than repeatedly raising and lowering the temperature. The result should be an evenly browned exterior with a soft bread-like center.
Cooking in Batches
Depending on the size of your skillet, all six English muffins may not fit comfortably at once. Cooking in batches is perfectly acceptable and may actually make the muffins easier to manage. The source notes that you should plan for approximately 15 minutes per batch.
Before starting another batch, remove loose or heavily browned cornmeal from the pan and prepare the surface again as needed. Old cornmeal can continue to toast and eventually burn, creating bitter dark spots. Keeping the skillet reasonably clean between batches helps maintain consistent browning across all six muffins.
Cool Before Splitting
Once cooked, transfer the English muffins to a cooling rack and allow them to cool fully. This waiting period is important because freshly cooked bread continues to set internally as it cools. Splitting a muffin immediately may compress its still-soft interior.
After cooling, use a fork rather than a knife to open each muffin. The fork-splitting method produces the irregular interior texture commonly called “nooks and crannies.” These uneven surfaces become crisp when toasted and provide small pockets where butter, jam, or other toppings can collect.
How to Fork-Split English Muffins
Fork splitting is easy once the muffins are completely cool. Insert the tines of a regular fork deeply into the side of the muffin, remove them, and repeat around the entire circumference. Once you have created perforations all the way around, gently pull the two halves apart.
Unlike cutting with a sharp knife, which creates two smooth surfaces, fork splitting leaves an uneven interior. Those rough edges toast particularly well and are one of the characteristics associated with traditional English muffins. For the best final texture, split first and toast the halves before adding your chosen toppings.
Best Way to Serve Gluten-Free English Muffins
These muffins are especially enjoyable when split and toasted. Toasting creates crisp edges while warming the softer interior, emphasizing the contrast that makes English muffins different from ordinary sliced bread.
They can be served simply with butter or jam, but the neutral bread flavor also makes them useful for savory breakfasts. They can accompany eggs or be used as a base for breakfast-style sandwiches. Because toppings are separate from the original recipe, each person can choose how to serve the finished muffin without changing the basic dough.
Are These Gluten-Free English Muffins Egg-Free?
Yes. The original recipe does not contain eggs. Its structure comes from the gluten-free flour blend, xanthan gum when required, yeast, milk, and the mixing and proofing process.
This makes the basic recipe naturally egg-free according to the supplied ingredient list. However, anyone preparing food for a medically necessary gluten-free or allergen-controlled diet should still check the labels of every packaged ingredient. Gluten-free flour blends and other processed products can differ between manufacturers, so ingredient labels remain important.
Can These English Muffins Be Made Dairy-Free?
The original recipe uses whole milk and butter, so as written it contains dairy. The source suggests that a dairy-free adaptation can be made by replacing these ingredients with plant-based milk and plant-based butter.
Those replacements are optional substitutions rather than ingredients in the original recipe. For that reason, they should not replace whole milk and butter in the main recipe card. Anyone making the dairy-free variation should also expect some possible differences in flavor, browning, and texture depending on the plant-based products selected.
Notes for the Best Gluten-Free English Muffins
Check Your Flour for Xanthan Gum
Before measuring xanthan gum, read the ingredient list on your gluten-free flour package. If the blend already includes xanthan gum, do not add the extra 1½ teaspoons specified in the recipe. The additional amount is intended only for flour blends that do not already contain it.
The source recommends an all-purpose, preferably rice-flour-based gluten-free blend for a light result. Using the correct type of flour is particularly important because this recipe was not developed around single-ingredient alternatives such as almond or coconut flour.
Give the Dough Enough Time to Rise
The two rising periods should not be skipped. The first rise lasts two hours, while the shaped English muffins receive an additional 30-minute proof before cooking. Together, these stages give the yeast time to work and contribute to a lighter finished texture.
If the dough has not expanded properly, check whether the environment is warm enough and whether the yeast is fresh. Avoid trying to compensate for insufficient rising by using excessive heat during cooking, as this will not create the same internal texture.
Keep the Skillet Properly Prepared
A lightly greased skillet helps prevent sticking and promotes an evenly browned surface. Cornmeal adds another protective layer while also providing the traditional slightly coarse exterior associated with English muffins.
When cooking multiple batches, remove old browned cornmeal before adding fresh muffins. Reusing heavily toasted crumbs throughout several batches can lead to burnt flavors. A clean, consistently heated pan gives more reliable results.
Do Not Flip Too Soon
Allow each English muffin to become golden on the first side before turning it. Flipping too early can interrupt browning and may make the soft muffin harder to handle.
Approximately five to seven minutes per side is the guideline supplied with the recipe. Use the appearance of the muffin along with the timing, since exact cooking speed can vary with skillet material, burner strength, and muffin thickness.
Fork-Split Instead of Cutting
For the most traditional interior texture, cool the muffins completely and split them with a fork rather than slicing through them with a knife. The fork creates irregular edges and small pockets across the interior.
When those uneven surfaces are toasted, the raised sections become crisp while the deeper pockets remain ready to hold melted butter or other spreads. It is a small technique that makes a noticeable difference in the final English muffin experience.
Easy Stovetop Gluten-Free Bread for Breakfast
Homemade gluten-free bread can sometimes seem complicated, but this English muffin recipe breaks the process into manageable stages. Mix the soft dough, allow it to rise, roll and cut it, proof the rounds, and cook them on the stovetop. There is no oven temperature to manage and no loaf pan required.
The majority of the three-hour total preparation is inactive rising time. Active work consists mainly of mixing, shaping, and skillet cooking. Once you understand the wet dough consistency and allow sufficient proofing time, the method becomes straightforward enough to repeat whenever you want homemade gluten-free English muffins.
Homemade Gluten-Free English Muffins Worth the Wait
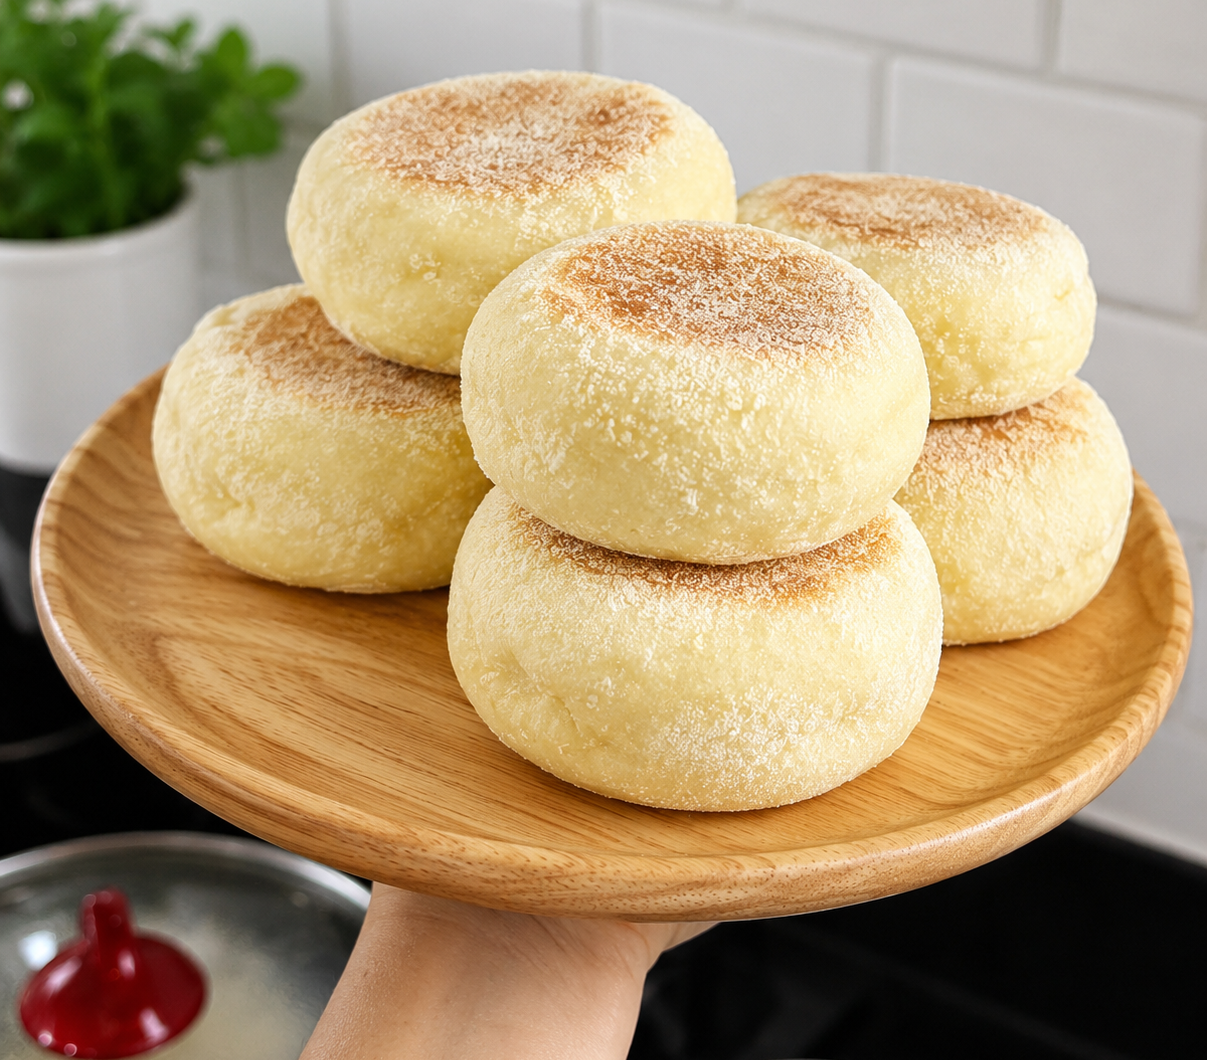
These Gluten-Free English Muffins offer the familiar qualities people look for in this classic breakfast bread: a round shape, golden stovetop-cooked exterior, soft center, and rough fork-split surface that becomes crisp when toasted. The combination of gluten-free flour, instant yeast, warm whole milk, butter, and cornmeal creates a straightforward dough without requiring an oven.
For the best result, use the correct gluten-free flour blend, add xanthan gum only when necessary, respect both rising periods, keep the skillet at medium heat, and allow the finished muffins to cool before splitting. With those details handled carefully, you can prepare six homemade gluten-free English muffins ready for toasting and serving with your favorite breakfast toppings.
Gluten-Free English Muffins
Soft and lightly golden Gluten-Free English Muffins made with a yeast-raised dough and cooked completely on the stovetop
6
servings15
minutes15
minutes350
kcal150
minutes3
hoursIngredients
3 cups all-purpose gluten-free flour
1½ teaspoons xanthan gum, only if your flour blend does not already contain it
1 tablespoon granulated sugar
2 teaspoons salt
2 teaspoons instant yeast
2 cups whole milk, warm
¼ cup butter, melted
¼ cup cornmeal, or more as needed
Directions
- Combine the Dry Ingredients
In a large bowl, whisk together the gluten-free flour, granulated sugar, salt, and instant yeast.
If your flour blend does not contain xanthan gum, add the 1½ teaspoons of xanthan gum at this stage. - Add Milk and Butter
Add the warm whole milk and melted butter.
Using a mixer, beat the mixture for about 5 minutes, or until the dough comes together. The dough should be uniform but fairly wet. - First Rise
Transfer the dough to a well-greased bowl and cover with a clean kitchen towel.
Leave in a warm place for about 2 hours, or until the dough has doubled in size. - Roll the Dough
Place the risen dough on a lightly floured surface.
Gently roll it to approximately ½-inch thickness. - Cut the Muffins
Use a round cookie cutter, biscuit cutter, or drinking glass to cut the dough into circles.
Gently bring the remaining dough scraps together and cut additional rounds. - Prepare for Second Rise
Line a sheet pan with wax paper and sprinkle it with some of the cornmeal.
Place the dough rounds on the prepared surface and sprinkle additional cornmeal over the tops. - Second Rise
Cover the shaped muffins and allow them to rise for another 30 minutes. - Heat the Skillet
Heat a lightly greased skillet or griddle over medium heat. Sprinkle the cooking surface with a little cornmeal. - Cook
Place the English muffins in the hot skillet without overcrowding.
Cook for approximately 5–7 minutes per side, or until both sides are golden brown and the muffins are cooked through.
Cook in batches if necessary. - Cool
Transfer the cooked English muffins to a cooling rack.
Allow them to cool completely before opening them. - Fork-Split and Serve
Use a fork to make deep holes around the edge of each cooled muffin. Gently pull the two halves apart along the perforations.
Toast before serving for a crispier surface and classic English muffin texture.
Nutrition Facts
6 servings per container
- Amount Per ServingCalories350
- % Daily Value *
- Total Fat
11g
15%
- Total Carbohydrate
57g
21%
- Protein 7g 15%
* The % Daily Value tells you how much a nutrient in a serving of food contributes to a daily diet. 2,000 calories a day is used for general nutrition advice.