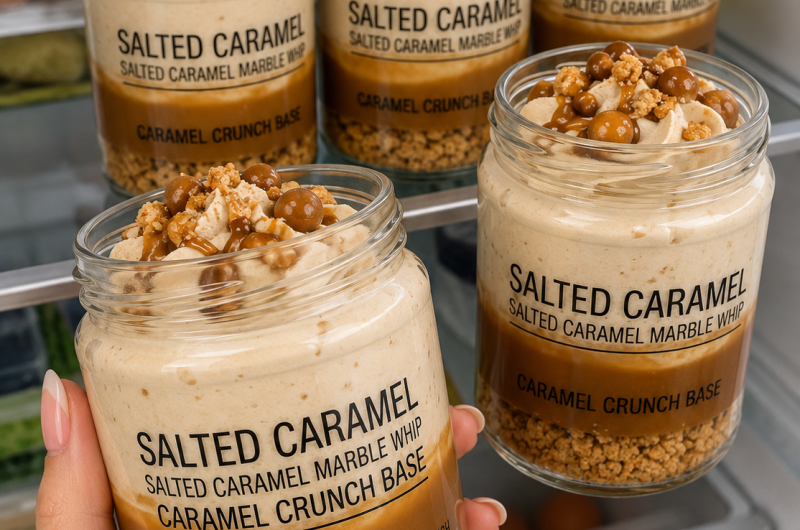
No Bake Salted Caramel Cheesecake Cups combine a buttery Biscoff cookie crust, smooth cheesecake filling, and rich salted caramel sauce in convenient individual portions. Each cup delivers several textures at once: a slightly crunchy cookie base, a light and creamy center, and a silky caramel topping with just enough salt to balance the sweetness. Because the cheesecake itself does not require baking, these individual desserts are especially useful when you want an impressive homemade treat without preparing a traditional baked cheesecake.
This easy no bake cheesecake recipe makes six individual dessert cups and can be prepared with either homemade salted caramel sauce or a quicker caramel made with chewy caramel candies. Both options create the caramel flavor that defines the dessert, while the cheesecake filling stays simple with cream cheese, sugar, vanilla, salted caramel sauce, and whipped heavy cream. After assembly, the cups need several hours in the refrigerator so the filling becomes properly chilled and set.
Why You’ll Love These Salted Caramel Cheesecake Cups
There is plenty to enjoy about individual no bake cheesecake cups. They look elegant enough for parties and special occasions, yet their preparation is much simpler than making a full cheesecake. There is no springform pan, water bath, or concern about cracks developing across the surface. Instead, the crust and filling are divided directly between six dessert cups, refrigerated, and finished with caramel before serving.
Another advantage is portioning. Since every dessert is assembled separately, there is no need to slice a large cheesecake neatly at serving time. Guests can simply take an individual cup. The clear layers also make the dessert visually appealing, especially when served in glass dessert cups that show the golden Biscoff crust beneath the pale caramel cheesecake filling.
What Makes This an Easy No Bake Cheesecake?
Traditional cheesecake recipes often require careful baking and cooling, but these salted caramel cheesecake cups rely on refrigeration instead. The Biscoff crust is made from cookie crumbs and melted butter rather than being baked. The cheesecake filling is prepared by beating cream cheese with sugar and vanilla, adding salted caramel sauce, and gently folding in whipped heavy cream.
Once assembled, the cups are refrigerated for four to six hours or overnight. This chilling period allows the filling to firm up and gives the dessert its creamy cheesecake consistency. Although the homemade caramel option requires cooking on the stove, the cheesecake portion itself remains completely no bake, making the overall dessert relatively straightforward to prepare.
The Layers of No Bake Salted Caramel Cheesecake Cups
These cheesecake cups have three main elements that work together. The bottom layer is a Biscoff cookie crust mixed with melted unsalted butter. Above that sits the soft salted caramel cheesecake filling. Finally, the cups are finished with more salted caramel sauce, with whipped heavy cream available as an optional decorative topping.
Each layer serves a different purpose. The cookie crumbs add texture and spiced caramelized flavor, the cheesecake filling provides richness and creaminess, and the salted caramel topping gives the dessert its strongest caramel character. Serving all three elements together creates a dessert with enough contrast to keep every spoonful interesting.
The Biscoff Cookie Crust
Biscoff cookies are particularly well suited to this no bake cheesecake because their caramelized, gently spiced flavor complements salted caramel. The cookies are processed into fine crumbs and mixed with melted unsalted butter. This creates a simple no bake cheesecake crust that holds together while remaining pleasantly crumbly.
The crust mixture is divided evenly between six 7-ounce dessert cups. It should be pressed down gently rather than packed very firmly. A narrow glass can help flatten the crumbs evenly inside each cup. Once prepared, the crusts are refrigerated while the cheesecake filling is made, helping the butter firm up and hold the cookie crumbs together.
Creamy Salted Caramel Cheesecake Filling
The filling begins with room-temperature cream cheese, sugar, and vanilla extract. Bringing the cream cheese to room temperature is useful because softened cream cheese blends more smoothly and reduces the chance of small lumps remaining in the finished mixture. The ingredients are beaten together for a few minutes until smooth and properly combined.
Salted caramel sauce is then mixed into the cream cheese base, adding caramel flavor throughout the filling instead of limiting it to the topping. Separately whipped heavy cream is gently folded into the mixture. This whipped cream lightens the dense cream cheese and helps produce the silky, airy consistency expected from a good no bake cheesecake cup.
Two Ways to Make the Salted Caramel Sauce
One convenient feature of this recipe is the choice between two caramel methods. The first option makes salted caramel from scratch using granulated sugar, unsalted butter, heavy cream, vanilla extract, and salt. This approach requires more attention and time but produces a classic homemade caramel sauce from basic ingredients.
The second option uses Werther’s Original Chewy Caramels with heavy cream and salt. The candies are melted gently into a smooth sauce, offering a quicker approach when you do not want to caramelize sugar from scratch. Only one caramel option is needed for the recipe, so readers can choose whichever method best suits their available time and comfort level.
Homemade Salted Caramel from Scratch
For the first caramel option, granulated sugar is placed in a wide-bottomed, light-colored pan and heated over the lowest stove flame. The sugar is stirred slowly while it begins to melt. During this process, it may initially look grainy before eventually becoming completely melted and developing a deep golden caramel color.
This stage can take 15 minutes or longer, so patience is important. Trying to speed up caramel by dramatically increasing the heat can make the sugar burn before it melts evenly. A light-colored pan is useful because it makes the changing color of the sugar easier to see, allowing you to judge when the caramel has reached a deep golden shade.
Adding Butter and Cream to Caramel
Once the sugar has completely melted and reached the desired caramel color, the pan is removed from the heat. Softened unsalted butter is whisked into the melted sugar. The mixture may temporarily appear separated, but this is part of the process. Continue carefully until the butter has melted into the caramel.
Warm heavy cream is then whisked into the mixture. Adding warm rather than very cold cream helps reduce the temperature difference and lowers the chance of the caramel suddenly seizing. If the sauce becomes excessively thick, it can be returned briefly to low heat. Vanilla and salt are added afterward, and the caramel is cooled completely before being incorporated into the cheesecake filling.
Quick Salted Caramel with Chewy Caramels
The second salted caramel option simplifies the process by starting with chewy caramel candies instead of granulated sugar. Unwrapped Werther’s Original Chewy Caramels are combined with heavy cream in a nonstick saucepan and heated on the lowest flame. Gentle heat allows the candies to soften and melt without scorching.
Continue stirring until the caramels and cream form a completely smooth sauce. Salt is then stirred into the mixture to create the sweet-and-salty flavor needed for the cheesecake. Like the homemade version, this sauce should be transferred to a heat-safe container and allowed to cool completely to room temperature before it is added to the filling.
Why the Caramel Must Cool First
Cooling the salted caramel is an important step regardless of which method you choose. Hot caramel should not be mixed directly into the cream cheese filling because the heat can soften the mixture too much and interfere with the light texture created by the whipped cream.
Allow the prepared caramel sauce to reach room temperature before measuring the amount required for the cheesecake filling. The remaining sauce can be reserved for finishing the dessert later. Separating the caramel this way gives the cheesecake flavor throughout the filling while still leaving enough sauce to create the glossy caramel layer on top.
How to Make the Biscoff Crust
Place the Biscoff cookies and melted unsalted butter in a food processor and process until the cookies become fine crumbs and the butter is evenly distributed. The crumbs should look moist enough to hold together lightly when pressed but should not become a dense paste.
Divide the mixture evenly among six dessert cups. Press the crumbs gently into the bottom of each cup using the base of a small narrow glass or another flat utensil that fits comfortably inside. Avoid pressing too firmly because a heavily compacted crust can become difficult to scoop with a spoon. Refrigerate the prepared cups while making the filling.
How to Make Smooth Cheesecake Filling
For the smoothest cheesecake texture, the cream cheese should be at room temperature before mixing begins. Place the softened cream cheese, sugar, and vanilla in the bowl of a stand mixer fitted with the paddle attachment. Beat for approximately two to three minutes, scraping the bowl when necessary.
The goal is a smooth mixture in which the sugar is well incorporated. Once this base is ready, add the measured salted caramel sauce after it has cooled to room temperature. Mix only until the caramel is incorporated. Excessive mixing is unnecessary and can work against the light consistency desired for these no bake cheesecake cups.
Whipping the Heavy Cream
The heavy cream used in the cheesecake filling should remain chilled until you are ready to whip it. Cold cream whips more effectively and develops the volume required to lighten the cream cheese mixture. Whisk the heavy cream separately until it reaches medium peaks.
Medium peaks provide enough structure without making the cream excessively stiff. Once whipped, the cream should be folded gently into the caramel cream cheese mixture with a rubber spatula. Folding rather than aggressively beating helps preserve the air incorporated during whipping, giving the final cheesecake filling a softer and more delicate consistency.
How to Fold the Filling Correctly
Folding is a gentle mixing technique that helps combine whipped cream with the heavier cream cheese mixture without knocking out too much air. Add the whipped cream and use a rubber spatula to scoop from the bottom of the bowl and fold the mixture over itself.
Rotate the bowl as you work and continue only until the filling appears evenly blended and silky. Avoid vigorous stirring or extended mixing. The purpose of whipping the cream separately is to introduce air, so maintaining that volume is important for achieving a light no bake cheesecake filling rather than an unnecessarily dense one.
Assemble the Cheesecake Cups
Once the filling is ready, remove the prepared Biscoff crusts from the refrigerator. Divide the salted caramel cheesecake filling evenly among the six cups, placing it directly over the chilled cookie bases. Smooth the top of each portion so the cups have a clean, attractive appearance.
Clear dessert cups are particularly effective for this recipe because the separate layers remain visible. The golden-brown cookie base contrasts nicely with the pale cheesecake filling, and the caramel added before serving creates another distinct layer. Even without complicated decoration, the individual presentation makes these desserts suitable for entertaining.
Why Cheesecake Cups Need Time to Chill
After assembly, refrigerate the cheesecake cups for at least four to six hours. The chilling time is essential because the filling needs time to firm sufficiently for serving. Although it may be tempting to shorten this stage, a properly chilled no bake cheesecake has a much better consistency.
For even more convenient preparation, the assembled cups can be refrigerated overnight. This makes them a useful make-ahead dessert for parties or gatherings because most of the work can be completed the previous day. When serving time arrives, only the caramel topping and any optional decoration need to be added.
Finishing with Salted Caramel Sauce
The reserved salted caramel sauce provides the final layer. Before serving, warm the remaining sauce very briefly until it becomes easily pourable. The source recipe suggests approximately 10 to 15 seconds in the microwave. It should become fluid enough to drizzle but should not become hot.
Spread approximately half a tablespoon of caramel over each cheesecake cup. The sauce provides a glossy finish and strengthens the salted caramel flavor in every serving. Because caramel is already incorporated into the filling, this final layer creates a more pronounced flavor while also improving the appearance of the individual desserts.
Optional Whipped Cream Topping
The original recipe includes one cup of chilled heavy cream as an optional topping. If you want a more decorative presentation, whip this cream until stiff peaks form and pipe it onto the chilled cheesecake cups before serving.
The whipped cream is entirely optional, so the dessert can be served successfully without it. Leaving it off creates a simpler appearance in which the salted caramel remains the main topping. Adding it produces a more elaborate dessert suitable for celebrations or entertaining while introducing another soft and creamy texture.
Serving No Bake Salted Caramel Cheesecake Cups
These individual salted caramel cheesecake cups should be served chilled. Their rich flavor and creamy consistency make them particularly suitable as a dessert after dinner, at family gatherings, holiday meals, parties, or other occasions when individually portioned sweets are convenient.
The dessert is already flavorful enough to stand alone, so elaborate accompaniments are unnecessary. If desired, fresh berries or a small serving of fruit can provide contrast to the richness. Coffee also pairs naturally with the caramel and Biscoff flavors. Whatever accompaniment you choose, keeping the cheesecake cups properly chilled until serving will give the best texture.
Make-Ahead Salted Caramel Cheesecake Dessert
One of the strongest practical advantages of this recipe is that it can be prepared well before serving. Since the cups need at least four to six hours of refrigeration anyway, preparing them earlier in the day or the evening before fits naturally into the recipe.
For a gathering, assemble the crust and cheesecake filling ahead of time, cover the cups, and keep them refrigerated. Wait until close to serving time to add the final caramel layer and optional piped whipped cream. This keeps the presentation neat while reducing the amount of last-minute dessert preparation required.
How to Store Cheesecake Cups
Leftover cheesecake cups can be stored in the refrigerator for up to three days. Cover each cup carefully with plastic wrap or place the cups inside airtight containers. Proper covering helps prevent the cheesecake from absorbing odors from other refrigerated foods and protects the texture of the filling and caramel.
Since this is a chilled dessert containing cream cheese and heavy cream, it should remain refrigerated rather than being left at room temperature for extended periods. If you know some cups will not be served immediately, keeping those portions covered in the refrigerator until needed is the most practical approach.
Can You Freeze No Bake Cheesecake Cups?
These cheesecake cups can also be frozen when longer storage is necessary. Cover each individual portion securely and freeze for up to one month. Individual cups make freezing particularly convenient because you can remove only the number of servings you need rather than defrosting an entire cheesecake.
Transfer frozen cheesecake cups to the refrigerator and allow them to thaw overnight before serving. They should not be reheated because the dessert is designed to be eaten chilled. After thawing, finish the cups with caramel and fresh decoration as desired before serving.
Notes for the Best Salted Caramel Cheesecake Cups
Keep the Caramel Heat Low
Caramel requires patience. When preparing the from-scratch version, keep the heat low and allow the sugar enough time to melt gradually. The process may take 15 minutes or longer. Excessively high heat can burn the sugar, producing a bitter flavor that will carry through the entire dessert.
A light-colored pan also makes it easier to monitor the caramel’s color. Look for a deep golden shade rather than relying only on cooking time, since stovetops and pans can behave differently.
Use Warm Cream for Homemade Caramel
The heavy cream added to melted sugar should be warm. Very cold liquid hitting extremely hot caramel can cause the mixture to seize and can create more aggressive bubbling.
Caramelized sugar becomes extremely hot, so the butter and cream should always be added carefully. Use an appropriate heat-safe pan and whisk, and keep hands and face away from the steam and bubbling mixture while combining the ingredients.
Use Room-Temperature Cream Cheese
Cold cream cheese is more difficult to blend smoothly and can leave small lumps in the cheesecake filling. Allow it to soften to room temperature before beating it with the sugar and vanilla.
The caramel used in the filling should also be cooled to room temperature. Combining ingredients at suitable temperatures helps create a smoother filling and prevents hot caramel from affecting the whipped cream later in the preparation.
Do Not Overmix the Filling
Once the whipped heavy cream has been added, handle the filling gently. Fold with a rubber spatula only until the mixture becomes evenly combined. Overmixing can remove the air from the whipped cream and result in a denser filling.
The same principle applies when adding the salted caramel to the cream cheese mixture. Mix until incorporated rather than continuing unnecessarily. A controlled mixing process helps preserve the soft, creamy texture of the finished dessert.
Do Not Pack the Crust Too Firmly
The Biscoff crumb mixture needs enough pressure to create an even base, but it should not be compressed into a hard layer. A lightly packed crust remains easier to scoop with a spoon and provides a pleasant crumbly contrast to the smooth cheesecake.
Use the bottom of a narrow glass to gently flatten the cookie mixture inside each dessert cup. Once all six crusts are prepared, refrigerate them while you finish the cheesecake mixture.
Chill for at Least Four to Six Hours
Refrigeration is part of the preparation process rather than an optional waiting period. The cheesecake filling needs several hours to become properly set. Four to six hours is the minimum recommended chilling period, while overnight refrigeration is an excellent option when preparing the dessert ahead.
Do not judge the final texture immediately after assembling the cups. The filling will naturally be softer at that stage and becomes firmer as it chills.
About Ingredient Substitutions
The original source discusses possible alternatives such as replacing Biscoff cookies with other biscuits or using dairy-free products. However, these substitutions change the original recipe and may alter its flavor, consistency, allergen profile, and nutritional information.
For that reason, the main recipe should retain the specified ingredients exactly as written. Anyone experimenting with substitutions should understand that the finished result may differ from these No Bake Salted Caramel Cheesecake Cups. This is particularly important when replacing structural ingredients such as cream cheese, heavy cream, or the cookies used for the crust.
A Simple Individual Dessert for Special Occasions
No Bake Salted Caramel Cheesecake Cups offer an attractive way to serve cheesecake without slicing a large dessert. The combination of Biscoff cookie crumbs, creamy caramel cheesecake, and salted caramel topping gives each portion a clear identity while keeping preparation manageable.
With six individual servings, two choices for making the caramel, and an optional whipped cream finish, the recipe can be prepared according to the amount of time available. The long chilling period also works in its favor because the dessert can be assembled well before guests arrive rather than competing with other last-minute kitchen tasks.
Rich, Creamy and Easy to Prepare Ahead
The appeal of these no bake salted caramel cheesecake cups comes from the contrast between their elegant appearance and relatively straightforward preparation. A crunchy Biscoff base supports a smooth cream cheese filling flavored with caramel, while the final salted caramel layer gives each cup a rich finish.
The key to getting the best result is not rushing the important stages. Melt the caramel gently, allow it to cool, use room-temperature cream cheese, fold in the whipped cream carefully, and give the assembled cups enough time to chill. Following these simple techniques creates individual cheesecake cups that are creamy, neatly layered, and ready to serve straight from the refrigerator.
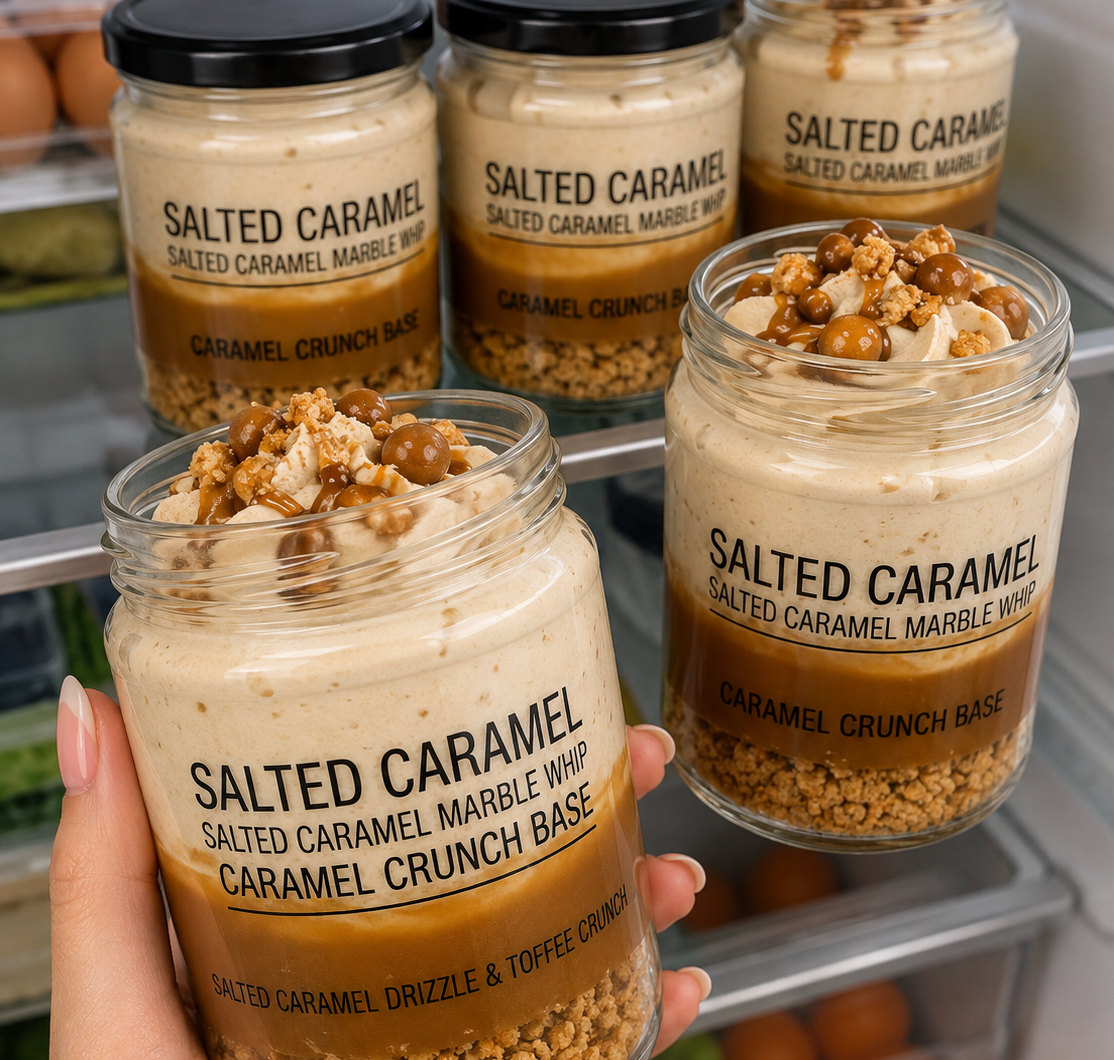
No-Bake Salted Caramel Cheesecake Cups
Creamy No Bake Salted Caramel Cheesecake Cups made with a buttery Biscoff cookie crust, smooth caramel cheesecake filling, and rich salted caramel sauce.
4
servings20
minutes20
minutes300
kcal240
minutes4
hours40
minutesIngredients
- Salted Caramel Sauce – Option 1: From Scratch
¾ cup granulated sugar (150g)
4 tablespoons unsalted butter, room temperature and sliced (56g)
⅓ cup heavy cream, room temperature (80g)
1 teaspoon vanilla extract
¾ teaspoon salt
- Salted Caramel Sauce – Option 2: With Candy
20 Werther’s Original Chewy Caramels
2 tablespoons heavy cream
½ teaspoon salt
- Biscoff Cookie Crust
200g Biscoff cookies (about 26 cookies)
6 tablespoons unsalted butter, melted (85g)
- Cheesecake Filling
16 oz cream cheese, room temperature (450g)
⅓ cup sugar (65g)
1 teaspoon vanilla extract
⅓ cup salted caramel sauce, from Option 1 or Option 2, room temperature
⅔ cup heavy cream, chilled (160g)
- Optional Topping
1 cup heavy cream, chilled (240g)
Directions
- Make Salted Caramel – Option 1
Add the granulated sugar to a wide, light-colored pan. Cook over the lowest heat, stirring slowly until the sugar completely melts and turns deep golden, about 15 minutes or longer.
Remove from the heat and carefully whisk in the softened butter. Add the warm heavy cream and whisk until smooth. If needed, briefly return to low heat. Mix in vanilla and salt, then cool completely to room temperature. - Make Salted Caramel – Option 2
For the quicker method, place the unwrapped chewy caramels and heavy cream in a nonstick saucepan.
Heat on the lowest setting, stirring continuously until completely melted and smooth. Mix in the salt and allow the sauce to cool to room temperature. - Prepare the Biscoff Crust
Process the Biscoff cookies with melted butter until fine crumbs form.
Divide evenly among six 7-ounce dessert cups. Gently press the crumbs into the bottom without packing them too firmly. Refrigerate while preparing the filling. - Prepare the Cheesecake Base
Beat the room-temperature cream cheese, sugar, and vanilla for 2–3 minutes until smooth and the sugar is well incorporated. Scrape down the bowl when necessary. - Add the Salted Caramel
Add ⅓ cup of cooled salted caramel sauce to the cream cheese mixture. Mix only until evenly combined. - Whip the Heavy Cream
In a separate bowl, whisk ⅔ cup chilled heavy cream until medium peaks form. - Finish the Cheesecake Filling
Gently fold the whipped cream into the cream cheese and caramel mixture with a rubber spatula. Fold only until smooth and evenly combined. - Assemble the Cheesecake Cups
Divide the cheesecake filling evenly among the six prepared cups. Smooth the tops. - Chill
Refrigerate the cheesecake cups for 4–6 hours or overnight until completely chilled and set. - Add the Caramel Topping
Before serving, warm the remaining salted caramel sauce for about 10–15 seconds in the microwave, just until pourable but not hot.
Drizzle approximately ½ tablespoon of caramel sauce over each cheesecake cup and spread gently. - Add Optional Whipped Cream
If using the optional topping, whip the chilled heavy cream to stiff peaks and pipe it over the cheesecake cups.
Serve chilled.