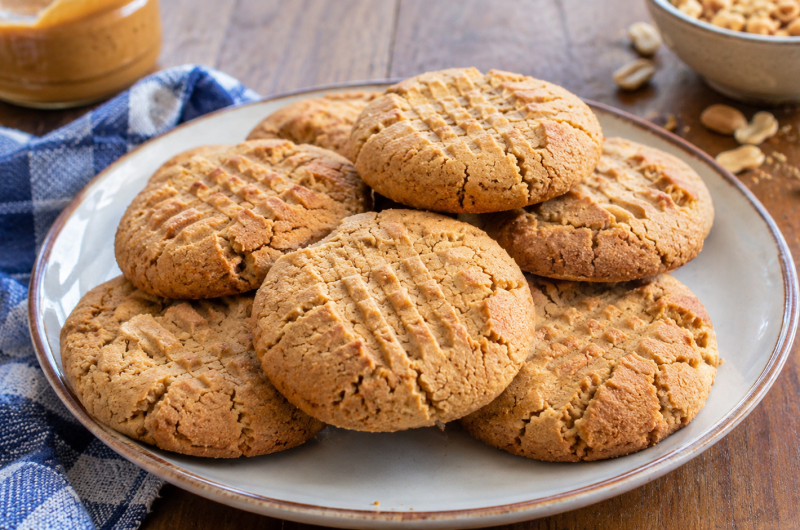
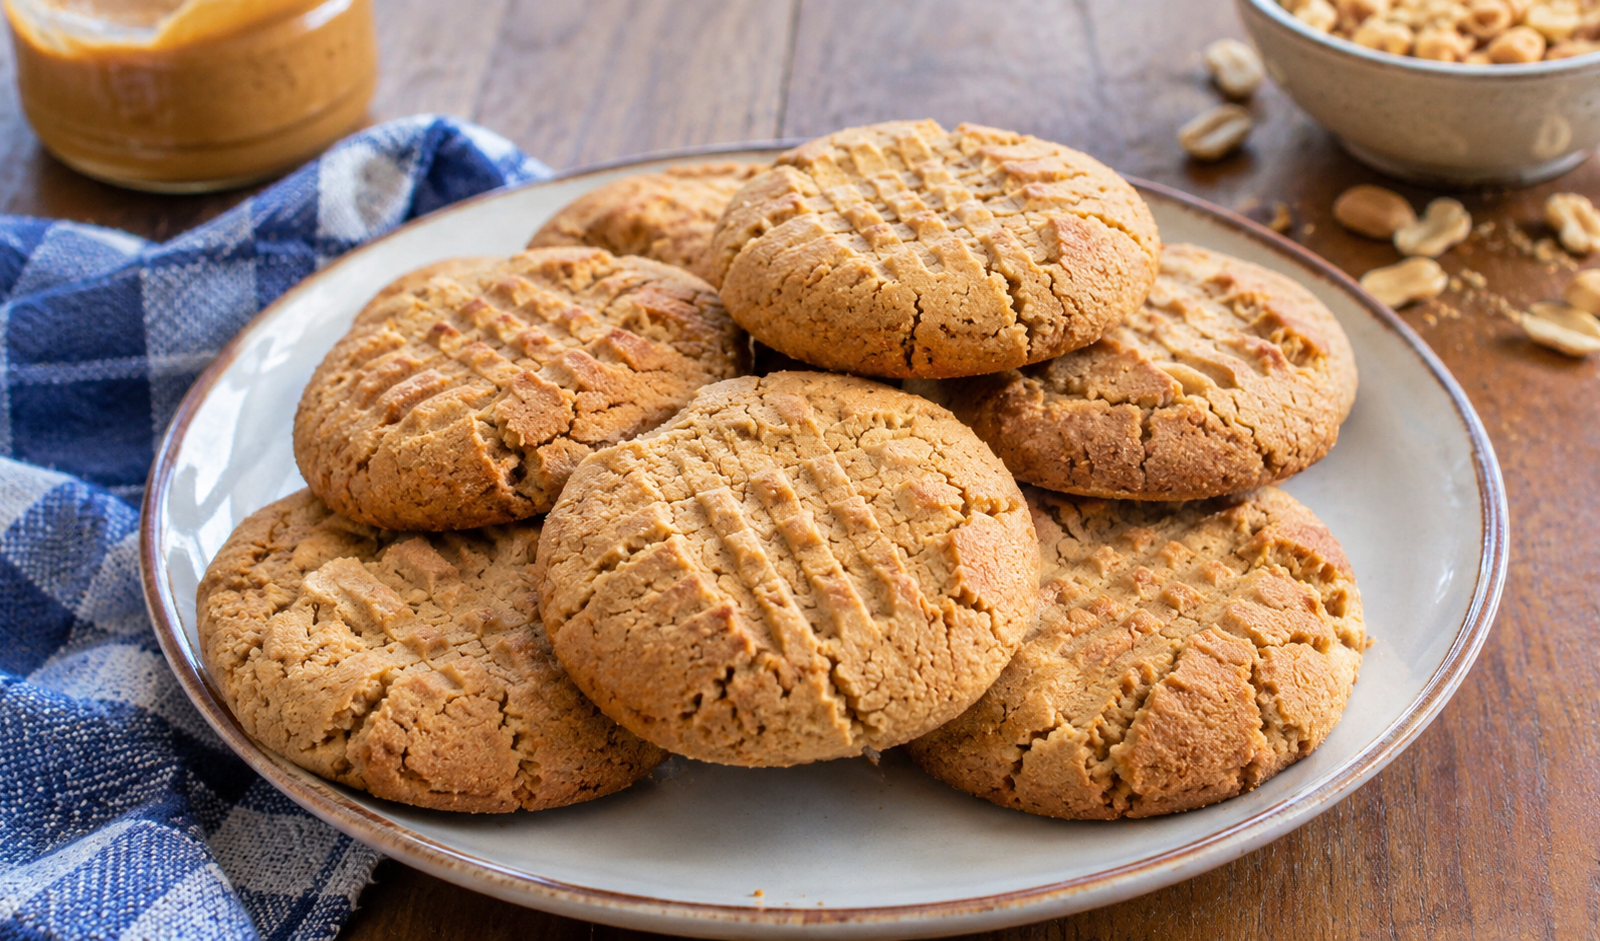
Gluten-free peanut butter cookies are a wonderful choice for anyone who loves the rich taste of peanut butter and the satisfying crunch of a homemade cookie. These classic cookies feature a crisp texture, a deep peanut butter flavor, and the familiar crosshatch pattern pressed into the top with a fork. They are easy to prepare with simple baking ingredients and are perfect for enjoying with coffee, tea, milk, or your favorite hot drink.
Unlike soft and chewy peanut butter cookies, this gluten-free version is designed to become crisp and crunchy as it cools. The generous amount of creamy peanut butter gives every bite a rich, nutty taste, while the combination of granulated sugar and light brown sugar contributes sweetness and helps create the desired texture. A little butter adds richness, and vanilla extract rounds out the flavor without overpowering the peanut butter.
These homemade gluten-free peanut butter cookies are ideal for everyday snacking, afternoon treats, lunchboxes, and casual gatherings. Their traditional appearance makes them instantly recognizable, while their gluten-free flour blend allows people who avoid gluten to enjoy a familiar favorite. Whether you are an experienced baker or trying a gluten-free cookie recipe for the first time, this straightforward method makes it easy to prepare a delicious batch at home.
What Makes These Gluten-Free Peanut Butter Cookies Special?
One of the most distinctive features of this recipe is the generous quantity of peanut butter used in the dough. Peanut butter is the main source of flavor rather than simply an additional ingredient. This creates cookies with a strong roasted-peanut taste and a rich consistency that peanut butter enthusiasts will appreciate. The flour supports the dough, but the peanut butter remains the star of every bite.
The recipe also follows the traditional crosshatch method, which gives peanut butter cookies their familiar appearance. Pressing the dough with a fork creates intersecting lines across each cookie. This pattern is more than a decorative detail because flattening the dough helps the cookies bake more evenly. It also gives each cookie a consistent thickness, helping the centers cook properly while the edges develop a pleasant crunch.
Another advantage is that the dough requires only a short chilling period when necessary. You can usually prepare it quickly, shape the cookies, and place them in the oven without waiting for an extended refrigeration period. If the mixture feels too soft or oily to handle, a brief rest in the refrigerator makes shaping easier. This flexibility makes the recipe suitable for home bakers who want homemade gluten-free cookies without a complicated preparation process.
Ingredients for Crispy Gluten-Free Peanut Butter Cookies
The ingredients in this recipe work together to produce a cookie that holds its shape, tastes strongly of peanuts, and develops a crunchy texture. Measuring the ingredients accurately is particularly important in gluten-free baking because different flour blends absorb moisture differently. For the most reliable results, use the quantities listed in the recipe card and choose ingredients that match the specified types.
Creamy peanut butter
Smooth, creamy, no-stir peanut butter provides the primary flavor and contributes much of the dough’s richness. A conventional no-stir variety is important because it maintains a consistent texture at room temperature. Natural peanut butter that separates into oil and solids can behave differently, potentially making the dough greasy or difficult to shape. Using a well-mixed, stable peanut butter helps produce more predictable results.
Butter
Unsalted butter adds richness and complements the roasted flavor of the peanuts. Melting it together with the peanut butter helps create a smooth mixture that can be incorporated easily into the dry ingredients. The butter should be melted gently rather than overheated. Allowing the mixture to cool briefly before adding the eggs also helps prevent the warm fat from affecting the eggs during mixing.
Gluten-free flour blend and xanthan gum
An all-purpose gluten-free flour blend provides the structure needed to hold the cookies together. Because gluten-free flour blends vary considerably, choose one intended for general baking rather than a single flour such as coconut or almond flour. Xanthan gum helps bind the ingredients and supports the cookie’s structure. However, if your chosen flour blend already contains xanthan gum, the additional amount listed in the recipe can be omitted.
Baking soda and salt
Baking soda supports the cookies’ texture and helps them spread and brown during baking. Kosher salt balances the sweetness and enhances the peanut butter flavor. Although these ingredients are used in relatively small quantities, they contribute to the final result. Measure them carefully instead of estimating, particularly when preparing gluten-free cookies where the balance of ingredients can affect texture.
Granulated sugar and light brown sugar
Granulated sugar and packed light brown sugar provide sweetness while helping create the characteristic crispness of these cookies. Granulated sugar contributes to the dry, crunchy finish, while brown sugar adds a deeper sweetness and a little moisture because of its molasses content. Using both sugars creates a more balanced flavor than relying on just one type.
Eggs and vanilla extract
Room-temperature eggs help bring the ingredients together and provide structure as the cookies bake. Beating the eggs before adding them makes them easier to distribute evenly throughout the dough. Pure vanilla extract adds a gentle aromatic flavor that complements the peanut butter and sugars. The optional extra granulated sugar can be used for dipping or sprinkling before baking for a slightly sweeter exterior.
Tips for Perfectly Crunchy Peanut Butter Cookies
Choose the correct peanut butter
For the best results, use smooth, creamy peanut butter that does not separate at room temperature. A stable commercial variety helps the dough maintain the right consistency and makes it easier to shape the cookies evenly. Peanut butter with separated oil can introduce additional variability, so it is best to follow the specified ingredient type rather than substituting a different variety without adjusting the recipe.
Measure the flour accurately
Too much flour can make gluten-free peanut butter cookies dry, dense, or crumbly. Weighing the flour is generally more reliable than measuring it by volume, especially when working with different gluten-free flour blends. Use the specified 210 grams whenever possible. Also, check whether your blend already contains xanthan gum before adding the separate amount, because unnecessary additional gum may change the texture.
Flatten the dough before using the fork
Pressing the dough into disks before making the crosshatch pattern helps the cookies retain their round shape. It also gives the fork a flatter surface to work with, reducing the chance of splitting the edges. Apply firm, controlled pressure instead of pressing repeatedly in random directions. If the fork starts sticking, lightly moisten its tines again before continuing with the remaining cookies.
Adjust baking time for your preferred crunch
For lightly crisp cookies, begin checking them around the 15-minute mark. If you prefer a firmer, crunchier cookie, the additional three minutes can make a noticeable difference. Oven temperatures and baking-sheet materials vary, so use the suggested times as a guide rather than a guarantee. Remember that the cookies will continue to firm up as they cool, which means they may not feel completely crisp when they first leave the oven.
Common Mistakes to Avoid
Moving the cookies while they are hot
One of the most common mistakes is transferring the cookies directly from the baking sheet to a cooling rack. Their structure is delicate immediately after baking, especially when using gluten-free flour. Allowing them to rest for at least five minutes helps them set and makes transferring them safer. Patience during this stage is important if you want attractive cookies that stay intact.
Overheating the peanut butter mixture
The peanut butter and butter should be melted gently until smooth. Excessive heat is unnecessary and may leave the mixture too hot when the eggs are added. Letting the mixture cool briefly creates a better starting point for combining the wet and dry ingredients. The goal is simply to make the fats easy to stir, not to cook them.
Skipping the texture check before shaping
Cookie dough can behave differently depending on the flour blend, room temperature, and peanut butter used. If you try to shape dough that is excessively soft or oily, the balls may stick to your hands or lose their shape. A short rest or 10-minute chill can solve this problem without requiring extra ingredients. Check the dough first and choose the approach that makes it comfortable to handle.
How to Store Gluten-Free Peanut Butter Cookies
Allow the cookies to cool completely before placing them in an airtight container. Storing them while they are still warm can trap steam and soften the crisp exterior. Once cooled, keep the container in a cool, dry place away from direct sunlight and sources of heat. For the best texture, avoid exposing the cookies to moisture, which can reduce their crunch over time.
If you want to prepare the cookies ahead of time, you can make the dough and shape the cookies when convenient, provided you handle and store the ingredients safely. If freezing is your preferred storage method, use a suitable airtight freezer container and separate layers with parchment paper to reduce sticking and breakage. Thaw frozen cookies in their container before opening it so that condensation is less likely to settle directly on their surfaces.
Frequently Asked Questions
Are these peanut butter cookies gluten-free?
Yes, the recipe uses an all-purpose gluten-free flour blend rather than conventional wheat flour. To keep the cookies suitable for a gluten-free diet, check the packaging of the flour blend, baking ingredients, and peanut butter for gluten-related labeling and possible cross-contact warnings. People with celiac disease should select ingredients and kitchen equipment appropriate for their level of gluten avoidance.
Why do peanut butter cookies have a crosshatch pattern?
The traditional fork pattern helps flatten the dough so the cookies can bake more evenly through the center. Peanut butter cookie dough can be relatively thick, so leaving the dough in rounded balls may make it harder to achieve a consistent bake. The crossed lines also give these homemade cookies their familiar, classic appearance.
How can I make these cookies extra crunchy?
Bake the cookies until they are lightly golden, then add approximately three minutes if you prefer a deeper color and crunchier texture. Keep an eye on the bottoms and lower the oven temperature to 325°F if they brown too quickly. Allow the cookies to cool completely before judging their final texture, because they become firmer as they stand.
Can I skip the chilling time?
Yes, chilling is optional and depends on the consistency of your dough. If the mixture is easy to roll and flatten, you can shape the cookies immediately. If it feels particularly sticky, greasy, or soft, refrigerate it for about 10 minutes. A brief rest may also help the flour absorb some of the oil and make shaping easier.
How do I keep the cookies from breaking?
Press the dough into disks before making the crosshatch pattern, and avoid excessive pressure around the edges. After baking, leave the cookies on the baking sheet for at least five minutes so they can set. Transfer them carefully to a wire rack only after they have become firm enough to handle.
Gluten-Free Peanut Butter Cookies
Classic crosshatch cookies with a rich peanut butter flavor and a crisp, crunchy texture.
24
servings10
minutes18
minutes184
kcal28
minutesIngredients
1 ½ cups (385 g) smooth, creamy no-stir peanut butter
4 tablespoons (56 g) unsalted butter, chopped
1 ½ cups (210 g) all-purpose gluten-free flour blend
½ teaspoon xanthan gum (omit if the flour blend already contains it)
1 teaspoon baking soda
¼ teaspoon kosher salt
½ cup (100 g) granulated sugar
½ cup (109 g) packed light brown sugar
2 eggs (100 g without shells), at room temperature and beaten
1 teaspoon pure vanilla extract
Granulated sugar for dipping or sprinkling (optional)
Directions
- Preheat the oven
Heat the oven to 350°F (175°C). Line baking sheets with unbleached parchment paper. - Melt the peanut butter and butter
Place both ingredients in a saucepan over medium-low heat or microwave them for about 45 seconds. Stir until smooth and allow to cool slightly. - Mix the dry ingredients
In a large bowl, whisk together the gluten-free flour, xanthan gum if needed, baking soda, salt, and granulated sugar. Add the brown sugar and break up any lumps. - Combine the ingredients
Add the melted peanut butter mixture to the dry ingredients and mix well. Add the beaten eggs and vanilla extract, stirring until a soft dough forms. - Chill if needed
If the dough is too sticky or greasy, cover and refrigerate for about 10 minutes. - Shape the cookies
Roll the dough into balls using about two tablespoons per cookie. Flatten each ball into a disk about ½ inch thick. Place the disks 1½ inches apart on the prepared baking sheets. - Make the fork pattern
Wet the tines of a fork and dip them in optional sugar. Press into each cookie, rotate 90 degrees, and press again to create a crosshatch pattern. - Bake
Bake for about 15 minutes until lightly golden. For crunchier cookies, bake for approximately three more minutes. If the bottoms brown too quickly, reduce the oven temperature to 325°F (163°C). - Cool
Leave the cookies on the baking sheet for at least five minutes. Transfer carefully to a wire rack and cool completely before serving.
Nutrition Facts
- Total number of serves: 1
- Calories: 184kcal
- Fat: 10g
- Carbohydrates: 19g
- Fiber: 1g
- Sugar: 10g
- Protein: 4g