Ingredients and Preparation:
To make a batch of Cosmic Beans, you’ll need the following ingredients:
– 1 lb bacon, diced
– 1 lb ground beef, browned
– 1 medium onion, diced
– 1 can of butter beans, drained
– 1 can of kidney beans, drained
– 1 can of pork n beans (avoid Van Camps)
– 1/2 cup ketchup
– 1 tsp dry mustard or 2 tsp regular mustard
– 3 tablespoons vinegar
– 5 heaping tablespoons brown sugar
Instructions:
1. Begin by frying the diced bacon in a large pot until crispy. Once cooked, drain the bacon and set it aside.
2. In the same pot, brown the ground beef until fully cooked. Remove the beef from the pot and set it aside.
3. Cook the diced onions in the same pot until they become translucent and fragrant.
4. Add the cooked bacon, ground beef, onions, butter beans, kidney beans, pork n beans, ketchup, dry mustard or regular mustard, vinegar, and brown sugar to the pot. Mix all the ingredients thoroughly.
5. Bring the mixture to a boil, allowing the flavors to meld together.
Canning Cosmic Beans:
To preserve the delightful taste of Cosmic Beans, you can choose to can them. Here’s a step-by-step guide on how to can this beloved recipe:
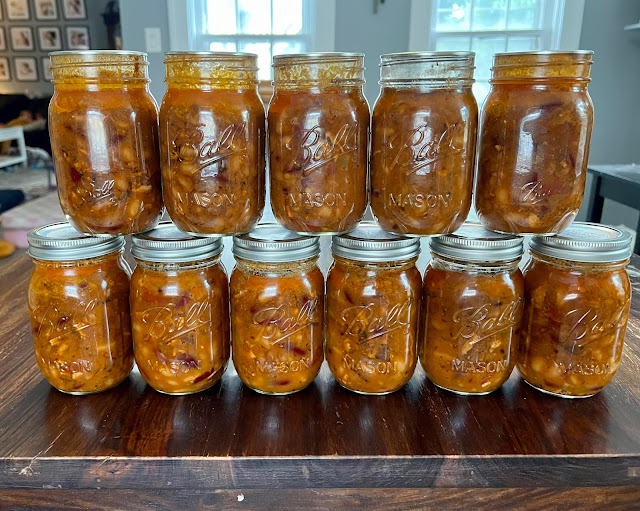
1. Prepare your canning equipment: Sterilize 12 pint-sized jars, lids, and rings following standard canning procedures.
2. Fill each hot jar with the hot Cosmic Beans, leaving about 1 inch of headspace.
3. Wipe the rims of the jars with white vinegar to ensure a clean seal.
4. Place the hot lids on the jars and twist the rings until fingertip tight.
5. Transfer the filled jars to a hot pressure canner.
6. Follow your pressure canner’s instructions to vent the canner for 10 minutes when a steady stream of steam is visible.
7. After venting, add the appropriate weight (10 lbs for your altitude) and bring the canner to the desired pressure.
8. Process the jars for 75 minutes for pints or 90 minutes for quarts, maintaining consistent pressure throughout.
9. Once the processing time is complete, turn off the heat and allow the canner to depressurize naturally.
10. Carefully remove the jars from the canner and place them on a towel-lined countertop to cool.
11. As the jars cool, you should hear the satisfying “pop” sound, indicating that a proper seal has been achieved.
12. Let the jars cool completely before storing them in a cool, dark place.