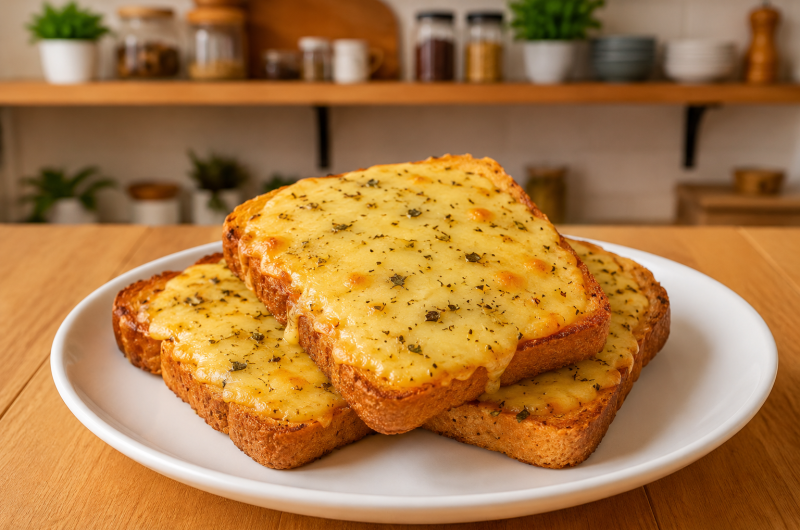
If you need a quick homemade snack that is crispy, cheesy, and ready in minutes, Air Fryer 3-Ingredient Cheese Toast is an excellent choice. This simple recipe combines everyday pantry ingredients with the convenience of an air fryer to create golden toast topped with perfectly melted cheese. It requires very little preparation, making it ideal for busy mornings, afternoon snacks, light lunches, or even late-night cravings. Despite its simplicity, the combination of crispy bread and bubbling cheese delivers satisfying flavor every time.
Importance Of This Recipe
One of the biggest reasons this recipe has become so popular is its convenience. With only three ingredients, there is no lengthy preparation, complicated cooking techniques, or special kitchen equipment beyond an air fryer. Even beginner cooks can achieve excellent results on the first attempt. Because the recipe is so adaptable, it also works well with different bread varieties, cheese options, and seasonings while still maintaining its quick cooking time.
What Makes the Air Fryer the Best Cooking Method
The air fryer cooks food by circulating hot air around it, creating a crisp exterior without the need for additional oil or butter. For cheese toast, this means the bread becomes beautifully golden while the cheese melts evenly and develops lightly browned spots on the surface. Unlike stovetop cooking, there is no need to flip the bread, and unlike a conventional oven, the air fryer reaches cooking temperature quickly, reducing the total preparation time significantly.
A Perfect Recipe for Busy Days
Not every meal needs to be complicated. Sometimes the simplest recipes become household favorites because they are reliable, fast, and satisfying. This cheese toast recipe is perfect when time is limited but you still want something freshly prepared. Since the ingredients are commonly available in most kitchens, you can prepare this snack without making a special trip to the grocery store. It is an excellent solution for busy weekdays, school lunches, or quick family snacks.
Bread Choices for the Best Results
Almost any bread works well in this recipe, allowing you to choose according to your taste or dietary needs. Thick sandwich bread produces a soft center with crisp edges, while sourdough creates a heartier texture with extra crunch. Whole wheat bread adds a nutty flavor, and artisan breads offer a rustic appearance. Even gluten-free bread can be used successfully, making this recipe suitable for individuals following a gluten-free diet. The important point is choosing bread that can support the melted cheese without becoming soggy.
Selecting the Right Cheese
Cheese is naturally the highlight of this recipe, and different varieties create different results. Cheddar provides a bold, rich flavor and excellent browning. Mozzarella melts into long, stretchy strands and produces a mild creamy taste. A combination of cheddar and mozzarella offers both flavor and texture. Swiss, Monterey Jack, Gouda, or Parmesan can also be used individually or blended together. Freshly grated cheese usually melts more evenly than packaged shredded cheese because it contains fewer anti-caking agents.
Seasoning Adds Extra Flavor
Although the recipe requires only three ingredients, dried herbs or seasoning make a noticeable difference. Italian seasoning, oregano, parsley, basil, garlic seasoning, or mixed herbs all complement the melted cheese beautifully. A small sprinkle is enough to enhance the flavor without overpowering it. Those who enjoy a little heat may also choose a pinch of crushed chili flakes or black pepper, provided it remains within the chosen seasoning ingredient.
Preparing the Bread
Place the bread slices on a clean work surface before adding any toppings. If the bread is slightly stale, it often becomes even crispier after air frying. Ensure each slice lies flat so the grated cheese spreads evenly across the surface. Covering the bread completely helps prevent the edges from drying excessively during cooking while creating a delicious cheesy topping from corner to corner.
Applying the Cheese Evenly
Even distribution of grated cheese helps every bite have consistent flavor. Spread the cheese across the bread without piling it too thickly in the center. Excessive cheese may slide off during cooking or prevent even melting. A moderate, even layer creates the ideal balance between crispy toast and creamy topping. Freshly grated cheese also browns more attractively than thicker cheese slices.
Preheating the Air Fryer
Although some air fryer models perform well without preheating, warming the basket to 180°C (350°F) before cooking encourages even browning and reduces cooking time. A properly heated basket begins crisping the bread immediately while allowing the cheese to melt gradually. This combination creates the perfect contrast between crunchy bread and soft melted cheese.
Cooking to Golden Perfection
Arrange the prepared bread slices in a single layer inside the air fryer basket. Avoid overlapping because proper airflow is essential for even cooking. Air fry for approximately 4 to 6 minutes, depending on your air fryer model and the thickness of the bread. The cheese should become fully melted and lightly golden while the bread develops a crisp, toasted surface. Watch carefully during the final minute because different cheeses brown at different speeds.
Serving Suggestions
Air Fryer Cheese Toast is delicious served immediately while the cheese remains hot and stretchy. It pairs wonderfully with tomato soup, vegetable soup, or creamy potato soup for a comforting meal. It can also accompany fresh green salads, scrambled eggs, or grilled vegetables for breakfast or lunch. Cut into smaller squares, it even works as a quick appetizer or party snack. Because the recipe is so versatile, it easily fits into almost any meal of the day.
Enjoy It Fresh for the Best Flavor
One of the greatest advantages of Air Fryer 3-Ingredient Cheese Toast is that it tastes best immediately after cooking. Fresh from the air fryer, the bread is crisp, the cheese is soft and bubbly, and the herbs release their aroma from the heat. Waiting too long allows the toast to cool and the cheese to firm up, so serving it straight away provides the best texture and flavor. If you’re making several servings, cook them in batches and serve each batch as soon as it’s ready.
Perfect for Breakfast
This quick cheese toast makes an excellent breakfast because it provides a warm and satisfying start to the day without requiring much preparation. Pair it with fresh fruit, yogurt, or a smoothie for a more complete morning meal. Since the recipe takes less than ten minutes from start to finish, it is ideal for busy weekdays when time is limited but you still want something homemade.
A Great Afternoon Snack
Instead of reaching for packaged snacks, this homemade cheese toast offers a warm and filling alternative. The combination of crispy bread and melted cheese satisfies hunger while requiring only a few simple ingredients. It is also easy enough for older children and beginner cooks to prepare with supervision, making it a practical option for after-school snacks or weekend lunches.
Easy to Customize
Although the recipe uses only three ingredients, it can easily be adapted to suit different tastes while keeping the original preparation method. Different breads produce different textures, and changing the cheese creates entirely new flavor combinations. Herbs such as oregano, parsley, basil, thyme, or Italian seasoning allow you to create a slightly different version each time without making the recipe more complicated.
Why Beginners Love This Recipe
Many first-time cooks choose this recipe because it is almost impossible to overcomplicate. There is no dough to prepare, no batter to mix, and no complicated baking process to follow. The ingredients are simply layered on the bread before being placed into the air fryer. The short cooking time also means you receive immediate results, making this an encouraging recipe for anyone learning basic cooking skills.
Making the Toast Crispy Every Time
Achieving perfectly crisp toast depends on proper airflow inside the air fryer. Place the bread slices in a single layer without overlapping so the hot air can circulate freely around each piece. Using thick bread also helps create a crispy outside while keeping the center soft. Watching the toast during the final minute prevents overcooking because different air fryer models vary slightly in cooking speed.
Choosing the Right Air Fryer Temperature
Cooking at 180°C (350°F) provides the ideal balance between melting the cheese and crisping the bread. Higher temperatures may brown the cheese before it melts completely, while lower temperatures can produce softer toast. Maintaining the recommended temperature allows the bread to become golden while the cheese develops an attractive bubbly surface with lightly toasted spots.
Storage and Reheating
Although this recipe is best enjoyed fresh, leftovers can be stored if necessary. Allow the toast to cool completely before placing it in an airtight container and refrigerate for up to one day. To restore some of its crispness, reheat it in the air fryer for one to two minutes. Microwaving is possible, but it softens the bread and reduces the crisp texture that makes this recipe so enjoyable.
Common Mistakes to Avoid
A few simple mistakes can affect the final result. Overloading the bread with cheese may prevent even melting, while overcrowding the air fryer basket restricts airflow and reduces crispness. Cooking at excessive heat can burn the cheese before the bread finishes toasting. Skipping preheating may also increase cooking time and reduce browning. Paying attention to these details helps produce consistently delicious toast every time.
Notes
Use Freshly Grated Cheese
Freshly grated cheese melts more smoothly than packaged shredded cheese and creates a richer flavor.
Keep the Cheese Evenly Distributed
Spread the cheese across the entire slice instead of placing it in the center for even melting.
Avoid Overcrowding
Leave space between the bread slices so hot air can circulate properly.
Watch the Final Minute
Air fryers cook differently, so check the toast near the end of cooking to prevent burning.
Serve Immediately
Cheese toast has the best flavor and texture when served hot, while the cheese is still soft and bubbly.
Experiment with Herbs
Italian seasoning, oregano, parsley, basil, or garlic seasoning all complement the melted cheese without changing the simplicity of the recipe.
Why You Prefer This Recipe
This Air Fryer 3-Ingredient Cheese Toast proves that delicious homemade food doesn’t need a long ingredient list or complicated preparation. With crispy toasted bread, perfectly melted cheese, and flavorful herbs, it delivers comforting flavor in just a few minutes. Whether served as breakfast, lunch, an afternoon snack, or a quick evening bite, this easy recipe offers convenience without sacrificing taste. It is beginner-friendly, budget-friendly, and versatile enough to become one of your favorite everyday air fryer recipes.
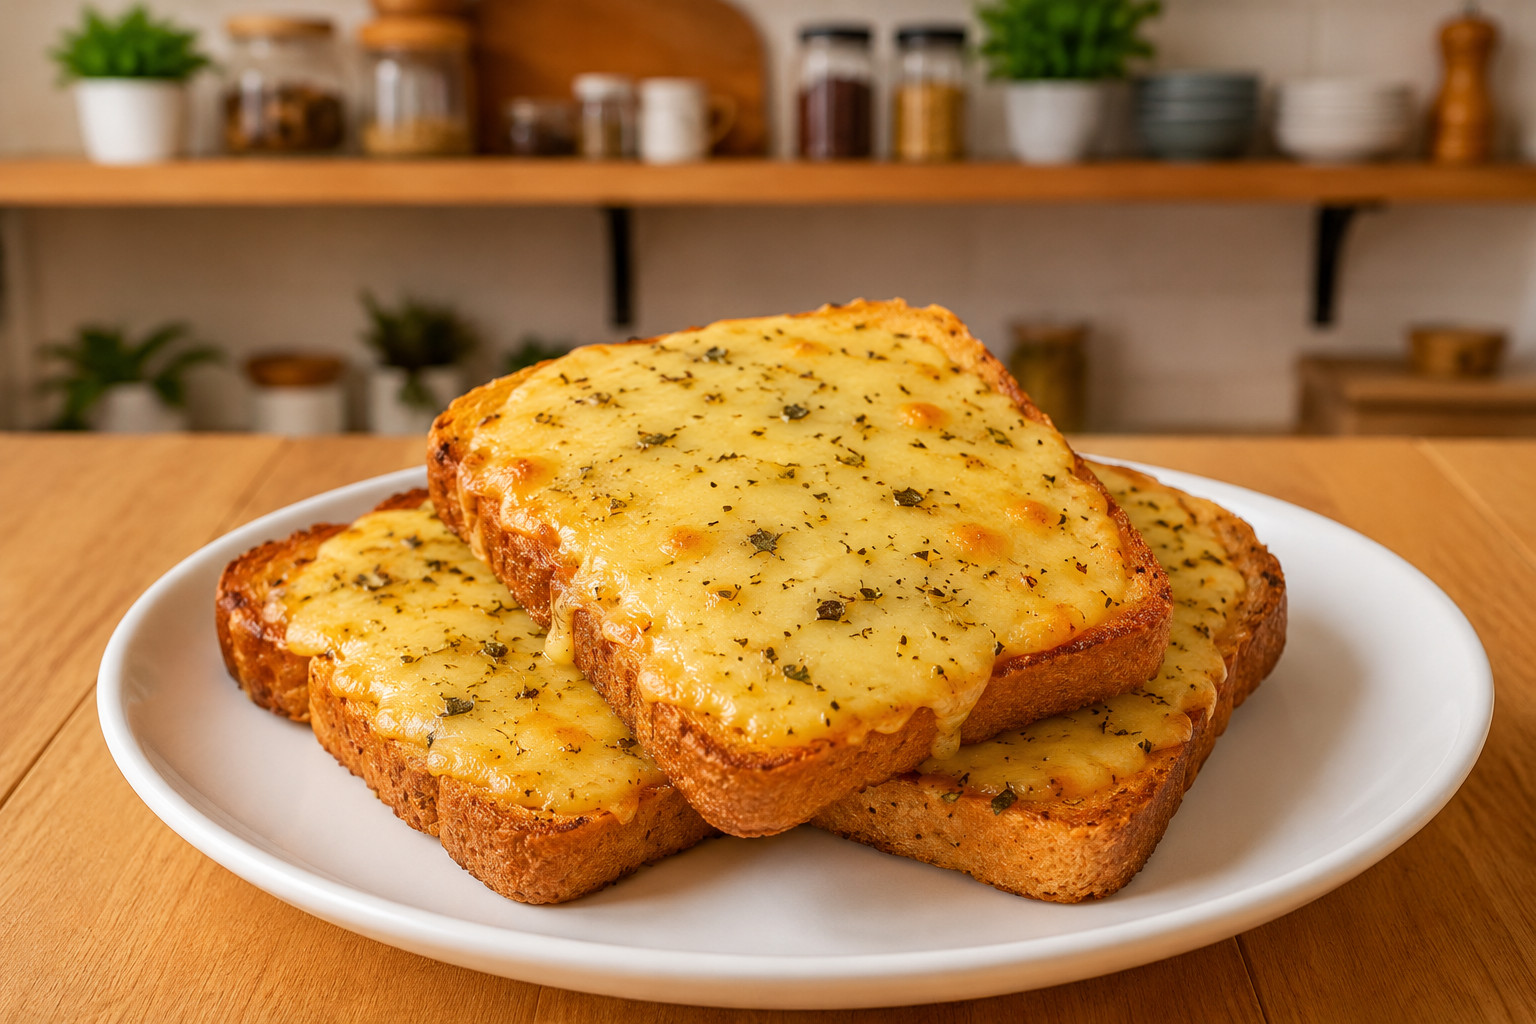
Air Fryer 3-Ingredient Cheese Toast
A quick and crispy Air Fryer Cheese Toast made with just three simple ingredients. Golden toasted bread, melted cheese, and your favorite dried herbs come together in minutes to create an easy breakfast, snack, or light meal.
2
servings2
minutes6
minutes290
kcal8
minutesIngredients
2 bread slices
1 cup grated cheese
1 teaspoon dried herbs or preferred seasoning
Directions
- Preheat the air fryer to 180°C (350°F).
- Arrange the bread slices on a clean work surface.
- Evenly sprinkle the grated cheese over each slice.
- Lightly season with dried herbs or your preferred seasoning.
- Place the prepared bread slices into the air fryer basket in a single layer.
- Air fry for 4–6 minutes, or until the cheese is melted, bubbly, and lightly golden.
- Carefully remove the toast and serve immediately while hot.
Nutrition Facts
2 servings per container
- Amount Per ServingCalories290
- % Daily Value *
- Total Fat
17g
22%
- Total Carbohydrate
20g
8%
- Protein 14g 29%
* The % Daily Value tells you how much a nutrient in a serving of food contributes to a daily diet. 2,000 calories a day is used for general nutrition advice.