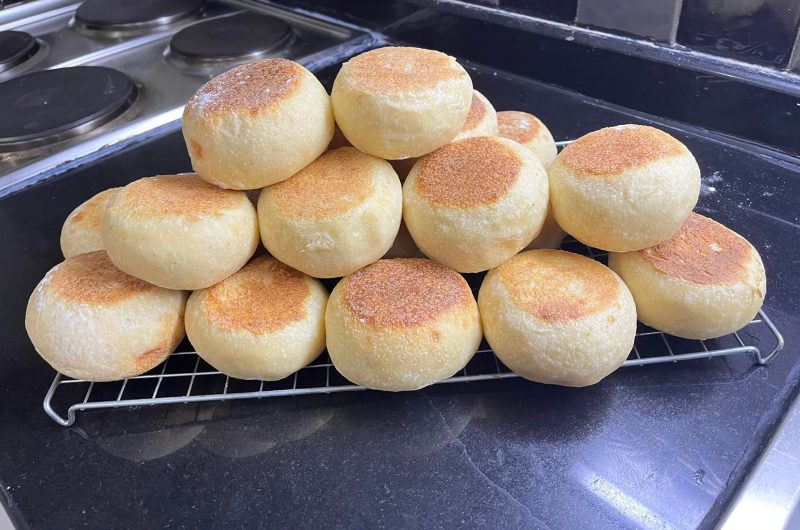
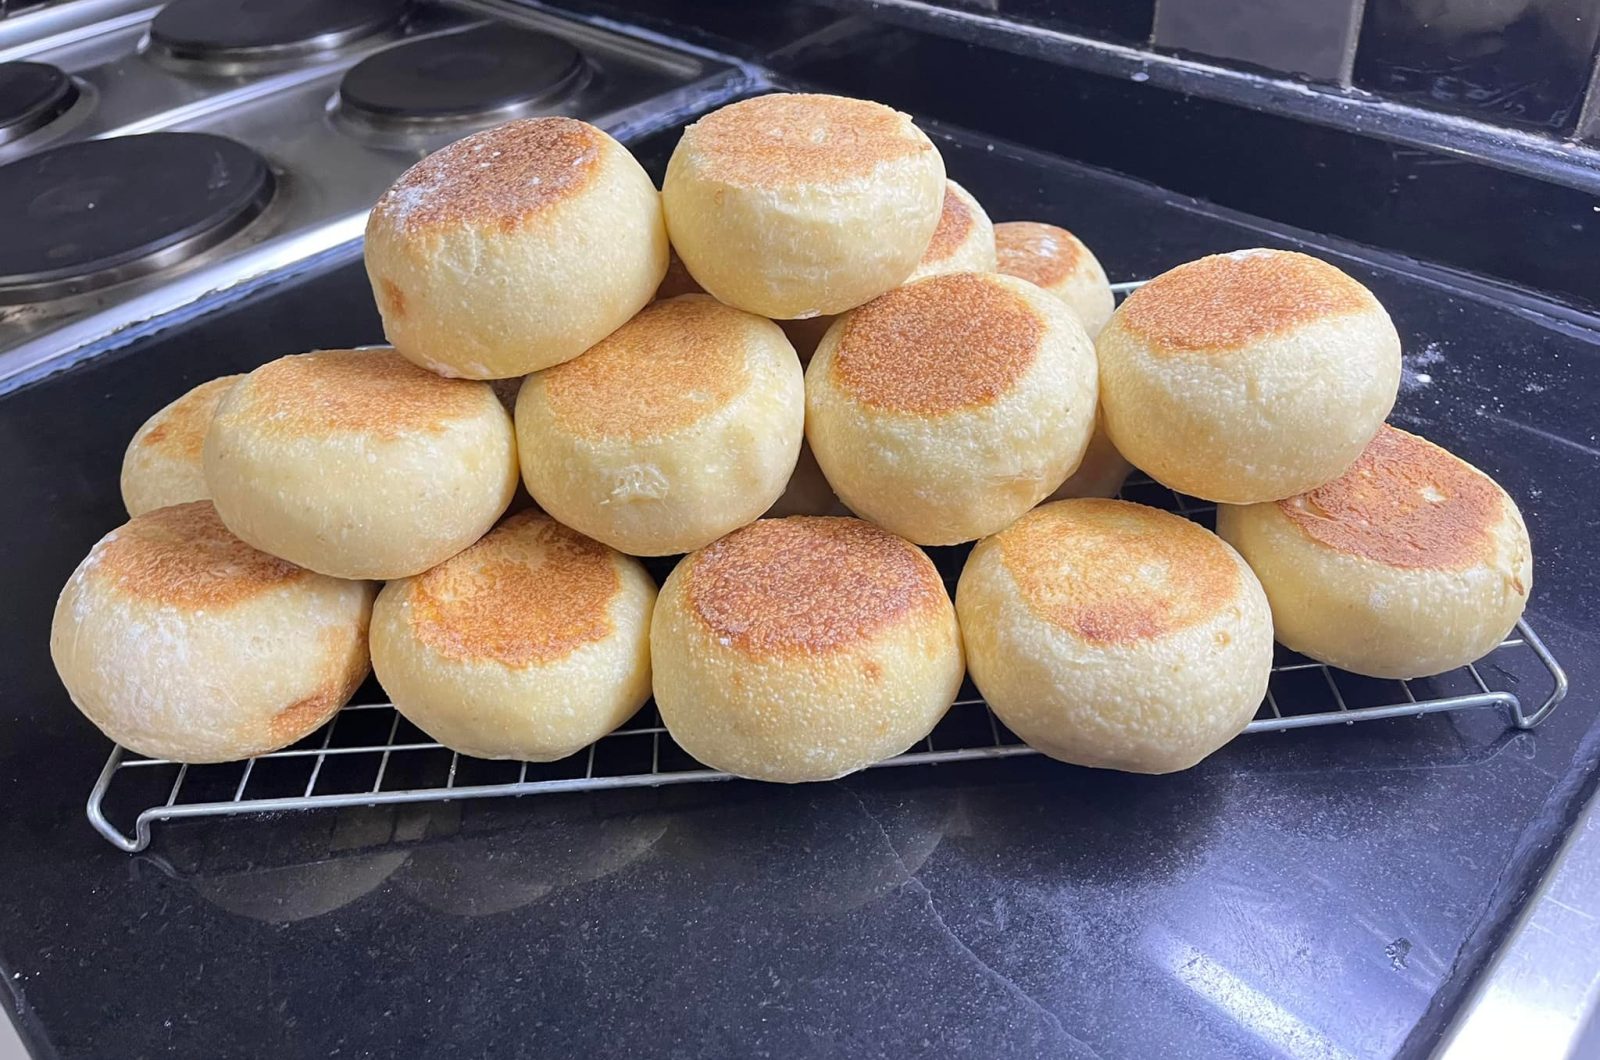
Easy Gluten-Free English Muffins bring the familiar taste and texture of a classic breakfast bread to anyone avoiding gluten. They are soft inside, lightly chewy, and covered with the small cornmeal-dusted crust traditionally associated with English muffins. Once opened with a fork, the textured interior catches melted butter, fruit jam, cream cheese, or egg yolk beautifully.
This homemade gluten-free English muffin recipe uses a carefully balanced combination of gluten-free all-purpose flour and tapioca starch or cornstarch. Instant yeast creates a gentle fermented flavor and helps the dough rise, while warm milk and melted butter keep the crumb soft. Cooking the muffins slowly in a frying pan gives them golden surfaces without requiring a conventional bread oven.
Whether you want a toasted English muffin for breakfast, a base for eggs Benedict, or a freezer-friendly bread for quick sandwiches, this recipe offers plenty of possibilities. The dough is softer and stickier than wheat-based bread dough, but that is completely normal. With patient rising and gentle cooking, it becomes tender gluten-free English muffins with an appealing homemade finish.
Why This Recipe Popular?
These easy gluten-free English muffins make a convenient alternative to expensive packaged gluten-free bread. The ingredients are straightforward, the dough does not require traditional kneading, and the muffins cook on a stovetop. Their mild flavor works equally well with sweet and savory toppings, making one batch useful for breakfast, lunch, snacks, or weekend brunch.
The recipe also creates the light, slightly elastic texture people often miss after removing gluten from their diets. Tapioca starch or cornstarch supports the gluten-free flour blend, while xanthan gum helps hold the dough together. Two rising periods give the yeast time to aerate the mixture, producing a softer interior instead of a heavy, compact bread.
Another advantage is that these muffins store and freeze well. You can prepare a batch in advance, cool the muffins completely, and keep them ready for busy mornings. A quick turn in the toaster restores their lightly crisp exterior while warming the soft centre. This makes homemade gluten-free English muffins a practical meal-preparation option rather than an occasional baking project.
What Makes an English Muffin Different?
An English muffin is a small, round yeast bread that is traditionally cooked on a griddle or in a frying pan. Unlike sweet American-style muffins baked in paper cases, English muffins have a bread-like crumb and a relatively plain flavor. They are usually split horizontally, toasted, and served with butter or various sweet and savory toppings.
The most recognizable feature is the uneven interior filled with small holes and textured pockets. These spaces catch melted butter, jam, sauces, and soft egg yolks. Instead of slicing the muffin cleanly with a knife, opening it around the edge with a fork preserves more of that rough texture and creates a better surface for crisp, evenly browned toast.
The cornmeal coating is another classic detail. It prevents the soft dough from sticking to the work surface and pan while contributing a subtle crunch. The contrast between the cornmeal-dusted outside and tender centre gives the finished bread its characteristic appearance and makes it noticeably different from an ordinary gluten-free breakfast roll.
How Gluten-Free English Muffins Get Their Structure
Wheat flour naturally contains gluten, which stretches around the gas produced by yeast and gives traditional bread its chewy structure. Gluten-free dough does not have this elastic protein network, so it needs other ingredients to provide stability. In this recipe, a quality gluten-free flour blend containing xanthan gum creates the main foundation for the muffins.
Xanthan gum improves binding and helps the dough hold the air generated during rising. Without enough structure, the muffins could spread, collapse, or become excessively crumbly. A dependable one-to-one gluten-free flour blend distributes different flours and starches in proportions intended to resemble the performance of standard all-purpose flour in everyday baking.
Tapioca starch or cornstarch provides additional softness and elasticity. Tapioca is especially useful for producing a slightly chewy bread-like texture, while cornstarch offers the alternative specified in the original recipe. The starch works with the flour blend and xanthan gum to create muffins that remain tender but are strong enough to split, toast, and fill.
Choosing the Best Gluten-Free Flour Blend
The choice of flour can make a significant difference to homemade gluten-free English muffins. Select a good-quality, one-to-one gluten-free all-purpose flour blend that already contains xanthan gum. A balanced blend normally includes several flours and starches, allowing it to provide more reliable structure and moisture absorption than a single gluten-free flour used on its own.
Check the package carefully before measuring. Since this recipe specifically calls for flour containing xanthan gum, a blend without it may produce muffins that spread or crumble more easily. Do not substitute almond flour, coconut flour, or another single-ingredient flour because those products absorb liquid differently and will not behave like the all-purpose blend used in the original formula.
Gluten-free flour can settle tightly in a storage bag or container. Loosen it before measuring, spoon it gently into the cup, and level the top without pressing it down. Scooping packed flour directly from the bag may add more than intended, creating stiff dough and dense muffins. A careful measurement supports a soft, well-hydrated result.
Why Tapioca Starch or Cornstarch Is Included
The half cup of tapioca starch or cornstarch is not an unnecessary addition to the gluten-free flour. It lightens the overall mixture and helps prevent the muffins from developing a coarse, heavy crumb. This is particularly valuable in yeast-raised gluten-free bread, which can otherwise become dense when the flour blend absorbs too much moisture.
Tapioca starch often contributes a gently stretchy, chewy quality that resembles the texture expected from a traditional English muffin. Cornstarch produces a soft, light result and can be used as the stated alternative. Either option should be combined thoroughly with the gluten-free flour and salt before the liquid ingredients are introduced.
Avoid changing the proportion of flour to starch because this balance affects the dough’s ability to rise and retain moisture. Too much starch could make the centre sticky or unstable, while too little may produce a heavier crumb. Using the original quantities provides the best foundation for soft gluten-free English muffins that cook evenly in a pan.
Understanding the Role of Instant Yeast
Instant yeast helps the dough rise and gives these gluten-free English muffins their subtle bread-like aroma. As the yeast feeds on sugar, it produces gas that forms bubbles throughout the soft dough. Those bubbles contribute to the small interior pockets that become especially noticeable after the cooked muffins are opened with a fork.
Although instant yeast can often be mixed directly with flour, the preparation method for this recipe combines it with warm milk and sugar first. Letting that mixture stand for five to ten minutes gives you an opportunity to check the yeast. A foamy surface indicates that it is active and ready to help the muffins rise.
If the mixture remains completely still, the yeast may be old or the milk temperature may have affected it. Yeast that does not activate will produce flat, dense muffins. Check the expiration date before beginning and store opened yeast according to its packaging instructions. Fresh yeast is one of the most important factors in successful gluten-free yeast baking.
Getting the Milk Temperature Right
The milk should be warm rather than hot. A temperature of approximately 38–43°C is suitable for encouraging yeast activity without damaging it. Milk that feels comfortably warm is usually appropriate, but a kitchen thermometer provides greater accuracy and removes uncertainty, especially if you are relatively new to working with yeast.
If the milk is too cool, the yeast may activate slowly and require additional rising time. If it is excessively hot, it can weaken or kill the yeast, preventing the dough from rising. Heat the milk gently, stir it to distribute the temperature evenly, and test it before combining it with the sugar and instant yeast.
The recipe permits dairy milk or plant-based milk without changing the stated quantity. Whichever option you choose, use one cup and make sure it is only warm. A plant-based milk may affect the flavor slightly, but almond, oat, or soy milk can support a dairy-free version when combined with the allowed plant-based butter alternative.
Why Sugar, Butter, and Salt Matter
The tablespoon of sugar provides more than sweetness. It gives the yeast an accessible food source during activation and helps balance the plain flavor of the flour and starch. The finished muffins are not dessert-like, so they remain suitable for savory fillings. The small amount of sugar also encourages attractive browning during slow stovetop cooking.
Melted butter contributes richness, tenderness, and a familiar bakery-style flavor. Allow it to cool slightly before adding it to the mixture so it does not overheat the yeast or create uneven areas in the dough. The recipe also permits a plant-based alternative, making dairy-free gluten-free English muffins possible without altering the overall preparation method.
Salt strengthens the flavor and prevents the bread from tasting bland. It also helps moderate yeast activity so the dough rises in a controlled way. Mix the salt with the dry ingredients rather than placing a concentrated amount directly into the yeast mixture. This distributes it evenly throughout every portion of the finished muffins.
Preparing the Gluten-Free Muffin Dough
Begin by combining the warm milk, sugar, and instant yeast. Leave the mixture undisturbed for five to ten minutes, watching for visible foam or bubbles. While the yeast activates, mix the gluten-free all-purpose flour, tapioca starch or cornstarch, and salt in a separate bowl until the ingredients are evenly distributed.
Add the activated yeast mixture and melted butter to the dry ingredients. Beat everything with an electric mixer or a stand mixer fitted with a paddle attachment. A dough hook is not necessary because gluten-free bread dough does not behave like firm wheat dough. Continue mixing until the mixture becomes smooth, sticky, and evenly hydrated.
The dough will be softer and more fluid than ordinary bread dough, and this should not be treated as a mistake. Do not add extra flour simply because it cannot be kneaded by hand in the traditional way. Additional flour could make the English muffins dry, heavy, and unable to develop the tender interior intended by the recipe.
Why Gluten-Free Dough Looks Different
Anyone familiar with conventional bread may expect a dough that can be lifted, stretched, and kneaded on a work surface. Gluten-free English muffin dough looks more like a very thick, sticky batter. The absence of gluten means it will not develop the smooth, elastic ball associated with wheat-based yeast dough, even after thorough mixing.
The extra moisture is necessary because gluten-free flours and starches continue absorbing liquid as they stand and cook. A dry mixture may be easier to handle initially, but it often produces crumbly or dense bread. The soft consistency allows the flour blend to hydrate properly and gives the yeast enough flexibility to expand the dough.
Using an electric mixer helps create an even consistency without requiring additional flour. Scrape the sides and bottom of the bowl as needed so no dry patches remain. Once the dough looks smooth and sticky, stop mixing. Extended beating is unnecessary and may warm the mixture before the first rising period begins.
The First Rise
Cover the mixing bowl with plastic wrap or a clean kitchen towel and place it in a comfortably warm, draft-free area. Leave the dough for 45 to 60 minutes, or until it has approximately doubled in volume. The exact time will depend on the room temperature, milk temperature, and freshness of the yeast.
A warm kitchen encourages faster fermentation, while a cool room may require the full hour or slightly longer. Look at the dough rather than relying only on the clock. It should appear expanded and airy, with visible signs of yeast activity. Avoid placing it beside intense direct heat, which can warm the dough unevenly or dry its surface.
Do not disturb the bowl repeatedly while the dough rises. Keeping it covered prevents the surface from forming a skin and helps retain warmth. This first fermentation develops both texture and flavor. Rushing it can produce heavy muffins, while allowing adequate time gives the yeast a chance to create a lighter internal structure.
Shaping Sticky Gluten-Free Dough
Prepare a parchment-lined baking sheet and sprinkle it with cornmeal before handling the risen dough. Lightly flour your hands, then remove portions measuring approximately one-quarter cup, or about 60 millilitres. Shape each portion into a round disc roughly two centimetres thick, working carefully to avoid pressing out all the trapped air.
Because the dough is sticky, the discs may look slightly rustic rather than perfectly smooth. That homemade appearance is natural and will not harm the finished texture. Use only enough flour on your hands to make shaping manageable. Adding large quantities of dry flour could change the moisture balance on the outside of each muffin.
Place the shaped discs on the cornmeal-dusted parchment with enough space between them to expand. Sprinkle a little more cornmeal over their tops. The cornmeal prevents sticking, adds the traditional textured finish, and creates a lightly crisp surface when the English muffins are cooked in the hot pan.
Why Cornmeal Should Not Be Skipped
Cornmeal is closely associated with the appearance and texture of a classic English muffin. Its coarse particles sit on the outer surface instead of dissolving into the soft dough. During pan cooking, they become lightly toasted, providing a delicate crunch that contrasts pleasantly with the tender, slightly chewy centre.
The cornmeal also acts as a practical barrier between the sticky gluten-free dough and the parchment or cooking surface. This makes the risen muffins easier to lift and transfer without damaging their shape. Apply enough to create a light coating, but there is no need to bury the dough under a thick layer.
For strict gluten avoidance, choose cornmeal that is clearly labeled gluten-free. Corn itself is naturally gluten-free, but it may be processed in facilities that also handle wheat. Checking the package is particularly important when preparing food for someone with celiac disease or a serious medically diagnosed gluten intolerance.
The Importance of the Second Rise
After shaping, cover the muffins with a clean kitchen towel and allow them to rise for another 20 to 30 minutes. This second resting period gives the dough time to recover after handling. The discs should become slightly fuller and lighter, preparing them to develop a soft, airy crumb during cooking.
Do not expect the dramatic expansion seen in conventional wheat rolls. Gluten-free dough often rises more subtly, but even a modest increase is valuable. The small pockets formed at this stage contribute to the muffin’s interior texture. Skipping the second rise can result in compact bread with fewer of the desired holes.
While the muffins rise, prepare the non-stick frying pan or griddle and arrange the remaining equipment. This keeps the process moving once the dough is ready. Handle the risen discs carefully when transferring them because pressing or dropping them can release the gas that developed during the two fermentation periods.
Cooking English Muffins on the Stovetop
Heat a non-stick frying pan or flat griddle over low-medium heat and grease it lightly with butter or oil. The pan should be warm before the muffins are added, but it should not be smoking. Gentle heat is essential because these thick rounds need time to cook through before their outsides become excessively dark.
Transfer the muffins carefully to the pan, leaving enough space to turn them. Cook for five to seven minutes on the first side, then flip gently and cook for another five to seven minutes. They should become evenly golden and feel set rather than wet or fragile when pressed lightly.
If the outside colors too quickly, reduce the heat immediately. High heat may create an attractive dark crust while leaving the middle raw or gummy. Slow stovetop cooking allows warmth to move gradually toward the centre, setting the gluten-free flour, starch, and xanthan gum without burning the cornmeal-dusted surfaces.
How to Know When the Muffins Are Cooked
A properly cooked gluten-free English muffin should have golden surfaces and a firm outer edge. The centre should feel set when gently pressed, although it will remain softer than the crust. Because stovetops and pans vary, use the stated cooking time as a guide and watch each batch carefully.
If a muffin browns before it appears cooked through, lower the temperature and continue heating it slowly. Avoid pressing down hard with the spatula because this can flatten the internal pockets. Turning the muffins only when necessary also helps them maintain their shape and reduces the risk of tearing the soft dough.
When possible, check the internal temperature with a food thermometer. Gluten-free yeast bread is generally cooked when its centre reaches roughly 93–96°C. This optional check can be especially useful for the first batch, helping you understand the ideal heat setting and timing for your particular frying pan and stovetop.
Cooling and Opening the Muffins
Transfer the cooked English muffins to a wire rack and let them cool for at least ten minutes. Although it may be tempting to open one immediately, the centre continues setting after leaving the pan. Cutting too soon can compress the soft crumb and make a fully cooked muffin appear sticky or underbaked.
Once cooled, insert the points of a fork around the middle edge, moving gradually around the muffin until the two halves separate. This method creates a rough, textured interior with small peaks and pockets. A knife produces a smoother surface that does not catch melted butter and jam as effectively when toasted.
For the best serving texture, toast the fork-split halves until their raised edges become lightly crisp. The outside develops more crunch while the middle stays pleasantly tender. Serve immediately so the warm surface can melt butter or soften cream cheese, peanut butter, and other preferred spreads.
Gluten-Free English Muffin Breakfast Ideas
For a simple breakfast, toast the muffin halves and spread them with butter and fruit jam. The lightly fermented bread flavor balances the sweetness, while the textured surface holds the melted butter rather than allowing it to run off. Honey or another preferred breakfast spread can also be served alongside the original muffin.
For a savory meal, use the muffins as the base for eggs Benedict or a bacon-and-egg breakfast sandwich. Their round shape makes them convenient for fried or poached eggs, cheese, and breakfast meats. Toasting the cut surfaces first helps the bread remain stable when topped with moist ingredients or sauce.
They can also become a quick snack with peanut butter, cream cheese, or chocolate spread. Because the muffins themselves are only gently sweet, they work comfortably with many toppings. Keep portions suitable for the intended meal and serve them warm whenever possible for the most enjoyable aroma and texture.
Notes for Successful Gluten-Free English Muffins
Use warm milk rather than hot milk, and check that the yeast becomes foamy before continuing. Select a one-to-one gluten-free flour blend containing xanthan gum, measure it carefully, and resist the temptation to add extra flour. The sticky consistency is part of the design and supports a soft finished crumb.
Give the dough enough time for both rises. Yeast activity changes with room temperature, so judge the dough by its appearance as well as the clock. Keep the bowl and shaped muffins covered during resting to prevent their surfaces from drying. Handle the risen discs gently when moving them to the pan.
Cook the muffins slowly over low-medium heat and reduce the temperature if they darken prematurely. Cornmeal helps prevent sticking and supplies the traditional finish, so include it on both sides. Finally, cool the muffins for at least ten minutes and open them with a fork to preserve their uneven, toast-friendly interior.
Making Dairy-Free Gluten-Free English Muffins
The original recipe allows plant-based milk and a plant-based butter alternative, making it possible to prepare dairy-free gluten-free English muffins without changing the basic quantities. Almond, oat, or soy milk can be used, provided the selected product is suitable for your dietary requirements and is warmed gently before activating the yeast.
Choose a plant-based butter designed for cooking and melting. Its flavor and salt content may differ from dairy butter, but it should still provide richness and help keep the muffins tender. If preparing the recipe for someone with multiple allergies, examine the labels for gluten, dairy, nuts, soy, and any other relevant ingredients.
Remember that some oat milk is not suitable for people who require strict gluten avoidance unless it is certified gluten-free. Oats can be affected by cross-contact during farming and processing. Selecting clearly labeled products and using clean utensils helps maintain the gluten-free and dairy-free status of the finished breakfast bread.
Storing Homemade English Muffins
Allow all the muffins to cool completely before placing them in an airtight container. They can be stored at room temperature for up to three days or refrigerated for up to five days. Sealing them while warm can trap condensation and make their cornmeal-coated surfaces damp, so patience during cooling is important.
Refrigeration may make gluten-free bread feel slightly firmer, but toasting helps restore a pleasant texture. For convenience, open the muffins with a fork before storage if you plan to place them directly in a toaster. Arrange parchment paper between layers if necessary to keep the pieces separated and easy to remove.
Store them away from heat, sunlight, and excess humidity. If a muffin develops an unusual smell, visible mold, or excessive moisture, discard it. Homemade gluten-free bread does not contain the preservatives found in many commercial products, so correct storage and prompt use provide the best flavor and quality.
Freezing and Reheating Instructions
For longer storage, wrap each cooled English muffin individually and place the wrapped pieces in a freezer-safe container or bag. Freeze them for up to three months. Individual wrapping protects the bread from freezer burn and allows you to remove only the number required for a particular breakfast or snack.
The muffins can be reheated directly from frozen in a toaster. Splitting them with a fork before freezing makes this especially convenient. Depending on the toaster, a second short cycle may be required to warm the centre completely. Watch them carefully so the cornmeal and raised interior edges do not become overly dark.
If the muffins were frozen whole, allow them to thaw enough to separate safely before toasting. Avoid forcing a knife through a solid frozen muffin. Gentle reheating improves the texture, refreshes the aroma, and gives the outside a light crispness while leaving the inside soft enough for butter, jam, eggs, or sandwich fillings.
Important Notes
These Easy Gluten-Free English Muffins combine a soft, lightly chewy centre with golden pan-cooked surfaces and the familiar crunch of cornmeal. A balanced gluten-free flour blend, tapioca starch or cornstarch, instant yeast, warm milk, melted butter, sugar, and salt work together to recreate a useful classic breakfast bread without wheat flour.
Success depends on a few simple details: activate the yeast with properly warmed milk, accept the naturally sticky dough, allow both rising periods, and cook the muffins gently. Once cooled and opened with a fork, they develop the textured interior that makes English muffins so satisfying when toasted and covered with favorite sweet or savory toppings.
Easy Gluten Free English Muffins
Soft, lightly chewy, and filled with small interior pockets, these homemade gluten-free English muffins are cooked in a frying pan and finished with a traditional cornmeal coating.
8
servings20
minutes1
hour225
kcal30
minutes15
minutes2
hours5
minutesIngredients
2 cups gluten-free all-purpose flour containing xanthan gum
½ cup tapioca starch or cornstarch
1 packet instant yeast, equal to 2¼ teaspoons
1 cup warm milk or plant-based milk
2 tablespoons melted butter or plant-based alternative
1 tablespoon sugar
½ teaspoon salt
Cornmeal, as needed for dusting
Directions
- Combine the warm milk, sugar, and instant yeast.
- Leave the mixture for 5–10 minutes until foamy.
- Mix the gluten-free flour, tapioca starch or cornstarch, and salt in another bowl.
- Add the activated yeast mixture and melted butter.
- Beat with an electric mixer until smooth and sticky.
- Cover the bowl with plastic wrap or a clean towel.
- Let the dough rise in a warm place for 45–60 minutes.
- Line a baking sheet with parchment paper.
- Sprinkle the parchment lightly with cornmeal.
- Lightly flour your hands to prevent sticking.
- Take approximately ¼-cup portions of dough.
- Shape each portion into a disc about 2 cm thick.
- Arrange the discs on the prepared baking sheet.
- Sprinkle additional cornmeal over the tops.
- Cover and leave them to rise for 20–30 minutes.
- Heat a non-stick pan over low-medium heat.
- Grease the pan lightly with butter or oil.
- Transfer the risen muffins carefully to the pan.
- Cook for 5–7 minutes on the first side.
- Flip carefully and cook for another 5–7 minutes.
- Reduce the heat if the surfaces brown too quickly.
- Transfer the cooked muffins to a wire rack.
- Cool for at least 10 minutes.
- Open around the edges with a fork.
- Toast if desired, then serve with preferred toppings.
Nutrition Facts
8 servings per container
- Amount Per ServingCalories225
- % Daily Value *
- Total Fat
5g
7%
- Total Carbohydrate
42g
16%
- Protein 4g 8%
* The % Daily Value tells you how much a nutrient in a serving of food contributes to a daily diet. 2,000 calories a day is used for general nutrition advice.