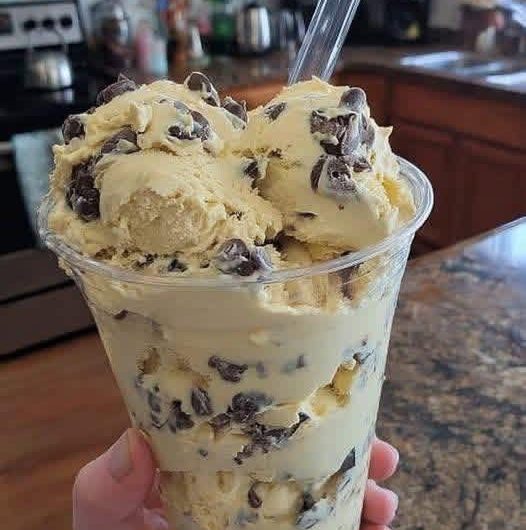
Making rich and creamy homemade ice cream does not have to involve expensive equipment or complicated techniques. This No-Churn Chocolate Chip Ice Cream is a simple recipe that delivers smooth, velvety texture and plenty of chocolate chips using only a handful of everyday ingredients. Without an ice cream maker, special tools, or lengthy preparation, you can enjoy a delicious frozen dessert that tastes just as satisfying as many store-bought premium ice creams.
This recipe is perfect for warm summer afternoons, birthday celebrations, family gatherings, or simply satisfying an ice cream craving at home. With its creamy vanilla base and generous amount of chocolate chips, every scoop offers the perfect balance of sweetness, rich dairy flavor, and crunchy chocolate. Once you try this easy homemade dessert, it is likely to become one of your favorite freezer recipes.
Importance Of This Recipe
One of the biggest advantages of this recipe is its simplicity. Instead of making a traditional custard or using an ice cream machine, the mixture comes together in just a few easy steps. The whipped cream creates a light texture, while sweetened condensed milk provides sweetness and creaminess without requiring additional sugar.
The result is an ice cream that is smooth, airy, and easy to scoop after freezing. Whether you are an experienced home cook or trying homemade ice cream for the first time, this recipe is both reliable and beginner-friendly.
What Makes No-Churn Ice Cream Different?
Traditional ice cream recipes rely on continuous churning during freezing to prevent large ice crystals from forming. No-churn ice cream uses a different method that produces similar creaminess without special equipment.
The combination of whipped heavy cream and sweetened condensed milk creates a stable mixture that freezes smoothly while maintaining a soft, creamy texture. Folding the ingredients together carefully traps tiny air bubbles inside the mixture, giving the finished dessert its light and luxurious consistency.
The Secret to Creamy Homemade Ice Cream
Creating rich homemade ice cream without churning depends on using the right ingredients and mixing them correctly.
Whipped Heavy Cream Creates a Light Texture
Heavy cream is the foundation of this recipe. Whipping it until soft peaks form introduces air into the mixture, creating the fluffy texture that replaces the work normally performed by an ice cream machine.
Soft peaks are ideal because they provide enough structure while still allowing the cream to fold smoothly into the condensed milk. Overwhipping can make the mixture grainy, so stopping at the right stage produces the best results.
Sweetened Condensed Milk Provides Creaminess
Sweetened condensed milk is another key ingredient. Its concentrated texture naturally sweetens the ice cream while helping prevent large ice crystals from developing during freezing.
Unlike regular milk, condensed milk remains smooth even at low temperatures, giving the finished dessert its signature creamy consistency without requiring eggs or a cooked custard base.
Simple Ingredients with Amazing Flavor
One of the reasons this recipe is so popular is its short ingredient list. Every ingredient contributes directly to the finished texture and flavor.
Heavy cream creates volume and richness, condensed milk provides sweetness, vanilla extract adds warm aromatic flavor, chocolate chips contribute crunchy bites throughout the ice cream, and a small pinch of salt gently enhances the sweetness while making the chocolate flavor even more noticeable.
Why Vanilla Makes Such a Difference
Although chocolate chips are the star of the recipe, vanilla extract quietly enhances every scoop. Good-quality vanilla provides warmth and depth that balances the sweetness of the condensed milk while complementing the chocolate beautifully.
Even a single teaspoon transforms the overall flavor, making the ice cream taste richer and more like premium homemade vanilla ice cream with chocolate chips.
Choosing the Best Chocolate Chips
The type of chocolate you choose affects both texture and flavor. Mini chocolate chips distribute more evenly throughout the mixture, ensuring chocolate in nearly every bite. Chopped dark chocolate creates larger pockets of rich chocolate flavor, while milk chocolate offers a sweeter finish.
Whichever option you choose, using quality chocolate produces noticeably better results because the flavor remains prominent even after freezing.
Mixing the Ice Cream Base
Preparing the ice cream base takes only a few minutes. After whipping the cream, the condensed milk is gently folded into it using slow movements rather than vigorous stirring. This helps preserve the air incorporated during whipping, allowing the mixture to remain light and fluffy.
The vanilla and chocolate chips are then folded through until evenly distributed. The finished mixture should be thick, smooth, and airy before being transferred to a freezer-safe container.
Freezing Without Churning
Once the mixture has been poured into a loaf pan or freezer-safe container, the surface is smoothed before covering tightly with plastic wrap or a fitted lid. Freezing for at least six hours allows the ice cream to firm up gradually while maintaining its creamy consistency.
For the best texture, overnight freezing is often recommended. This extra time allows the flavors to develop fully while producing perfectly scoopable homemade ice cream.
Serving Ideas for Homemade Chocolate Chip Ice Cream
This No-Churn Chocolate Chip Ice Cream is delicious straight from the freezer, but it can also be dressed up for special occasions. Serve scoops in waffle cones, sugar cones, or chilled dessert bowls for a classic presentation. Drizzle with chocolate syrup, caramel sauce, or a little melted dark chocolate to create an elegant homemade dessert.
Fresh strawberries, raspberries, banana slices, or blueberries add natural sweetness and refreshing flavor. For extra crunch, sprinkle chopped almonds, walnuts, pecans, or toasted coconut flakes over each serving. These simple additions transform every bowl into a beautiful dessert that looks as good as it tastes.
Delicious Flavor Variations
One of the greatest advantages of this recipe is how easy it is to customize. Once you master the basic vanilla and chocolate chip version, you can create countless flavor combinations using the same creamy base.
Mint Chocolate Chip
Add a small amount of peppermint extract and a drop of green food coloring before freezing to create a refreshing mint chocolate chip ice cream with a cool, fresh flavor.
Mocha Chocolate Chip
Stir instant espresso powder or instant coffee into the condensed milk before folding everything together. The coffee enhances the chocolate while creating a rich café-style frozen dessert.
Peanut Butter Chocolate Chip
Swirl a few spoonfuls of creamy peanut butter through the mixture before freezing. The ribbons of peanut butter pair perfectly with the chocolate chips and create an extra indulgent dessert.
Cookie Dough
Fold small pieces of edible cookie dough into the ice cream mixture for a bakery-inspired version that is especially popular with children and dessert lovers.
Perfect for Every Occasion
Homemade chocolate chip ice cream is suitable for almost any celebration. It is a refreshing dessert during hot summer weather, a wonderful addition to birthday parties, and an easy treat for family gatherings. Because the recipe can be prepared well in advance, it also makes entertaining much easier.
Whether served after a barbecue, enjoyed during movie night, or offered alongside homemade brownies and cakes, this versatile dessert always receives compliments from guests of all ages.
Great Make-Ahead Dessert
Since the ice cream requires several hours in the freezer, it naturally becomes a make-ahead dessert. Preparing it the day before serving allows the flavors to develop while ensuring the texture becomes perfectly firm and creamy.
Having homemade ice cream already waiting in the freezer is especially convenient for unexpected visitors or family desserts after dinner. Simply scoop and serve whenever needed.
Storage Tips
To maintain the best texture, store the ice cream in an airtight freezer-safe container. Pressing a piece of plastic wrap directly onto the surface before covering the container helps reduce ice crystals and preserves the creamy consistency.
When stored properly, the ice cream remains fresh for up to two weeks. Although it is safe to keep longer, the smooth texture is usually best during this period.
Easy Scooping Tips
Homemade no-churn ice cream freezes slightly firmer than freshly churned ice cream. For easier serving, allow the container to stand at room temperature for about five minutes before scooping.
Using a scoop dipped briefly in warm water also helps create smooth, attractive scoops while reducing effort.
Common Mistakes to Avoid
Although this recipe is very simple, a few small details make a noticeable difference. Overwhipping the cream can produce a grainy texture, while vigorous mixing after adding the condensed milk may remove the air needed for a light consistency.
It is also important to freeze the ice cream for enough time. Serving it before it has completely set may result in a softer texture that does not hold its shape as well.
Notes
Chill the Bowl
Using a cold mixing bowl and chilled beaters helps the cream whip more quickly and produces better volume.
Use Mini Chocolate Chips
Mini chocolate chips distribute more evenly throughout the mixture, giving chocolate in almost every bite.
Freeze Overnight
Although six hours is usually sufficient, overnight freezing creates the best texture and flavor.
Let It Soften Slightly
Allow the ice cream to rest for 5 minutes before scooping for smoother servings.
Store Correctly
Keep the ice cream tightly covered to help prevent freezer burn and unwanted ice crystals.
Summary
This No-Churn Chocolate Chip Ice Cream is proof that making homemade ice cream can be easy, affordable, and incredibly rewarding. With only a few simple ingredients and no special equipment, you can create a rich, creamy frozen dessert that rivals many premium store-bought brands.
Whether you enjoy it in a cone, a bowl, or alongside your favorite baked desserts, this recipe delivers delicious results every time. Its smooth vanilla base, crunchy chocolate chips, and effortless preparation make it a freezer favorite that you’ll want to prepare throughout the year.
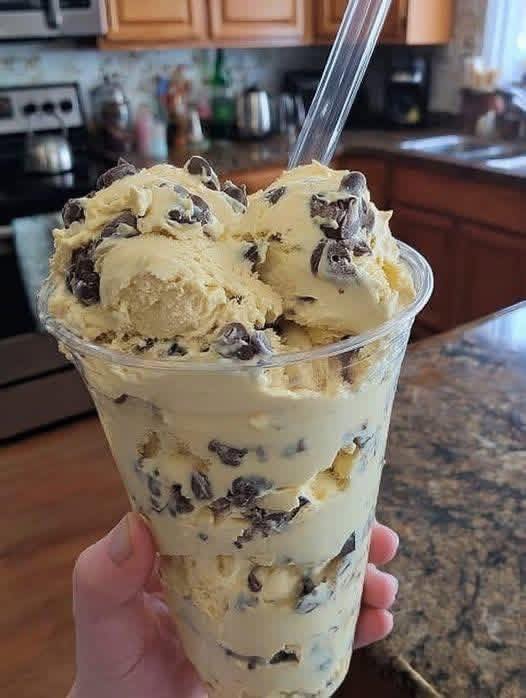
No-Churn Chocolate Chip Ice Cream
No-Churn Chocolate Chip Ice Cream is a rich, creamy homemade frozen dessert made without an ice cream maker. With a smooth vanilla base and plenty of chocolate chips, this easy recipe is perfect for summer treats, family gatherings, or everyday desserts.
10
servings30
minutes6
hours280
kcal6
hours30
minutesIngredients
2 cups heavy cream
1 can (14 oz / 400 g) sweetened condensed milk
1 tsp vanilla extract
½ cup mini chocolate chips
Pinch of salt (optional)
Directions
- Whip the Cream
Beat the heavy cream until soft peaks form. - Mix the Base
Fold in the sweetened condensed milk.
Stir in the vanilla extract and salt. - Add the Chocolate
Fold in the mini chocolate chips. - Freeze
Transfer to a freezer-safe container.
Smooth the top and cover.
Freeze for 6 hours or overnight. - Serve
Let the ice cream soften for 5 minutes.
Scoop and enjoy.
Nutrition Facts
10 servings per container
- Amount Per ServingCalories280
- % Daily Value *
- Total Fat
19g
25%
- Total Carbohydrate
24g
9%
- Protein 4g 8%
* The % Daily Value tells you how much a nutrient in a serving of food contributes to a daily diet. 2,000 calories a day is used for general nutrition advice.