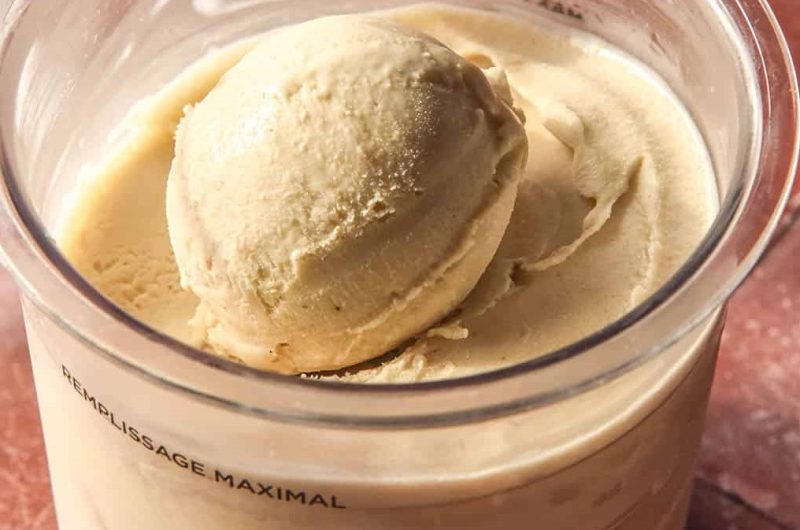
Ninja Creami banana ice cream is a simple homemade frozen dessert made with three main ingredients: ripe bananas, thickened cream, and sweetened condensed milk. The combination produces a rich banana flavor with a smooth, dense, and creamy texture. It is a convenient recipe for anyone who wants homemade ice cream without cooking a custard, using eggs, or operating a traditional ice cream maker.
The preparation takes approximately five minutes, although the mixture must remain in the freezer for 16 to 24 hours before processing. Once completely frozen, the Ninja Creami transforms the solid banana mixture into soft, scoopable ice cream. A small dash of vanilla or a pinch of fine salt can also be included to balance and deepen the flavor without taking attention away from the banana.
Why This Recipe So Popular
This easy Ninja Creami banana ice cream requires very little active work. There is no need to heat milk, temper eggs, prepare a sugar syrup, or blend a complicated base. You simply combine the ingredients in the Ninja Creami tub, freeze the mixture completely, and process it using the Ice Cream setting. The uncomplicated method makes the recipe suitable for beginners as well as experienced home cooks.
Another advantage is its naturally rich and fruity taste. Ripe bananas contribute sweetness and a familiar tropical flavor, while thickened cream creates a luxurious mouthfeel. Sweetened condensed milk provides additional sweetness and helps the frozen mixture become smooth after processing. Together, the three ingredients create a dessert with a consistency similar to creamy banana gelato.
The recipe is also easy to adapt for different dietary requirements. Lactose-free cream and condensed milk may be used when lactose is a concern, while plant-based versions can be tested for a vegan variation. Although substitutions can change the final texture and flavor, the basic preparation method remains straightforward and convenient.
Why Bananas Work Well in the Ninja Creami
Bananas are especially effective in frozen desserts because their soft flesh contains natural sugars, fiber, and starch. These components help thicken the ice cream base and reduce the watery texture that can occur in some fruit-based recipes. Once frozen and processed, the banana blends with the dairy ingredients to create a smooth consistency without requiring gelatin, gums, or commercial ice cream stabilizers.
The natural sweetness of ripe bananas also reduces the need for a large quantity of additional sweetener. The sweetened condensed milk is still important because it supports the creamy texture, but the banana supplies much of the dessert’s fruit sweetness. This balance gives the finished ice cream a rich taste without making it feel like a plain cream-based dessert.
Bananas are also easy to prepare because they do not need to be cooked or blended separately. They can be chopped directly into the tub or mashed before being combined with the remaining ingredients. Mashing the fruit generally produces a more evenly distributed banana flavor, while finely chopped pieces will become smooth when the frozen mixture is processed.
Choosing the Best Bananas
Use ripe bananas with yellow skins and a few brown spots for the best balance of sweetness and flavor. At this stage, the fruit is soft enough to mash easily but has not yet developed the intense sweetness of an extremely overripe banana. These moderately ripe bananas create a classic banana ice cream flavor that works well with the cream and condensed milk.
Less-ripe bananas contain more starch and less natural sugar, so they will produce a milder and less sweet dessert. Very soft bananas with heavily browned skins can also be used, but they will give the ice cream a stronger aroma and sweeter taste. The ideal level of ripeness ultimately depends on how intense you want the banana flavor to be.
Because the recipe contains sweetened condensed milk, you do not need to choose the darkest or softest bananas available. Fruit that is ripe but still firm enough to chop provides a pleasant balance. Using bananas at a similar ripeness each time will also make your results more consistent from one batch to the next.
Fresh and Frozen Bananas
Fresh bananas provide the most traditional banana flavor and are the easiest option for this recipe. Peel the bananas, weigh the required quantity, and then chop or mash them before adding them to the Ninja Creami tub. Measuring the fruit by weight is more accurate than counting bananas because individual fruits can vary considerably in size.
Store-bought frozen bananas may also be used, but they must be completely defrosted first. Do not place loose, solid banana chunks directly into the tub for processing. Defrost the pieces, mash or chop them, combine them with the other ingredients, and then freeze the entire mixture as one level base.
Some packaged frozen bananas are treated with ascorbic acid to prevent browning. This treatment can sometimes introduce a very light citrus-like tang. It is safe to consume, but the flavor may differ slightly from fresh banana ice cream. Fresh fruit is therefore the better choice when you want a pure and familiar banana taste.
How the Three Main Ingredients Work
Although this Ninja Creami recipe uses only three main ingredients, each one has an important purpose. The banana supplies flavor, body, natural sugar, and fiber. The thickened cream adds fat and richness, while the sweetened condensed milk provides concentrated sweetness and additional milk solids. Removing or significantly changing any one of these components can affect the final consistency.
The balance between the ingredients helps the frozen base remain manageable after processing. Banana alone would freeze very firmly and could produce a dense fruit-based dessert. Cream softens the texture, while condensed milk reduces iciness and contributes to a more cohesive finish. This is why the simple combination produces better results than merely freezing mashed bananas.
Thickened Cream
Thickened cream containing approximately 35 percent fat gives the ice cream its rich and silky mouthfeel. Fat is important in frozen desserts because it helps create smoothness and carries flavor. It allows the banana aroma to remain noticeable even when the dessert is served at a very cold temperature.
The cream does not need to be whipped before it is added. Pour it directly into the tub and combine it with the banana and condensed milk. Whipping it separately could introduce unnecessary air and make the base difficult to level. A thoroughly mixed base freezes more evenly and gives the Ninja Creami a consistent block to process.
Sweetened Condensed Milk
Sweetened condensed milk is a concentrated mixture of milk and sugar. Its thick texture adds body to the ice cream base, while its sugar content helps reduce the formation of large ice crystals. This allows the processed ice cream to become smoother and more scoopable than a mixture prepared with thin, unsweetened milk.
Do not replace sweetened condensed milk with evaporated milk. Evaporated milk is unsweetened and has a different consistency, so it cannot provide the same sweetness or structural benefits. The recipe specifically requires 75 grams of sweetened condensed milk to maintain the correct balance with the cream and banana.
Optional Flavor Additions
A dash of vanilla paste or vanilla extract can give the dessert a fuller and more rounded aroma. Vanilla works particularly well with banana because it supports the fruit’s natural sweetness without overpowering it. Only a small amount is needed, as the main flavor should remain banana rather than vanilla.
A small pinch of fine salt may also be included. Salt does not make the dessert taste salty when used sparingly. Instead, it balances the sweetness of the condensed milk and helps the banana flavor seem more distinct. Both additions are optional, so they can be omitted when you want a pure three-ingredient banana ice cream.
How to Prepare the Ice Cream Base
Place 250 grams of chopped or mashed ripe banana into a clean 470-millilitre Ninja Creami tub. Add 200 grams of thickened cream and 75 grams of sweetened condensed milk. If desired, include one dash of vanilla paste or extract and one small pinch of fine salt.
Mix everything thoroughly until the banana is evenly distributed and no separate pockets of condensed milk or cream remain. Mashing the banana before combining it with the dairy ingredients can make this easier. The mixture does not need to be completely blended, but it should have a consistent appearance before it goes into the freezer.
Check that the mixture remains below the maximum fill line on the container. Smooth the surface so it is level, as the Ninja Creami should process a flat and evenly frozen base. Place the tub upright on a stable freezer shelf to prevent the mixture from freezing at an angle.
Freezing the Ninja Creami Tub
Freeze the prepared tub without its lid for 16 to 24 hours. The base must be frozen completely from the surface through the center before it is placed in the machine. Although it may appear solid after several hours, the middle can remain too soft for proper processing.
Keeping the tub on a level surface is particularly important. An uneven or slanted frozen base may not process correctly. Avoid moving the container while the mixture is setting, and do not begin processing if the contents are only partially frozen. Preparing the mixture one day before serving is the easiest way to allow enough freezing time.
Freezer temperatures vary, so some mixtures may become harder than others. A very cold freezer can produce a particularly firm block, while a warmer freezer may create a slightly softer base. These differences can influence whether the ice cream needs an additional Re-spin after the first processing cycle.
Processing the Frozen Banana Ice Cream
After 16 to 24 hours, remove the fully frozen tub from the freezer and place it in the Ninja Creami according to the manufacturer’s instructions. Select the Ice Cream program and allow the machine to complete the full cycle. The blade will gradually shave and combine the solid base until it develops a creamy consistency.
Inspect the ice cream when the cycle ends. It may already look smooth, dense, and scoopable. If it appears dry or crumbly, this does not necessarily mean anything has gone wrong. The frozen particles may simply need another processing cycle to combine into a cohesive texture.
When to Use Re-Spin
Select Re-spin if the ice cream looks crumbly or powdery after the first cycle. One additional spin will often transform the mixture into smooth banana ice cream. Check the consistency after the Re-spin and stop processing once it becomes creamy and evenly blended.
Repeated processing can warm the dessert and make it softer than intended, especially in a warm kitchen. For that reason, use the Re-spin function only when necessary. The sweetened condensed milk and thickened cream should normally help the mixture become creamy without adding extra liquid.
Lactose-Free and Low-FODMAP Options
For a lactose-free version, use lactose-free thickened cream and lactose-free sweetened condensed milk. These alternatives perform the same basic roles as the original dairy ingredients while reducing or removing lactose. Product thickness and fat content can vary, so the finished consistency may differ slightly between brands.
If ready-made lactose-free condensed milk is unavailable, the source recipe suggests adding lactase drops to ordinary condensed milk one or two days before preparing the ice cream. Follow the directions supplied with the lactase product because the required quantity and treatment time can vary.
A low-FODMAP variation can be tested with suitable lactose-free dairy products and Ladyfinger bananas, which are also called sugar bananas. Portion size and personal tolerance remain important. Anyone following a medically supervised low-FODMAP eating plan should confirm suitable ingredients and serving quantities with a qualified dietitian.
Vegan and Alternative Sweetener Options
A vegan variation can be prepared experimentally with vegan condensed milk and plant-based cream. Choose products designed for desserts and with enough fat to create a creamy result. Because plant-based products vary in thickness and composition, the finished ice cream may not have exactly the same texture as the original dairy version.
Maple syrup or agave may also be tested in place of condensed milk, although either replacement will create a lighter and potentially icier dessert. Sweetened condensed milk contributes concentrated milk solids and thickness in addition to sweetness. Thin liquid sweeteners cannot reproduce all these qualities, so they should be considered experimental alternatives rather than exact replacements.
Notes for the Best Texture
Use a kitchen scale to measure the banana, cream, and condensed milk accurately. Correct proportions help the mixture freeze and process consistently. The ripeness of the bananas also matters because riper fruit contains more natural sugar, while less-ripe fruit contains more starch and may produce a firmer result.
Mash the bananas well if you want a smooth and evenly flavored base. Mix the condensed milk thoroughly so it does not collect in one area of the tub. Keep the surface level throughout freezing and allow the full 16 to 24 hours before processing.
If the first cycle produces a powdery texture, use Re-spin rather than assuming the recipe has failed. Differences in freezer temperature can change how the base behaves. Once you know whether your freezer usually requires one or two cycles, it will become easier to reproduce your preferred texture.
Serving and Storage
Serve the banana ice cream soon after processing for the softest and creamiest consistency. The recipe fills one 470-millilitre Ninja Creami tub and provides approximately four modest portions. Since the mixture contains thickened cream and condensed milk, even a relatively small serving has a satisfying richness.
Place leftovers in the same Ninja Creami tub and secure the lid before returning the container to the freezer. Homemade ice cream often becomes firm during storage because it does not contain the same stabilizers found in many commercial products. This change in texture is normal.
Allow stored ice cream to stand at room temperature for a few minutes before scooping. If it remains too firm or develops an icy consistency, it can be processed again according to the Ninja Creami manufacturer’s instructions. Keep the surface reasonably level before refreezing the remaining ice cream.
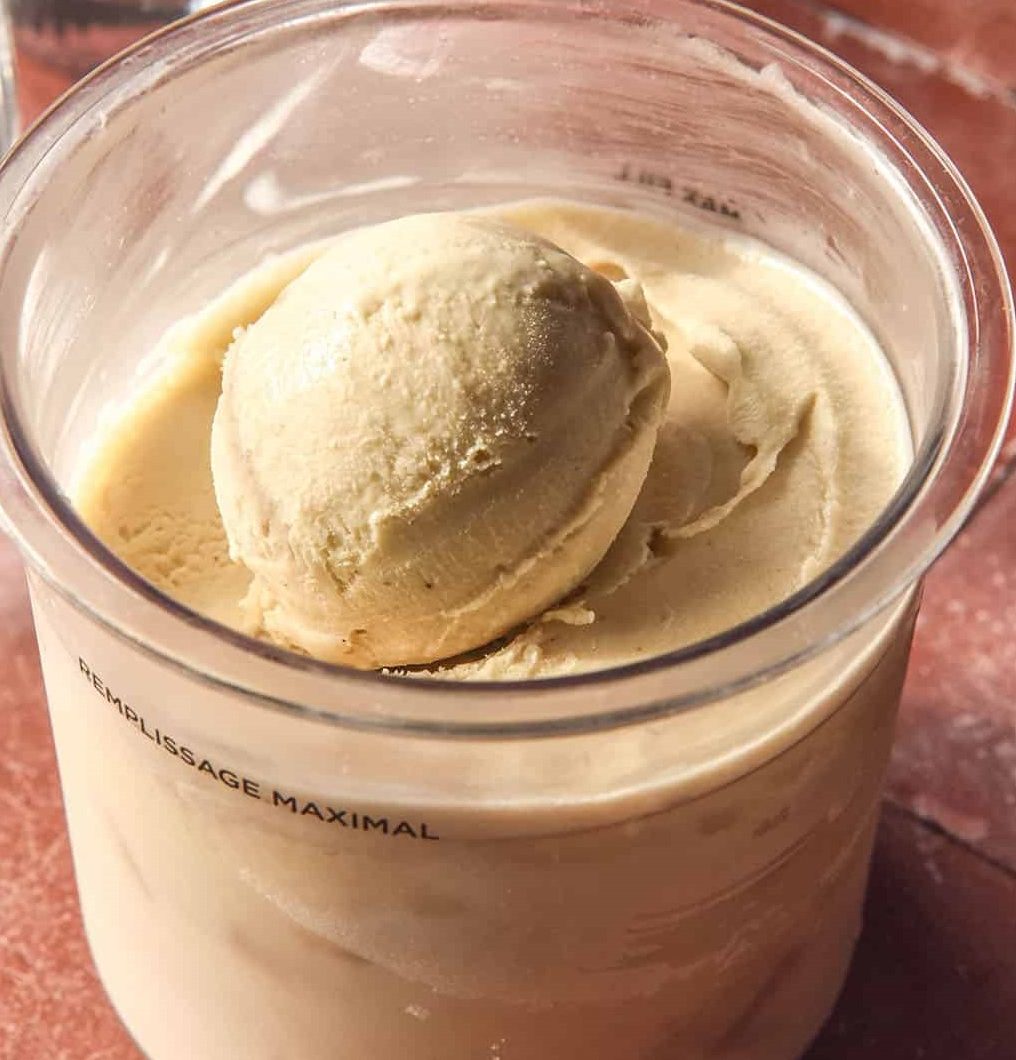
Ninja Creami Banana Ice Cream
A smooth and rich Ninja Creami banana ice cream prepared with ripe banana, thickened cream, and sweetened condensed milk.
4
servings5
minutes0
minutes330
kcal288
5
minutes4
hours58
minutesIngredients
250 g ripe banana, chopped or mashed, fresh or defrosted from frozen
200 g thickened cream with 35% fat
75 g sweetened condensed milk, not evaporated milk
- Optional Ingredients
1 dash vanilla paste or vanilla extract
1 small pinch fine salt
Directions
- Put the chopped or mashed banana into a 470 ml Ninja Creami tub.
- Add the thickened cream and sweetened condensed milk.
- Add vanilla or salt if using.
- Mix thoroughly and level the surface.
- Place the tub upright in the freezer without its lid.
- Freeze for 16–24 hours.
- Process using the Ice Cream setting.
- Select Re-spin if the texture is crumbly.
- Serve immediately.
Nutrition Facts
4 servings per container
- Amount Per ServingCalories330
- % Daily Value *
- Total Fat
20g
26%
- Total Carbohydrate
37g
14%
- Protein 4g 8%
* The % Daily Value tells you how much a nutrient in a serving of food contributes to a daily diet. 2,000 calories a day is used for general nutrition advice.