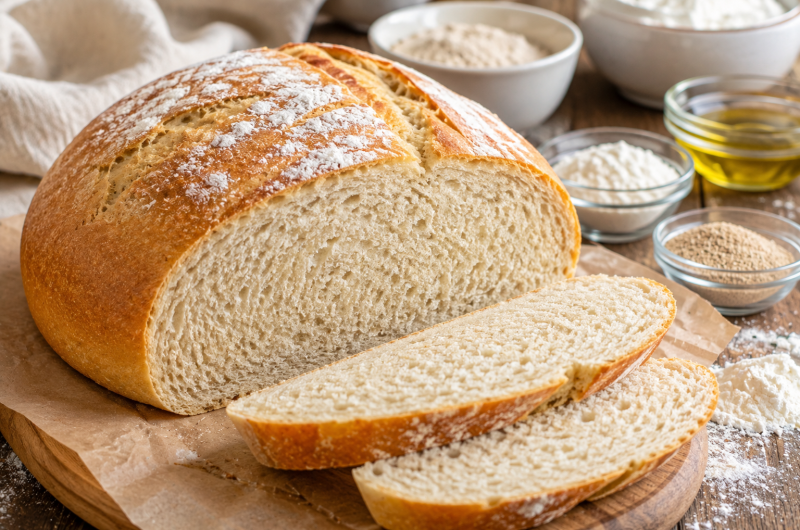
Freshly baked bread is one of life’s simplest pleasures, and this Magic Gluten-Free Bread proves that you don’t need wheat flour to enjoy a soft, fluffy loaf. Made with a carefully balanced blend of gluten-free flours, psyllium husk, and yeast, this bread delivers a light texture, a tender crumb, and a beautiful golden crust. Whether you are following a gluten-free lifestyle because of celiac disease, gluten intolerance, or personal preference, this recipe provides a dependable way to bake delicious homemade bread that tastes just as satisfying as traditional loaves.
Unlike many store-bought gluten-free breads that can feel dry, crumbly, or overly dense, this homemade version stays soft, slices neatly, and works perfectly for everyday meals. It is ideal for breakfast toast, sandwiches, soups, or simply served warm with butter. The recipe is straightforward enough for beginners while producing bakery-style results that experienced bakers will appreciate.
Importance of Recipe
If you have struggled with gluten-free baking before, this recipe offers a refreshing change. The dough is simple to prepare, uses everyday ingredients, and creates consistent results when each step is followed carefully. The finished loaf has a soft interior, a lightly crisp crust, and enough structure to hold sandwich fillings without falling apart.
This homemade gluten-free bread is also highly versatile. It can be enjoyed fresh from the oven, toasted for breakfast, or frozen for future use. Because the ingredients work together to create excellent texture, every slice remains tender without becoming dry or crumbly.
What Makes This Bread “Magic”?
The name “Magic Gluten-Free Bread” comes from the remarkable texture achieved without using wheat flour. Many gluten-free breads struggle to imitate the elasticity and structure that gluten naturally provides. This recipe overcomes that challenge by combining gluten-free flours with psyllium husk, creating a loaf that is soft, flexible, and easy to slice.
Instead of producing a heavy or compact loaf, the dough rises beautifully during proofing and baking. The result is a light, airy crumb that closely resembles traditional homemade bread while remaining completely gluten-free.
The Secret to Soft Gluten-Free Bread
Several ingredients work together to create the perfect loaf, but one stands above the rest.
Psyllium Husk Creates Better Structure
Psyllium husk plays an essential role in gluten-free baking because it acts as a natural binder. When mixed with water, it forms a gel that mimics the elasticity normally created by gluten. This allows the dough to trap air during rising, producing a loaf that feels soft instead of dense.
Psyllium husk also helps the bread stay moist for longer, improves slicing, and prevents excessive crumbling. For this reason, it should never be omitted from the recipe.
A Balanced Flour Blend
Using only one gluten-free flour rarely produces the best results. Whole rice flour creates the main structure, buckwheat flour adds flavor and nutrition, while potato or corn starch lightens the texture. Together, these ingredients create a loaf with excellent flavor, softness, and stability.
Understanding the Ingredients
Each ingredient contributes something important to the finished bread. While the ingredient list remains simple, understanding their purpose helps produce consistently successful results.
Whole rice flour forms the foundation of the loaf and provides a neutral flavor that works well in both sweet and savory recipes. Buckwheat flour introduces a mild nutty taste while adding nutrients and improving texture. Potato or corn starch helps reduce density, producing a lighter crumb that feels closer to traditional wheat bread.
Warm water activates the yeast, while olive oil contributes softness and helps the bread remain tender after baking. Salt enhances the overall flavor while supporting balanced yeast activity throughout the fermentation process.
Activating the Yeast Correctly
Successful bread begins with active yeast. Mixing the yeast with warm water allows it to wake up and begin producing the gas needed for rising. The water should feel comfortably warm rather than hot. Excessively hot water may damage the yeast and prevent proper fermentation.
After several minutes, the mixture should become foamy, showing that the yeast is healthy and ready to use. If little or no foam appears, it is best to replace the yeast before continuing with the recipe.
Mixing the Dough
Unlike traditional wheat dough, gluten-free bread dough does not require kneading. Once the wet ingredients are added to the dry mixture, everything is simply mixed until fully combined. The dough will appear softer and stickier than regular bread dough, which is completely normal.
Avoid adding unnecessary flour in an attempt to create a firmer dough. The softer consistency is essential for producing a moist, airy loaf after baking.
Allowing Enough Time for Rising
Rising is one of the most important stages in bread making. During this period, the activated yeast releases carbon dioxide, causing the dough to expand naturally. Allowing approximately one and a half hours gives the dough enough time to nearly double in size.
Keeping the bowl in a warm, draft-free location encourages even fermentation and produces better texture. Rushing this stage may result in a smaller, denser loaf with reduced softness.
Shaping the Dough
Once fully risen, the dough can be transferred into a loaf pan or gently shaped into a round loaf on a parchment-lined baking tray. Since gluten-free dough is naturally softer than wheat dough, handling it gently helps preserve the trapped air that has developed during proofing.
Using lightly damp hands makes shaping easier and prevents the dough from sticking excessively.
Baking the Bread to Perfection
Baking is the stage where the dough transforms into a beautifully risen loaf with a crisp golden crust and a soft interior. A fully preheated oven is essential because consistent heat helps the bread rise quickly during the first few minutes of baking. This rapid expansion creates a lighter crumb while allowing the crust to develop an appealing golden color.
Bake the bread until the top feels firm and evenly browned. Avoid removing it too early, as underbaked gluten-free bread may have a gummy center. Once baked, the loaf should sound slightly hollow when tapped on the bottom, indicating it has cooked through properly.
Why Cooling Is an Essential Step
Many people are tempted to slice freshly baked bread immediately, but allowing the loaf to cool completely is one of the most important steps in gluten-free baking. During cooling, the internal structure continues to set, helping the crumb become stable and easier to slice.
Cutting the bread while it is still hot may cause the inside to become sticky or compressed. Waiting until the loaf has cooled ensures clean slices, a better texture, and a more enjoyable eating experience.
Flavor and Texture You Will Enjoy
One of the best qualities of this Magic Gluten-Free Bread is its balanced flavor. Whole rice flour provides a mild taste, while buckwheat flour adds a gentle nutty note without overpowering the loaf. Together, they create a bread that pairs well with both sweet and savory toppings.
The texture is equally impressive. The crust becomes lightly crisp during baking, while the inside stays soft, airy, and moist. Unlike many gluten-free breads that dry out quickly, this loaf remains pleasant to eat and slices neatly without crumbling.
Delicious Ways to Serve Gluten-Free Bread
This homemade bread is incredibly versatile and fits into almost any meal. Enjoy it fresh with butter for breakfast, toast it until lightly crisp, or use it as the base for your favorite sandwiches. Its sturdy texture also makes it an excellent choice for avocado toast, grilled cheese, or homemade garlic bread.
The bread pairs wonderfully with soups, salads, and hearty stews. It can even be served alongside pasta dishes or used to prepare gluten-free breadcrumbs after drying and blending leftover slices.
Health Benefits of Homemade Gluten-Free Bread
Making gluten-free bread at home allows you to control every ingredient that goes into your loaf. Unlike many commercial gluten-free breads, homemade versions often contain fewer preservatives and unnecessary additives. You can also choose high-quality ingredients that suit your dietary preferences.
Buckwheat flour contributes valuable minerals and antioxidants, while psyllium husk provides dietary fiber that supports healthy digestion. Preparing your own bread also allows you to avoid artificial flavors while enjoying fresh, wholesome ingredients.
Common Mistakes to Avoid
Even though this recipe is beginner-friendly, avoiding a few common mistakes can improve your results. Using water that is too hot may prevent the yeast from activating properly, leading to poor rising. Skipping the psyllium husk will also affect the bread’s structure, making it more likely to crumble after baking.
Another common mistake is adding extra flour because the dough appears sticky. Gluten-free dough should remain softer than traditional wheat dough. Finally, avoid slicing the loaf before it has cooled completely, as this can affect the final texture.
Storing Your Homemade Bread
Proper storage helps maintain freshness for several days. Once the loaf has cooled completely, place it in an airtight container or wrap it well to prevent it from drying out. It will stay fresh at room temperature for up to three days.
For longer storage, slice the bread before freezing. Individual slices can be removed as needed and toasted directly from frozen, making this recipe convenient for busy mornings and meal preparation.
Notes
Don’t Skip the Psyllium Husk
Psyllium husk is the key ingredient that gives this bread its soft texture and flexible structure. Replacing or omitting it will significantly change the final result.
Use Warm, Not Hot Water
Warm water activates the yeast properly, while overly hot water can damage it. Aim for comfortably warm water for the best rise.
Add Steam for a Crispier Crust
Placing a small oven-safe dish of hot water inside the oven during baking creates steam that helps develop a crisp, golden crust while keeping the inside soft.
Cool Before Slicing
Allow the loaf to cool completely before cutting. This helps the crumb set properly and prevents the bread from becoming gummy.
Customize the Bread
For extra flavor and nutrition, stir in seeds such as flaxseed, sunflower seeds, or chia seeds before baking. They add texture without changing the basic recipe.
Summary
Magic Gluten-Free Bread is proof that homemade gluten-free baking can be both simple and rewarding. With its soft crumb, light texture, and crisp golden crust, this loaf delivers everything you would expect from traditional homemade bread without containing gluten. The balanced blend of rice flour, buckwheat flour, starch, and psyllium husk creates reliable results that both beginners and experienced bakers can achieve.
Whether you enjoy it fresh, toasted, or as the base for your favorite sandwiches, this easy gluten-free bread recipe is one you’ll want to make again and again. Its wholesome ingredients, straightforward preparation, and delicious flavor make it a perfect everyday loaf for the whole family.
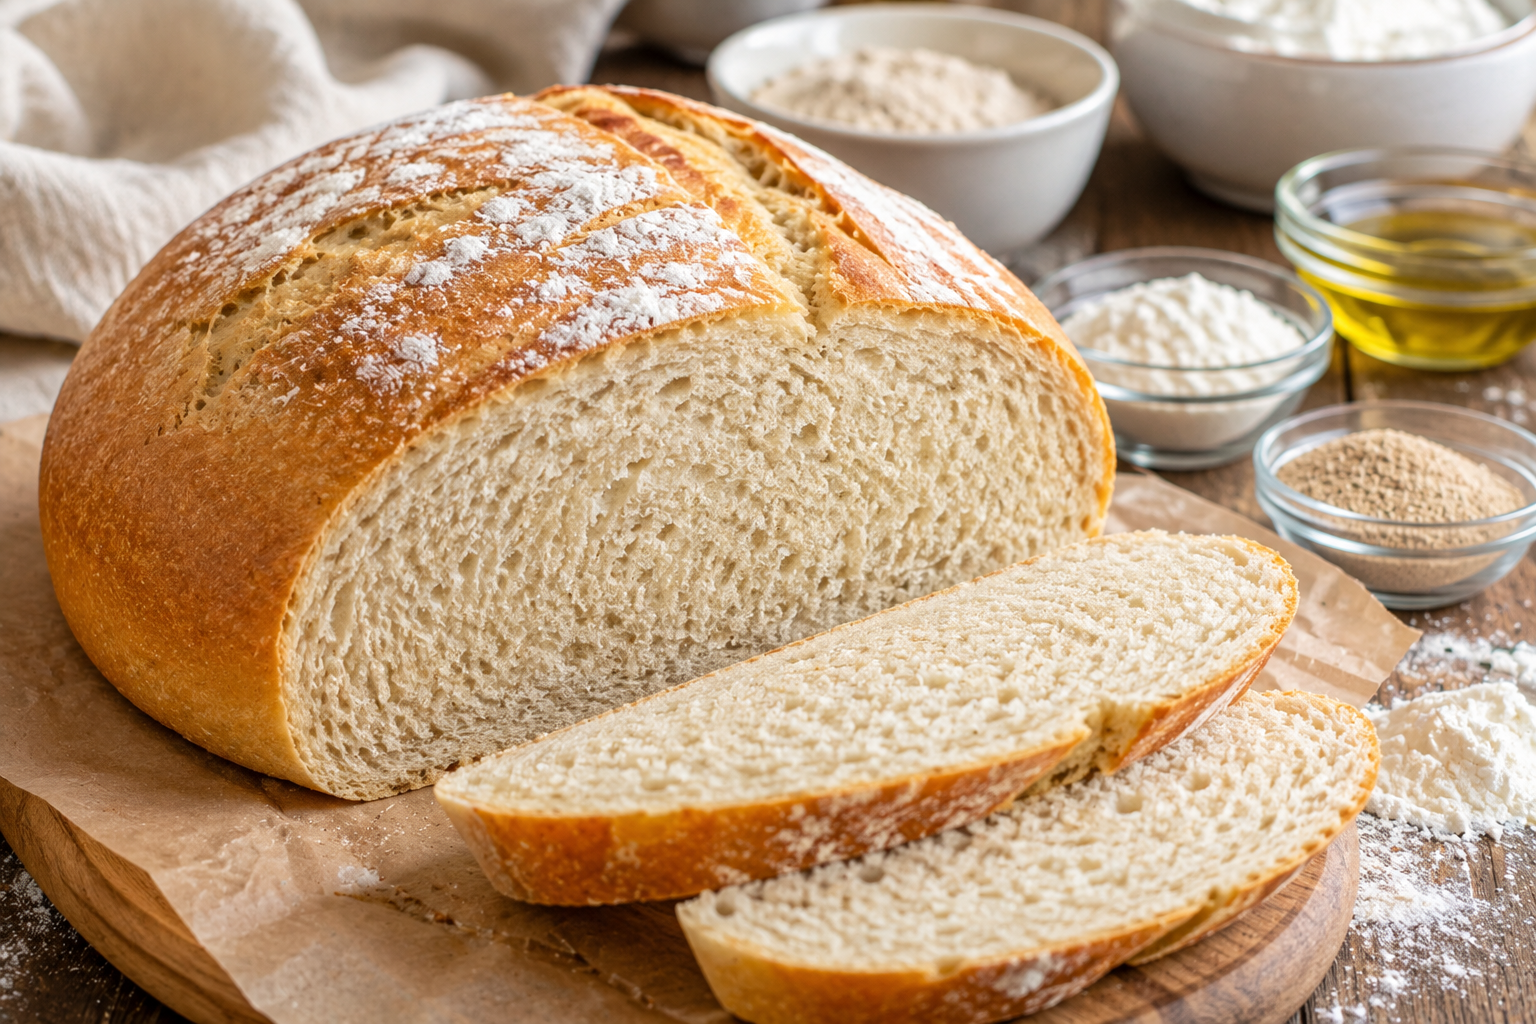
Magic Gluten-Free Bread
Magic Gluten-Free Bread is soft, fluffy, and easy to make with a perfectly tender crumb and a golden crust. Made with simple gluten-free ingredients, this homemade loaf is ideal for sandwiches, toast, or serving fresh with butter.
1
servings15
minutes40
minutes150
kcal90
minutes2
hours25
minutesIngredients
250 g whole rice flour
100 g buckwheat flour
50 g starch (potato or corn)
10 g blond psyllium husk
1 packet gluten-free baker’s yeast
1 tsp salt
350 ml warm water
1 tbsp olive oil
Directions
- Activate the Yeast
Mix the yeast with the warm water and a pinch of sugar.
Let stand for 10 minutes until foamy. - Prepare the Dough
Combine the rice flour, buckwheat flour, starch, psyllium husk, and salt.
Add the yeast mixture and olive oil.
Mix until a smooth, sticky dough forms. - Let the Dough Rise
Cover the bowl with a damp cloth.
Leave in a warm place for 1 hour 30 minutes, or until nearly doubled. - Shape the Loaf
Transfer the dough to a lined baking tray or loaf pan.
Shape gently into a loaf. - Bake
Preheat the oven to 210°C (410°F).
Bake for 35–40 minutes, until golden brown. - Cool and Serve
Cool the bread completely.
Slice and serve.
Nutrition Facts
1 servings per container
- Amount Per ServingCalories150
- % Daily Value *
- Total Fat
2g
3%
- Total Carbohydrate
29g
11%
- Protein 3g 6%
* The % Daily Value tells you how much a nutrient in a serving of food contributes to a daily diet. 2,000 calories a day is used for general nutrition advice.