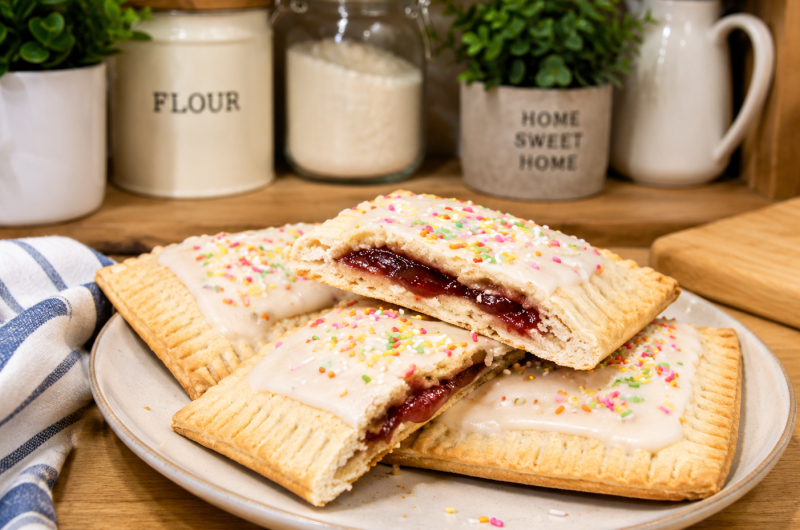
Gluten-Free Pop Tarts are a delicious homemade version of the classic toaster pastry that many people grew up enjoying. These flaky pastries feature a buttery gluten-free crust wrapped around a sweet fruit filling and finished with a smooth vanilla glaze. They are perfect for breakfast, afternoon snacks, lunch boxes, or dessert. Unlike many packaged toaster pastries that contain preservatives, artificial flavors, and refined ingredients, homemade Gluten-Free Pop Tarts are made with simple pantry staples that deliver fresh flavor and a satisfying texture.
One of the greatest advantages of making pop tarts at home is the ability to customize every part of the recipe. You can choose your favorite fruit jam, create chocolate-filled pastries, or even experiment with peanut butter and other delicious fillings. Homemade pastries also allow you to control the sweetness while using high-quality ingredients that suit your dietary needs. Whether you are baking for someone with gluten intolerance or simply looking for a fun homemade treat, this recipe offers an enjoyable baking experience and excellent results.
Why We Prefer This Recipe
These homemade Gluten-Free Pop Tarts combine a tender, flaky pastry with a sweet filling and creamy glaze. Every bite delivers a wonderful contrast between the crisp outer crust and the soft fruit center. Unlike many gluten-free baked goods that can become dry or crumbly, these pastries stay pleasantly tender when prepared correctly.
The recipe is beginner-friendly and does not require advanced baking skills. Although gluten-free pastry behaves differently from traditional wheat dough, following a few simple techniques makes the process straightforward and rewarding. Once baked, these pastries can be enjoyed fresh, stored for later, or reheated in the toaster for a warm homemade breakfast.
Why Homemade Pop Tarts Are Better Than Store-Bought
Many commercial toaster pastries contain preservatives, artificial colors, and flavorings designed to extend shelf life. Homemade Gluten-Free Pop Tarts offer a fresher alternative made with recognizable ingredients.
Preparing them yourself also gives you complete control over the filling, glaze, and sweetness. You can select high-quality fruit preserves, reduce added sugar if desired, and avoid unnecessary additives. The result is a pastry that tastes homemade because it truly is.
Another benefit is freshness. Freshly baked pastries have a delicate flaky texture and rich buttery flavor that packaged versions simply cannot match.
Understanding Gluten-Free Pastry
Gluten-free pastry differs from traditional pastry because it lacks gluten, the protein responsible for elasticity in wheat dough. Instead of becoming stretchy, gluten-free dough is more delicate and requires gentle handling throughout preparation.
Keeping the ingredients cold is especially important because cold butter creates small pockets within the dough. During baking, these pockets release steam, producing a light, flaky pastry.
Although the dough may seem fragile while rolling, chilling and handling it carefully helps create beautiful pastries that bake evenly and hold their shape well.
Ingredient Overview
Each ingredient contributes to the final texture and flavor of these homemade pastries.
Gluten-Free All-Purpose Flour
A quality gluten-free flour blend containing xanthan gum provides the structure needed for the pastry.
Blends containing rice flour, tapioca starch, and potato starch generally work well for pie dough and pastries.
If your flour blend does not already include xanthan gum, additional xanthan gum may be necessary according to the manufacturer’s instructions.
Butter
Cold butter is one of the most important ingredients in pastry making.
Small pieces of cold butter remain solid while mixing. As they melt during baking, they create tiny layers that produce a flaky crust.
Always keep the butter refrigerated until ready to use.
Egg
The egg helps bind the dough while adding richness and improving structure.
It also contributes to a beautiful golden color during baking.
Cold Milk
Cold milk provides just enough moisture to bring the dough together.
Because different gluten-free flour blends absorb moisture differently, the exact amount may vary slightly.
Add only enough milk to form a soft dough.
Fruit Jam
The filling provides sweetness and fruity flavor.
Popular choices include:
- Strawberry
- Blueberry
- Raspberry
- Cherry
- Mixed berry
Choose a thick jam to reduce the chance of leaking during baking.
Vanilla Glaze
The simple glaze creates the classic pop tart appearance.
Made with powdered sugar, milk, and vanilla extract, it adds sweetness while complementing the fruit filling without overpowering it.
Why Keeping the Dough Cold Matters
Temperature plays a major role in successful pastry making.
Cold butter produces flaky layers, while warm butter blends completely into the flour and creates a denser crust.
After mixing the dough, refrigerating it for 30–40 minutes allows the butter to firm up while making the dough easier to roll and cut.
If the dough becomes soft while working, simply return it to the refrigerator for several minutes before continuing.
Rolling Gluten-Free Dough Successfully
Many people worry about rolling gluten-free pastry, but parchment paper makes the process much easier.
Place the chilled dough between two sheets of parchment paper before rolling.
This prevents sticking while allowing the dough to remain smooth and even.
Aim for approximately ¼-inch thickness, which provides enough structure to hold the filling without becoming too thick after baking.
Working slowly and gently helps prevent cracking while producing attractive rectangles ready for filling.
Perfect for Every Occasion
These Gluten-Free Pop Tarts are wonderfully versatile and suitable for many occasions.
They make an excellent:
- Quick breakfast
- School lunch box treat
- Afternoon snack
- Dessert
- Holiday brunch addition
- Picnic dessert
- Weekend baking project
Because they can be prepared in advance and reheated, they are also convenient for busy mornings when you want something homemade without additional preparation.
Step-by-Step Instructions
Making homemade Gluten-Free Pop Tarts is easier than it may seem. The secret is working with chilled dough, handling it gently, and sealing each pastry carefully to keep the filling inside while baking. Once you become familiar with the process, these homemade pastries can become a regular breakfast or snack that is far superior to store-bought versions.
Step 1: Prepare the Pastry Dough
In a large mixing bowl, combine:
- Gluten-free all-purpose flour
- Salt
- Sugar
Whisk the dry ingredients until evenly mixed.
Add the cold butter cubes.
Using a pastry cutter, fork, or your fingertips, work the butter into the flour until the mixture resembles coarse crumbs with small butter pieces remaining throughout.
Those butter pieces create the flaky layers during baking.
Step 2: Add the Wet Ingredients
Add:
- Egg
- Cold milk
Mix gently until the dough begins coming together.
If necessary, add one additional tablespoon of cold milk.
The finished dough should be soft enough to hold together without becoming sticky.
Avoid overmixing, which can make the pastry less tender.
Step 3: Chill the Dough
Shape the dough into a flat disc.
Wrap it tightly in plastic wrap.
Refrigerate for 30–40 minutes.
Chilling relaxes the dough while keeping the butter cold, making rolling much easier.
Step 4: Roll the Dough
Place the chilled dough between two sheets of parchment paper.
Roll it evenly until approximately ¼ inch thick.
Using parchment prevents sticking and reduces the risk of cracking.
If the dough softens while rolling, refrigerate it again for several minutes before continuing.
Step 5: Cut the Pastry
Using a sharp knife or pizza cutter, cut the dough into evenly sized rectangles.
Try to keep each rectangle the same size so the pastries bake uniformly.
Arrange half of the rectangles on a parchment-lined baking tray.
These will become the bottom layer.
Step 6: Add the Filling
Place 1–2 teaspoons of fruit jam in the center of each rectangle.
Leave a border around the edges.
Avoid overfilling, as excess jam may leak during baking.
A thick fruit preserve works best because it remains inside the pastry more easily.
Step 7: Seal the Pop Tarts
Place a matching rectangle over each filled pastry.
Press the edges gently together.
Using the tines of a fork, crimp all four sides to create a decorative seal.
This step also helps prevent the filling from escaping.
Use the fork to poke a few small holes in the top of each pastry.
These vents allow steam to escape during baking.
Step 8: Bake
Preheat the oven to:
350°F (180°C)
Bake for approximately 20–25 minutes.
The pastries should become lightly golden around the edges while remaining tender.
Avoid overbaking, which may dry the pastry.
Step 9: Cool Completely
Transfer the baked pastries to a wire rack.
Allow them to cool completely before glazing.
Warm pastries may cause the glaze to melt and slide off.
Step 10: Prepare the Glaze
In a small bowl combine:
- Powdered sugar
- Milk
- Vanilla extract
Whisk until smooth.
Adjust the consistency by adding small amounts of milk or powdered sugar if necessary.
Spread the glaze evenly over the cooled pastries.
Allow the glaze to set before serving.
Delicious Filling Variations
One of the best things about homemade Gluten-Free Pop Tarts is their versatility.
Berry Pop Tarts
Use:
- Strawberry jam
- Blueberry jam
- Raspberry jam
- Mixed berry preserves
These classic flavors are always popular.
Chocolate Pop Tarts
Replace the jam with:
- Chocolate spread
- Chocolate hazelnut spread
The result is a rich dessert-style pastry.
Peanut Butter Version
Spread peanut butter inside before sealing.
You may also combine peanut butter with fruit jam for extra flavor.
Apple Cinnamon Version
Fill with apple butter or cinnamon apple preserves.
This variation is especially popular during autumn.
Common Mistakes to Avoid
Avoiding a few simple mistakes helps produce beautifully baked pastries every time.
Using Warm Butter
Cold butter creates flaky pastry.
Warm butter produces a denser crust.
Overfilling
Too much filling causes leaks during baking.
Keep the filling centered.
Skipping the Chill Time
Cold dough rolls more easily and maintains better shape while baking.
Forgetting Steam Holes
Small fork holes allow steam to escape, helping prevent bursting.
Serving Suggestions
These homemade Gluten-Free Pop Tarts are delicious served:
- Warm from the toaster
- With coffee
- With hot chocolate
- Alongside fresh fruit
- As a breakfast pastry
- With yogurt
- As an afternoon snack
- On dessert platters
- During holiday brunches
They are equally enjoyable served warm or at room temperature.
Storage Instructions
Store cooled pastries inside an airtight container at room temperature for 2–3 days.
For longer storage:
- Refrigerate for up to 5 days.
To freeze:
- Wrap individually.
- Store in freezer-safe containers.
- Freeze for up to 3 months.
Reheat in a toaster or oven before serving.
Nutrition Benefits
Homemade Gluten-Free Pop Tarts allow you to enjoy a sweet pastry while using simple ingredients and avoiding many preservatives found in commercial products. The gluten-free flour blend provides the pastry base, while fruit jam contributes natural fruit flavor. Making them at home also allows you to control the sweetness and customize fillings to suit your family’s preferences.
Notes
Always keep the butter and dough cold for the flakiest pastry. Roll the dough between parchment paper to prevent sticking and reduce cracking. Use thick fruit preserves to minimize leaking during baking. Avoid overfilling the pastries, and always seal the edges firmly with a fork. Allow the pastries to cool completely before applying the glaze for the best appearance. These Gluten-Free Pop Tarts are perfect for breakfast, brunch, lunch boxes, afternoon snacks, dessert, holiday baking, meal prep, and homemade family treats.
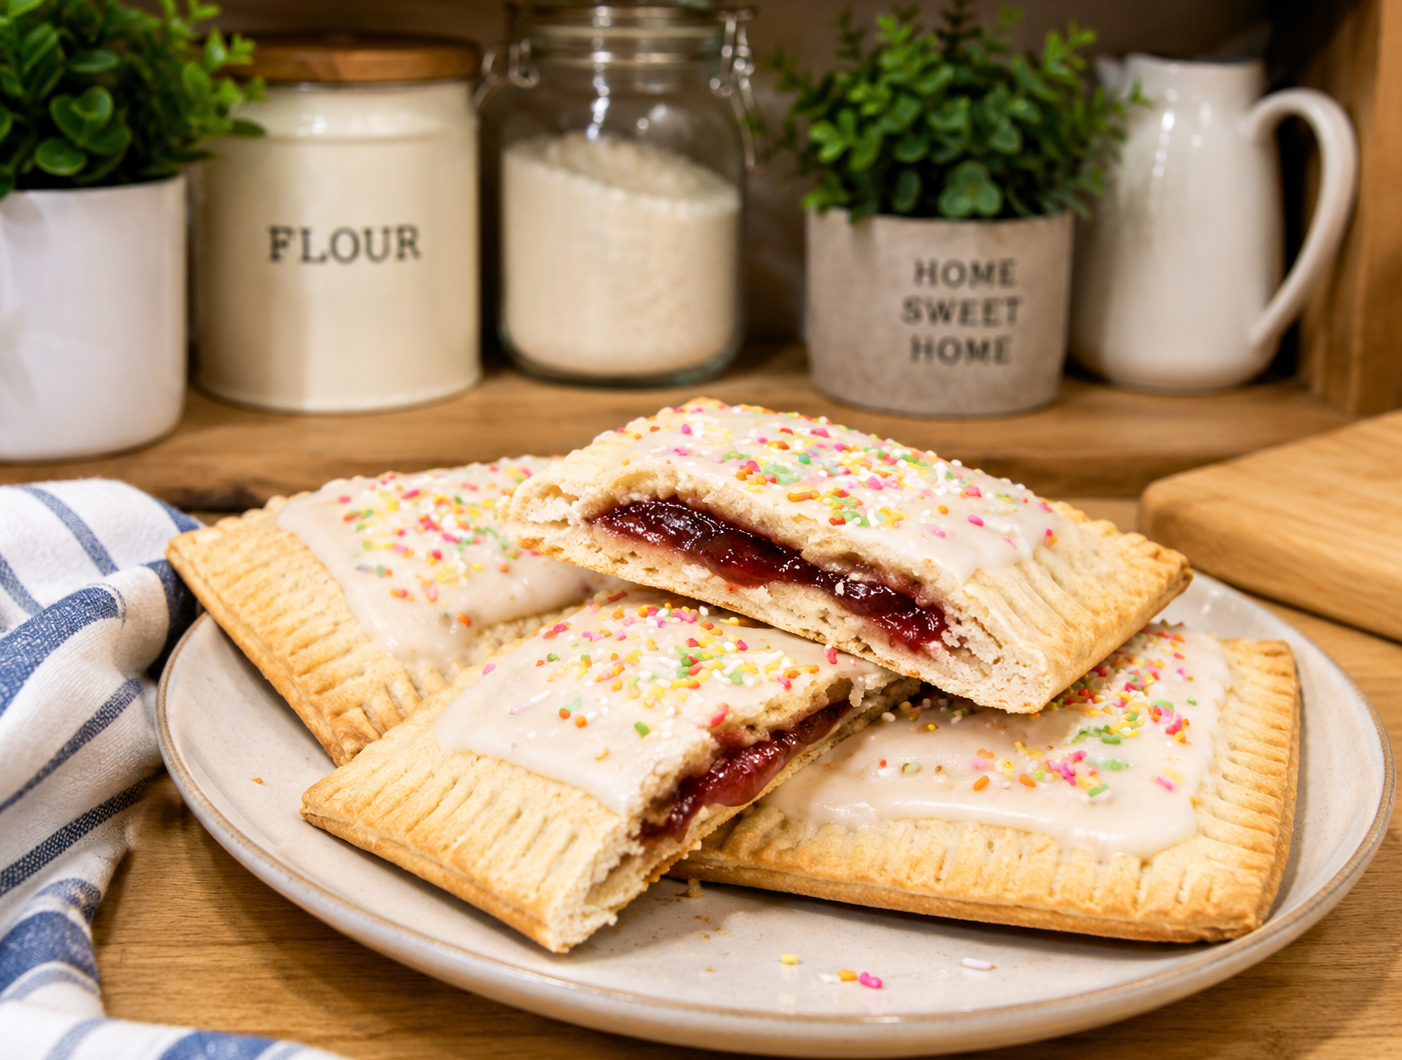
Gluten-Free Pop Tarts
These Gluten-Free Pop Tarts are flaky, buttery, and filled with your favorite fruit jam before being topped with a smooth vanilla glaze. Made with simple pantry ingredients, these homemade toaster pastries are a delicious alternative to store-bought versions. Perfect for breakfast, lunch boxes, snacks, or dessert, they offer a tender gluten-free crust and a sweet, fruity center that everyone will love.
8
servings20
minutes40
minutes260
kcal25
minutes1
hour15
minutesIngredients
- For the Dough
2 cups gluten-free all-purpose flour (with xanthan gum)
1/2 teaspoon salt
1 tablespoon sugar
1/2 cup cold butter (cut into small cubes)
1 egg
2–3 tablespoons cold milk
- For the Filling
1/2 cup fruit jam (strawberry or your choice)
- For the Glaze
1 cup powdered sugar
1–2 tablespoons milk
1/2 teaspoon vanilla extract
Directions
- Prepare the Dough
In a large mixing bowl, whisk together:
Gluten-free all-purpose flour
Salt
Sugar
Add the cold butter cubes and work them into the flour using your fingertips or a pastry cutter until the mixture resembles coarse crumbs. - Add the Wet Ingredients
Mix in:
Egg
Cold milk
Stir gently until a soft dough forms.
If necessary, add a little extra milk, one tablespoon at a time. - Chill the Dough
Shape the dough into a flat disc.
Wrap it tightly in plastic wrap.
Refrigerate for 30–40 minutes. - Roll the Dough
Place the chilled dough between two sheets of parchment paper.
Roll it to approximately ¼-inch thickness.
Cut the dough into evenly sized rectangles. - Fill the Pastries
Arrange half of the rectangles on a parchment-lined baking tray.
Place 1–2 teaspoons of fruit jam in the center of each rectangle, leaving a small border around the edges. - Seal the Pop Tarts
Place another dough rectangle on top of each filled pastry.
Press the edges together gently.
Seal all sides using the tines of a fork.
Poke several small holes in the tops with a fork to allow steam to escape. - Bake
Preheat the oven to:
350°F (180°C)
Bake the pop tarts for 20–25 minutes, or until lightly golden around the edges. - Cool
Transfer the baked pastries to a cooling rack.
Allow them to cool completely before adding the glaze. - Prepare the Glaze
In a small bowl, whisk together:
Powdered sugar
Milk
Vanilla extract
Mix until smooth and spreadable. - Decorate and Serve
Spread the glaze evenly over each cooled pop tart.
Allow the glaze to set for several minutes before serving.
Enjoy immediately or store for later.
Nutrition Facts
8 servings per container
- Amount Per ServingCalories260
- % Daily Value *
- Total Fat
11g
15%
- Total Carbohydrate
36g
14%
- Total Sugars 15g
- Protein 4g 8%
* The % Daily Value tells you how much a nutrient in a serving of food contributes to a daily diet. 2,000 calories a day is used for general nutrition advice.