Tomato and Basil Soup Recipe for Soup Maker
Prep Time: 10 minutes
Cooking Time: 20-30 minutes
Total Time: 30-40 minutes
Servings: 4 servings
Ingredients:
- 4 large ripe tomatoes, chopped (or 1 can of chopped tomatoes)
- 1 medium onion, chopped
- 1 clove garlic, minced
- 1 tablespoon olive oil
- 2 cups vegetable stock (or chicken stock for a richer flavor)
- 1 teaspoon sugar (optional, to balance acidity)
- Salt and pepper, to taste
- A handful of fresh basil leaves (around 8-10 leaves, more for garnish)
- 1/2 cup cream (optional, for a creamy finish)
- Optional garnish: Fresh basil leaves, a swirl of cream, or croutons
Step-by-Step Instructions:
1. Prepare the Ingredients:
- Chop the vegetables: Roughly chop your tomatoes, onion, and garlic.
- Tear the basil: Tear the basil leaves into smaller pieces to release their aroma and flavor.
- Stock: If you are using homemade stock, ensure it’s heated or at room temperature before adding to the soup maker.
2. Set up the Soup Maker:
- Add the ingredients:
- Place the chopped tomatoes, onion, garlic, and torn basil leaves into the soup maker jug.
- Pour in your vegetable stock (or chicken stock).
- Add the sugar (if you prefer a slightly sweeter balance to the tomatoes’ acidity).
- Season with salt and pepper according to your taste preferences.
3. Select the Correct Soup Setting:
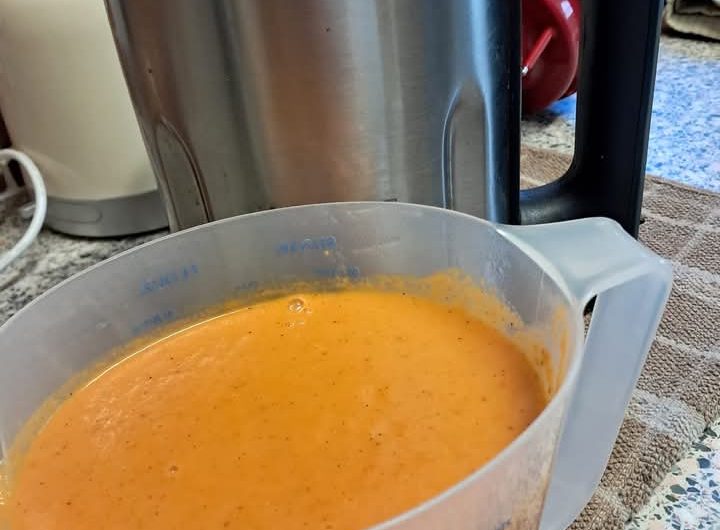
- Smooth soup setting: Close the lid and select the “smooth” setting on your soup maker (this is common in most soup makers, such as the Ninja, Morphy Richards, or Philips brands). This setting will cook and blend the soup together for a smooth, creamy consistency.
- Cooking Time: Typically, the soup will take around 20-30 minutes to cook and blend, depending on the model and its power.
4. Let the Soup Cook:
- Soup temperature: Soup makers generally cook at temperatures around 95-100°C (203-212°F). This is ideal for softening the ingredients and ensuring the flavors meld together perfectly.
- Automatic blending: The soup maker will automatically blend the soup to a smooth consistency once it’s cooked. If you prefer a chunkier texture, you can stop the machine early.
5. Final Touches:
- Taste and adjust seasoning: Once the soup is ready, taste and adjust the seasoning. If you feel the soup needs more acidity, add a small squeeze of lemon juice. If you prefer a richer flavor, stir in a spoonful of butter.
- Optional creaminess: For a creamier texture, add the cream after the soup is finished cooking. Stir it in and blend for a few seconds to ensure it’s fully incorporated.
6. Serve:
- Pour the soup into bowls and garnish with a drizzle of cream, extra fresh basil, or croutons for crunch.
- Serving suggestion: Serve with a slice of crusty bread or a grilled cheese sandwich for a classic pairing.
Tips for the Best Tomato and Basil Soup:
- Use ripe tomatoes: The more flavorful your tomatoes, the tastier your soup will be. Fresh, in-season tomatoes are ideal for maximum flavor. If using canned tomatoes, choose high-quality whole or chopped tomatoes.
- Roast the tomatoes (optional): If you prefer a richer flavor, you can roast the tomatoes with a drizzle of olive oil and some salt for 20 minutes at 180°C (350°F) before adding them to the soup maker. This deepens the flavor of the tomatoes and adds a smoky undertone.
- Balance acidity: Tomatoes can sometimes be acidic, so a teaspoon of sugar can help balance this. Taste as you go and adjust.
- Basil flavor: For an intense basil flavor, use fresh basil leaves and tear them up right before adding them to the soup. Avoid adding basil too early, as it can lose its flavor if cooked for too long. Adding it at the end helps preserve its vibrant taste.
- Make it creamy: If you like your soup creamy, use double cream or a splash of milk. You can also add a little cream cheese or coconut cream for a different twist.
- Customize with extras: For an extra burst of flavor, consider adding a small piece of chopped celery, carrot, or bell pepper at the beginning, or a pinch of red pepper flakes for heat.
How to Store Leftovers:
- In the fridge: Store any leftover soup in an airtight container in the fridge for up to 3 days.
- In the freezer: Allow the soup to cool completely before transferring it to a freezer-safe container. Freeze for up to 3 months. Reheat thoroughly on the stovetop or in the microwave before serving.
Why Use a Soup Maker:
A soup maker is perfect for making smooth, creamy soups quickly. It cooks the ingredients and blends them in one step, cutting down on prep time and reducing the need for extra pots and blenders. Plus, the automatic temperature control ensures your soup is always cooked at the perfect temperature, with no risk of overcooking or undercooking.


