Baking your own sourdough bread is a rewarding experience. A sourdough starter is a mix of flour and water that captures wild yeast and bacteria, helping bread rise naturally. This guide will show you how to make a strong and active sourdough starter from scratch.
What is a Sourdough Starter?
A sourdough starter is a natural culture of wild yeast and bacteria. When mixed with flour and water, these microorganisms ferment and create gases that make bread rise. The result is a flavorful, slightly tangy loaf with a chewy texture.
Sourdough bread is easier to digest than regular bread due to the fermentation process, though it still contains gluten.
How Long Does It Take?
Creating a sourdough starter takes 7 to 14 days, depending on the temperature of your kitchen. The ideal temperature is around 75°F (24°C), but it can still be made in cooler conditions with patience.
Tip: If your kitchen is around 68°F (20°C), it may take about 10 days for your starter to be ready.
What You Need
- Flour & Water:
- Mix 6 cups all-purpose flour with 3 cups whole wheat flour and store in an airtight container.
- You can use all-purpose flour alone, but whole wheat flour helps fermentation.
- Use bottled, filtered, or tap water (let tap water sit uncovered for 24 hours to remove chlorine).
Tools Needed
- Glass jar or food-grade plastic container
- Lid or breathable cloth (cheesecloth or kitchen towel)
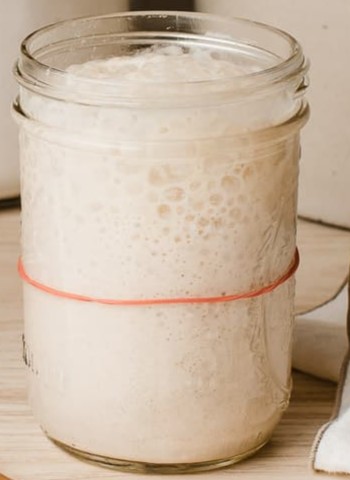
- Rubber band (to track growth)
- Kitchen scale (for accurate measurements)
- Spoon or offset spatula (for stirring)
- Digital thermometer (optional, to monitor room temperature)
Step-by-Step Instructions
Day 1: Mix Flour and Water
- Combine 1 cup flour mixture with 1/2 cup water (120g flour + 120g water).
- Stir well until fully mixed.
- Cover loosely with a lid or breathable cloth.
- Place in a warm spot.
Day 2: Stir the Mixture
- Stir the mixture to incorporate air.
- You may see some small bubbles.
Days 3-7: Discard & Feed Daily
- Each day, discard all but 2 tablespoons of the starter.
- Add 1/2 cup fresh flour and 1/4 cup water (60g flour + 60g water).
- Stir well and cover.
- Continue until the starter is bubbly and doubles in size after feeding.
How to Know When It’s Ready
- The starter rises and doubles after feeding.
- Small bubbles appear on the surface.
- It smells pleasantly tangy.
- It has a light, fluffy texture.
- It passes the float test: Drop a small spoonful into water. If it floats, it’s ready to use.
Boosting a Sluggish Starter
If your starter isn’t active by Day 4:
- Add 2 tablespoons flour and 2 teaspoons water 12 hours after feeding.
Maintaining Your Starter
- Feed it daily for two weeks to strengthen it.
- After two weeks, you can store it in the fridge and feed it once a week.
Tips & Tricks
- Creating a Warm Spot: Place near the oven, on top of the fridge, or use a heating pad on the lowest setting.
- If Your Kitchen is Too Warm: Store in a cooler area or use cold water for feeding.
- What to Do with Discards: Keep discard in the fridge and use it for pancakes or waffles.
Beginner Sourdough Starter Recipe
Description: A simple and foolproof way to create a sourdough starter for homemade bread.
Duration: 7-14 days
Ingredients:
- 6 cups (720g) all-purpose flour
- 3 cups (360g) whole wheat flour
- Water
Instructions:
- Prepare Flour Mixture: Mix all-purpose and whole wheat flour and store in an airtight container.
- Day 1: Mix 1 cup flour with 1/2 cup water (120g each). Stir well and cover loosely. Place in a warm spot.
- Day 2: Stir the mixture and let it rest.
- Days 3-7: Discard all but 2 tablespoons of the starter. Feed it with 1/2 cup flour and 1/4 cup water (60g each). Stir and cover. Repeat daily until the starter is bubbly and doubles in size within 4-12 hours after feeding.
- Float Test: If a small amount of starter floats in water, it’s ready to use.
Notes:
- If your starter is slow to grow, add extra flour and water 12 hours after feeding.
- Feed daily for two weeks to build strength before storing in the fridge.
- Use discard for recipes like pancakes and waffles.
Enjoy baking your homemade sourdough bread!