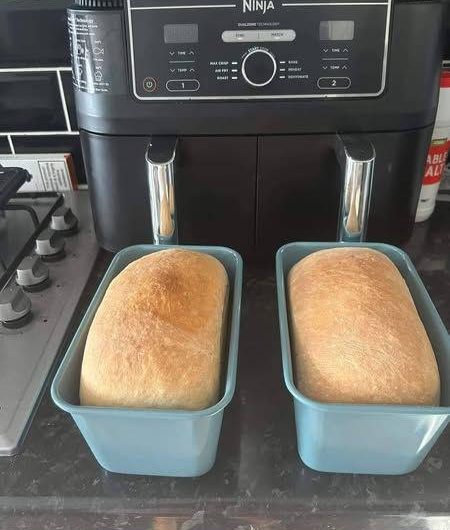
If you want a soft and fluffy bread that’s easy to make and cooks quickly, try this air fryer milk bread recipe. It has a crispy outer crust and a soft, airy inside that’s perfect for dipping in soup or stew. The best part is, it only takes about 30 minutes to prepare and cook, making it a great option for a quick homemade bread.
Ingredients:
For the Starter:
- 1/4 cup all-purpose flour
- 1/4 cup milk
- 1/4 cup room temperature water
For the Bread:
- 2 1/2 cups all-purpose flour
- 2 1/4 teaspoons active instant yeast
- 1/4 cup granulated sugar
- 1 teaspoon salt
- 1 tablespoon sweetened condensed milk
- 1/2 cup whole milk (room temperature)
- 1/4 cup unsalted butter (room temperature)
- 1 large egg
- Melted butter for brushing on top
Instructions:
- Prepare the Starter:
- Add the starter ingredients (flour, milk, and water) to a small pan and heat over low to medium heat.
- Stir until the mixture thickens, then transfer it to a bowl and cover with a dish towel. Let it cool.
- Make the Dough:
- In a stand mixer bowl, combine the flour, yeast, sugar, salt, and condensed milk. Mix them together.
- Start the stand mixer on low and add the flour, milk, the beaten egg, and the cooled starter mixture. Increase the speed to medium and mix until a dough forms that pulls away from the sides of the bowl and forms a ball.
- Let the Dough Rise:
- Transfer the dough ball to a large bowl that’s been lightly sprayed with cooking spray. Spray the top of the dough to prevent it from drying out.
- Cover the bowl with a dish towel or plastic wrap and let it rise for about 1 hour, or until it doubles in size.
- Shape the Dough:
- Once the dough has risen, take it out of the bowl and place it on a floured surface. Divide the dough into 4 equal pieces.
- Roll each piece into a rectangle and fold in the sides slightly. Then, roll each piece from the short side to form a log shape. Repeat this for all the pieces.
- Let the Dough Rise Again:
- Place the rolled dough pieces into the air fryer pan. Cover them and let them rise for another hour.
- Cook the Bread:
- Preheat the air fryer to 350°F (175°C).
- Brush the top of each dough piece with melted butter.
- Air fry for 15-20 minutes, or until the bread is golden brown on top.
- Cool and Serve:
- Let the bread cool on a rack before slicing and serving.
Enjoy your freshly baked, soft, and fluffy air fryer milk bread!
Short Recipe
Description:
This air fryer milk bread is soft, fluffy, and perfect for dipping in your favorite soups or stews. With a crispy outer crust and a tender inside, it’s a quick and easy bread recipe that’s ready in under 40 minutes.
Duration:
- Prep Time: 20 minutes
- Cook Time: 20 minutes
- Total Time: 40 minutes
Servings:
4 servings
Ingredients:
For the Starter:
- 1/4 cup all-purpose flour
- 1/4 cup milk
- 1/4 cup room temperature water
For the Bread:
- 2 1/2 cups all-purpose flour
- 2 1/4 teaspoons active instant yeast
- 1/4 cup granulated sugar
- 1 teaspoon salt
- 1 tablespoon sweetened condensed milk
- 1/2 cup whole milk (room temperature)
- 1/4 cup unsalted butter (room temperature)
- 1 large egg
- Melted butter for brushing
Instructions:
- Make the starter: Mix flour, milk, and water in a pan. Heat until thickened, then cool.
- Mix the bread ingredients in a stand mixer and knead until dough forms.
- Let the dough rise for 1 hour until doubled in size.
- Divide dough into 4, roll into logs, and place in an air fryer pan. Let rise for 1 hour.
- Preheat air fryer to 350°F, brush dough with melted butter, and cook for 15-20 minutes.
- Cool on a rack, then serve.
Tips & Tricks:
- Use room temperature ingredients for better results.
- Spray the dough with cooking spray to avoid it drying out during the rise.
- If you don’t have an air fryer, you can bake in a regular oven at 350°F for 20-25 minutes.
Notes:
- You can brush the bread with extra butter after baking for a richer taste.


