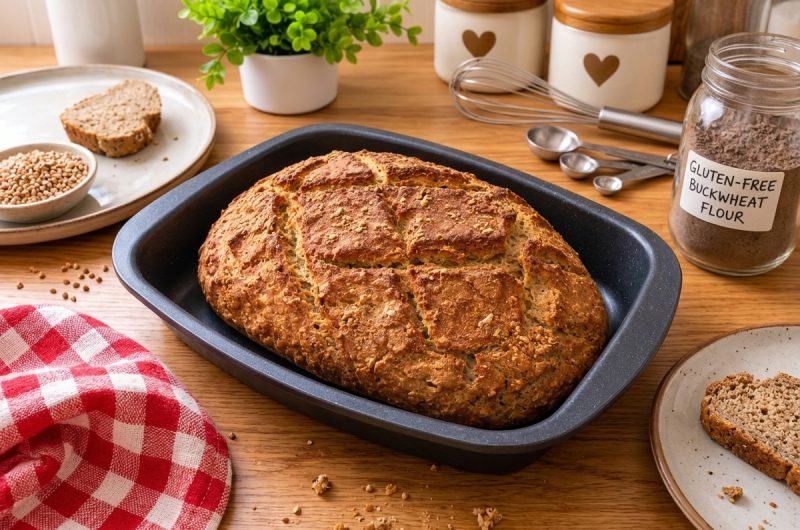
Finding a good gluten free bread that has a satisfying texture, holds together when sliced, and tastes delicious can be challenging. Many store-bought gluten free breads contain several types of starches, flour blends, and binding agents to create a texture similar to traditional wheat bread.
However, if you enjoy the natural, slightly earthy flavor of buckwheat, this homemade gluten free buckwheat bread is a wonderful alternative. It uses buckwheat flour as its main ingredient, with a small amount of cassava or tapioca flour to improve the texture.
This homemade buckwheat bread is designed for people who want a loaf made primarily from naturally gluten free buckwheat flour rather than a complicated commercial flour blend. It also contains no xanthan gum, making it a useful option for anyone who prefers baking without this common gluten free ingredient. Psyllium husk powder provides structure and helps the bread hold together, while instant yeast gives the loaf a pleasant rise and a soft interior.
One of the best things about this recipe is its versatility. You can enjoy the finished bread for breakfast, prepare sandwiches for lunch, or serve toasted slices alongside soups and salads. Its naturally distinctive buckwheat flavor pairs nicely with both sweet and savory toppings.
Although gluten free bread requires a little more attention to moisture and proofing than traditional wheat bread, the process is manageable when you understand what the dough should look like.
What Makes This Buckwheat Bread Different?
Many recipes advertised as gluten free buckwheat bread use only a small quantity of buckwheat flour and rely mainly on other gluten free flours. This recipe takes a different approach by making buckwheat the primary flour. Approximately 450 grams of buckwheat flour form the foundation of the loaf, giving it a more noticeable buckwheat taste and making it particularly suitable for people who enjoy this naturally gluten free grain alternative.
Buckwheat has a distinctive earthy flavor that makes this bread different from ordinary white sandwich bread. It is technically a seed rather than a true cereal grain, even though it is commonly used like a grain in cooking and baking. Naturally gluten free buckwheat flour can be used in pancakes, porridge, noodles, and homemade bread. When combined with psyllium husk and a little starch, it can also produce a loaf that is suitable for everyday sandwiches.
The addition of cassava or tapioca flour is important because buckwheat flour alone can produce a more delicate loaf. These ingredients help improve elasticity and contribute to a lighter crumb. Psyllium husk powder provides additional binding, allowing the dough to hold its shape without relying on xanthan gum. Together, these ingredients create a bread that is easier to slice and more practical for everyday use.
This Homemade Gluten Free Bread
There are several reasons to make this homemade gluten free buckwheat bread instead of relying entirely on packaged alternatives. First, the recipe uses a relatively straightforward collection of ingredients, most of which are commonly used in gluten free baking. You do not need an elaborate flour blend or complicated bread-making equipment. A mixing bowl, a suitable loaf pan, and a little patience during proofing are enough to prepare the dough.
Another advantage is that the recipe does not require xanthan gum. Instead, psyllium husk powder performs an important structural role by absorbing water and forming a gel. This gel helps hold the ingredients together and gives the baked loaf a more cohesive texture. It also helps retain moisture, which is particularly important because gluten free dough does not have the elastic gluten network found in traditional bread dough.
The recipe is also adaptable to different preferences. You can use cassava flour or tapioca flour for the additional starch component, depending on what is available. Both options work, although their absorption levels differ. You can also choose between light and dark buckwheat flour, keeping in mind that the amount of water and psyllium may need attention when using darker flour.
How to Get the Right Dough Consistency
Hydration is one of the most important parts of making gluten free buckwheat bread. Unlike regular wheat bread, this dough does not develop a stretchy gluten network. Instead, its structure depends on the flour, psyllium gel, and the correct balance of moisture. Different brands of buckwheat flour can absorb different amounts of water, so following the liquid quantity without checking the dough may not always produce the same result.
The recipe calls for approximately 750 to 800 grams of water, but it is best to begin with the lower amount. Once the psyllium mixture has formed a gel and you combine it with the dry ingredients, examine the dough carefully. If it appears dry, rough, or contains patches of unmixed flour, gradually add more water. Avoid pouring in the entire quantity immediately because it is easier to increase hydration than to correct an overly wet mixture.
The ideal dough should look smooth, moist, and slightly floppy. It should not have visible dry areas or a rough, spiky appearance. You should be able to pick it up, although it will feel much softer and wetter than traditional bread dough. This consistency is normal for a high-hydration gluten free loaf.
If you use cassava flour, allow the combined dough to rest for approximately five minutes before deciding whether additional water is needed. Cassava flour continues absorbing moisture, so the texture can change after mixing. Fermented cassava flour may absorb even more liquid than non-fermented varieties, making gradual hydration particularly important.
Choosing Between Light and Dark Buckwheat Flour
Both light and dark buckwheat flour can be used in this recipe, but they may produce slightly different results. Light buckwheat flour is made from hulled seeds, while dark buckwheat flour contains the outer hull. This difference affects the flour’s appearance, fiber content, and how it behaves when mixed with water.
Dark buckwheat flour can produce a more fragile loaf, especially around the upper crust and inner slices. When using it, the original recipe testing suggests increasing the psyllium husk powder to approximately 30 grams, or potentially 35 grams, and reducing the water slightly. One tested version used 25 grams of psyllium powder and 800 grams of water, but the resulting bread was less sturdy than a loaf made with light buckwheat flour.
If you are experimenting with dark buckwheat flour for the first time, avoid adding all the water at once. Pay attention to the dough texture and make small adjustments when necessary. You may also need a little additional baking time. Every flour behaves differently, so checking the loaf rather than relying only on the clock is a useful approach.
Why a Steel Loaf Pan Is Important
A suitable baking pan plays a major role in the shape and structure of this gluten free buckwheat bread. Because the dough contains a high amount of water and has limited natural structure, it needs support while rising. A steel loaf pan holds the mixture in place and encourages it to rise upwards rather than spreading outwards.
A small steel Pullman loaf pan measuring approximately 10 x 10 x 23 centimeters is recommended for this recipe. Its straight sides help create a sandwich-style loaf with a practical shape for slicing. This is particularly helpful when making gluten free bread because the dough is softer and more delicate than traditional wheat-based dough.
Silicone loaf pans are not recommended because they may not provide enough support during proofing. If you do not have a suitable steel pan, a free-form buckwheat boule recipe would be a better alternative. Using the correct pan from the beginning can make the baking process easier and help you achieve a taller, more evenly shaped loaf.
Understanding the Proofing Process
Proofing gives the instant yeast time to work and allows the dough to rise before baking. This recipe offers two different proofing methods, so you can choose the one that suits your schedule. Both approaches are suitable, although the two-stage method is the preferred option because it allows the dough to develop its structure in two steps.
For the first method, transfer the prepared dough directly into the greased and lined steel loaf pan. Smooth the surface with a wet hand and leave the pan in a suitable place until the dough reaches the top. This generally takes around one and a half hours, although room temperature can affect the timing.
The second method involves allowing the dough to rise in a covered mixing bowl for approximately one hour. After that, transfer it into the prepared loaf pan, smooth the surface, and leave it for another 30 to 60 minutes. This additional stage does not require much extra work and may help the loaf retain its structure during baking.
Avoid relying only on a fixed proofing time. Temperature, yeast activity, and the condition of your ingredients can affect how quickly the dough rises. Look for the dough to reach approximately the top of the loaf pan before baking. Allowing enough time for proofing is important for achieving a well-shaped loaf.
How to Bake Gluten Free Buckwheat Bread
Before baking, preheat your oven thoroughly to 200°C or 400°F. A properly heated oven helps the loaf begin baking evenly as soon as it enters. Approximately 10 minutes before baking, place an ovenproof cake tin or suitable pan containing boiling water at the bottom of the oven. This creates steam, which helps the bread rise and remain moist during the initial baking stage.
Place the proofed loaf into the oven and bake it at 200°C (400°F) for 30 minutes. After this first stage, carefully remove the container of water and reduce the oven temperature to 180°C (356°F). Continue baking for another 20 minutes. The finished loaf should have a medium-brown appearance and a firm, hard top.
If you are using dark buckwheat flour, consider checking the bread carefully because it may benefit from additional baking time. The tested dark flour version performed better with approximately one hour of total baking rather than 50 minutes. However, oven performance and flour differences can affect the final result, so use the appearance and firmness of the loaf as additional guides.
Cooling and Slicing the Bread Properly
Once the bread has finished baking, remove it from the oven and allow it to rest in the pan for approximately 10 minutes. This short cooling period helps the loaf settle and makes it easier to remove. If the bread feels stuck, give it another 10 minutes rather than forcing it out immediately. The crust gradually softens as the bread cools, making removal easier.
After removing the loaf, transfer it to a wire rack so air can circulate around the sides and bottom. Avoid slicing the bread while it is still hot. Gluten free bread needs time to cool and allow its internal structure to settle. Cutting too early can result in a crumb that feels sticky or appears undercooked, even when the loaf has baked properly.
For the cleanest slices, allow the bread to cool for at least one hour, preferably until completely cool. Use a sharp bread knife and cut gently to avoid tearing the delicate interior. Once cooled, the slices are ready for sandwiches, toast, or your favorite toppings.
Serving Ideas for Homemade Buckwheat Bread
This gluten free buckwheat sandwich bread can be served in many different ways. For a simple breakfast, toast a slice and add butter, avocado, or your preferred spread. The earthy flavor of buckwheat also works nicely with nut butter, jam, and other sweet toppings. Its slightly hearty taste makes it a satisfying alternative to ordinary white bread.
For lunch, use the cooled slices to prepare sandwiches with vegetables, cheese, eggs, or other fillings. You can also serve toasted bread alongside vegetable soup, salads, and warm meals. Because the loaf has a distinctive buckwheat flavor, it pairs particularly well with savory ingredients that complement its natural taste.
If you prefer a crispier texture, toast the slices before serving. Toasting also makes slightly older bread more enjoyable and gives it a firmer surface. Whether served fresh or toasted, this homemade loaf offers plenty of ways to include gluten free bread in everyday meals.
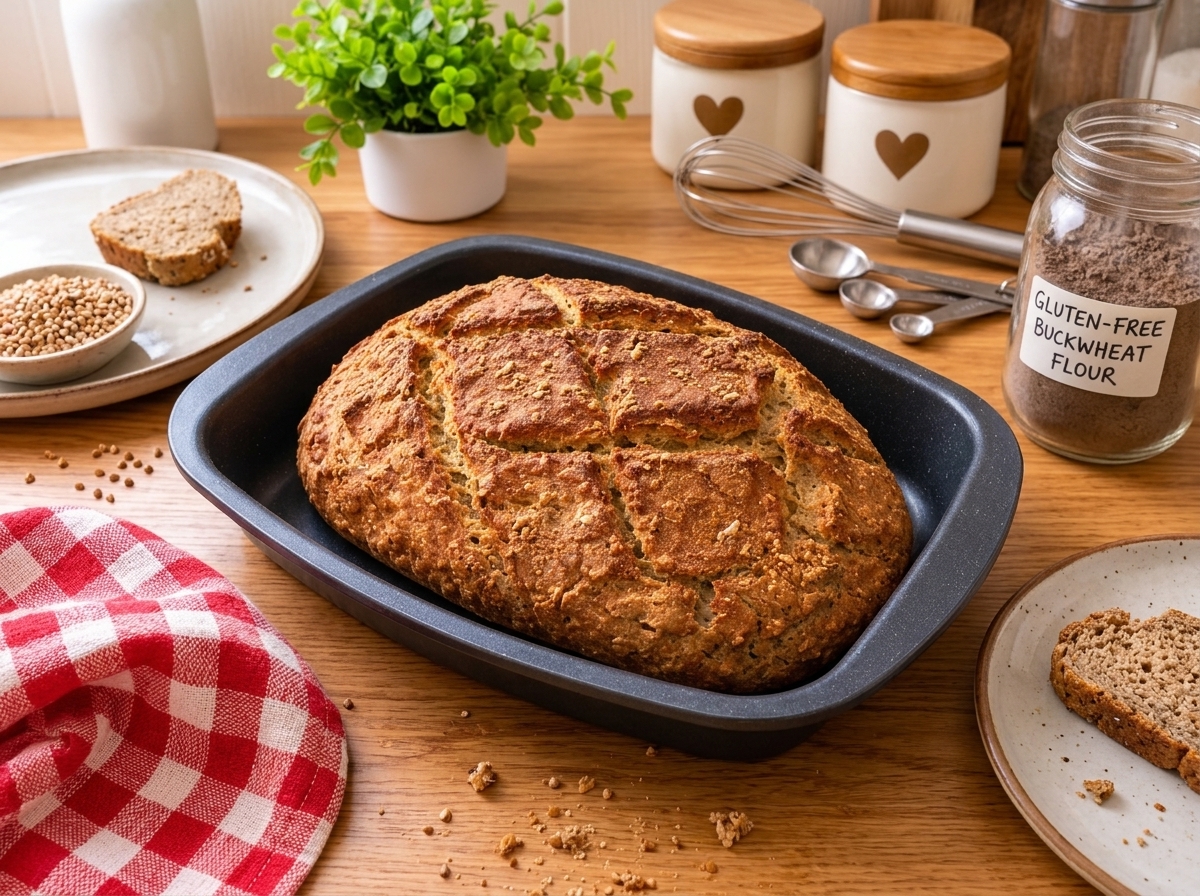
Gluten-Free Buckwheat Bread
A homemade gluten free buckwheat bread made primarily with buckwheat flour, psyllium husk powder, and a little cassava or tapioca flour. This soft, yeast-raised loaf is xanthan gum free and suitable for sandwiches and toast.
1
servings20
minutes50
minutes90
minutes2
hours40
minutesIngredients
450 g buckwheat flour
60 g cassava flour or tapioca flour
10 g (2 teaspoons) baking powder
10–12 g salt
1 sachet (7.5 g) instant yeast
25–30 g psyllium husk powder
750–800 g water
20 ml (1 tablespoon) oil
20 ml (1 tablespoon) maple syrup
Directions
- Prepare the Loaf Pan: Grease and line a steel bread pan measuring approximately 10 x 10 x 23 cm.
- Combine the Dry Ingredients: Add buckwheat flour, cassava or tapioca flour, baking powder, salt, and instant yeast to a large mixing bowl. Whisk thoroughly to distribute everything evenly and remove any lumps.
- Prepare the Psyllium Gel: In a separate medium bowl, combine the psyllium husk powder and water. Whisk until smooth and leave it for approximately 10 minutes to develop a gel.
- Add the Wet Ingredients: Once the psyllium mixture has thickened, whisk in the oil and maple syrup until combined.
- Mix the Dough: Pour the psyllium mixture into the dry ingredients. Stir with a spoon, then use your hands to combine everything thoroughly. Make sure there are no dry patches or lumps. Adjust the water gradually if necessary.
- First Proofing: Cover the dough and leave it in the mixing bowl for approximately one hour.
- Transfer to the Pan: Move the dough into the prepared loaf pan. Use a wet hand to smooth the surface and distribute the dough evenly.
- Second Proofing: Allow the dough to rise in the pan for another 30–60 minutes or until it reaches the top of the pan. Alternatively, proof the dough directly in the pan for approximately 1 hour and 30 minutes.
- Preheat the Oven: Heat the oven to 200°C (400°F). About 10 minutes before baking, place an ovenproof pan containing boiling water at the bottom of the oven.
- Bake the Bread: Bake at 200°C (400°F) for 30 minutes. Carefully remove the water pan and reduce the temperature to 180°C (356°F). Continue baking for another 20 minutes.
- Cool the Loaf: Remove the bread from the oven and leave it in the pan for 10 minutes. Transfer it to a wire rack to cool.
- Slice and Serve: Allow the loaf to cool for at least one hour, preferably completely, before slicing and serving.
Notes
- Use light or dark buckwheat flour.
- Cassava flour absorbs more water than tapioca flour, so adjust hydration gradually.
- Start with 750 g water and add more if needed.
- Use 30–35 g psyllium powder when using dark buckwheat flour for better structure.
- Fermented cassava flour may require extra water.
- A steel loaf pan is recommended for the best shape and rise.
- Allow the bread to cool completely before slicing.
- Store in an airtight container.