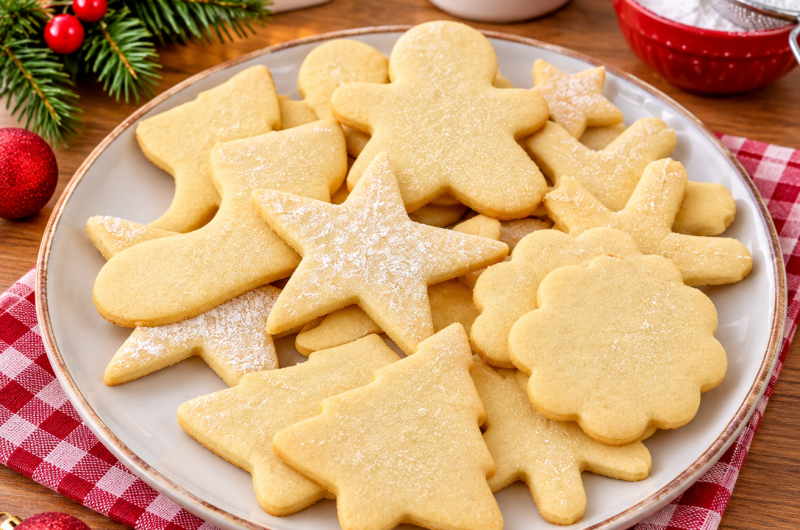
Christmas baking is even more enjoyable when you have a reliable sugar cookie recipe that produces beautiful results without complicated preparation. These Gluten-Free Christmas Sugar Cookies are soft, buttery, lightly crisp around the edges, and deliciously tender in the middle.
They are designed to hold their shape during baking, making them an excellent choice for festive cut-out cookies. Whether you are preparing holiday treats for family, decorating cookies with children, or putting together a homemade Christmas gift box, these cookies bring plenty of seasonal charm to your kitchen.
One of the best features of this gluten-free sugar cookie recipe is that the dough does not require refrigeration before rolling or baking. Many traditional cut-out cookie recipes need several hours of chilling to prevent spreading, but this dough is prepared to be firm enough for immediate use.
You can mix the ingredients, roll out the dough, cut your favorite shapes, and place the cookies directly into the oven. This saves preparation time while helping every cookie maintain its original shape.
The finished cookies have a lovely balance of textures. Their centers remain soft and buttery, while the outer edges develop a delicate crispness. A gentle vanilla flavor makes them taste like classic homemade sugar cookies, and their smooth surfaces provide an ideal base for royal icing, colorful decorations, and Christmas sprinkles. Even people who do not usually eat gluten-free baked goods can enjoy their familiar flavor and satisfying texture.
What Makes These Gluten-Free Sugar Cookies Special?
No-Spreading Cookie Dough
Keeping cut-out sugar cookies from spreading is important when you want recognizable shapes and clean edges. Cookies that spread too much can lose their details, especially when using smaller cutters or designs with delicate points. This recipe uses a carefully balanced combination of flour, butter, sugar, and egg to create dough that holds together during baking without requiring refrigeration.
The preparation technique also plays an important role in preventing excessive spreading. Instead of incorporating lots of air by beating the butter and sugar together, the softened butter is worked directly into the dry ingredients. This creates a texture similar to breadcrumbs before the egg and vanilla are added. The resulting dough is smooth, manageable, and suitable for cutting into festive shapes.
No-Chill Preparation
Another reason to love these easy gluten-free Christmas cookies is that you can work with the dough immediately after mixing. Chilling cookie dough is often recommended because it helps firm up the butter, but this recipe is designed to have the right consistency without that extra step. You can move directly from preparing the dough to rolling and cutting, which makes holiday baking more convenient.
This is particularly helpful when you are preparing several batches of Christmas cookies or working with limited kitchen time. There is no need to plan hours ahead or wait for the dough to become firm enough to handle. As long as you follow the ingredient measurements and preparation method, the dough should be easy to roll and cut without becoming overly sticky.
Soft Centers with Slightly Crisp Edges
Texture is one of the most important parts of a good sugar cookie. These cookies are designed to stay tender in the middle while developing lightly golden edges. The butter provides richness, while the sugar contributes sweetness and helps create a delicate exterior. Their texture is sturdy enough for decorating but soft enough to enjoy with a cup of tea, coffee, or hot chocolate.
Baking time allows you to make small adjustments depending on your preferred result. For softer sugar cookies, remove them when the edges are just beginning to turn light golden. If you prefer a firmer, crispier cookie, leave them in the oven for a few additional minutes until they develop a deeper golden color. Keep an eye on them because gluten-free cookies can become dry if overbaked.
How to Make Gluten-Free Christmas Sugar Cookies
Prepare the Oven and Baking Sheets
Start by preheating your oven to 350°F (180°C). Position the oven rack in the middle so the cookies bake evenly without becoming too dark underneath. Line two large baking sheets with parchment paper or baking paper. Preparing the trays before mixing the dough makes the next steps easier because the cookies can be transferred directly onto the prepared surfaces.
Make sure your butter is softened but not melted. Melted butter can change the consistency of the dough and may increase spreading during baking. Having all the ingredients measured and ready before beginning also helps you work efficiently, particularly if you are preparing different Christmas cookie shapes in one batch.
Mix the Dry Ingredients
In a large mixing bowl, combine the gluten-free flour blend, sugar, xanthan gum, and salt. Whisk everything together until the ingredients are evenly distributed. This step is important because it helps prevent concentrated areas of xanthan gum or salt in the dough. An even mixture creates a more consistent texture throughout the finished batch.
You can prepare the dough by hand using a wooden spoon or use a stand mixer fitted with the paddle attachment. If using a stand mixer, keep it on the lowest speed setting to avoid incorporating unnecessary air. A hand mixer is not recommended for this particular preparation method because the goal is to work the butter into the flour rather than beat the ingredients together.
Incorporate the Butter
Add the softened unsalted butter to the dry ingredients. Work it into the flour mixture until everything resembles fine breadcrumbs. If preparing the dough by hand, use your fingertips to rub the butter into the dry ingredients. With a stand mixer, use the paddle attachment at low speed until the mixture reaches a similar consistency.
Avoid beating the butter and sugar together as you would for some other cookie recipes. Incorporating too much air can cause the cookies to expand during baking and lose their carefully cut shapes. The breadcrumb-like mixture is the correct starting point for creating a smooth dough that holds its edges without needing to chill.
Add the Egg and Vanilla
Add the room-temperature egg and vanilla bean paste to the butter and flour mixture. Mix until the ingredients come together into a smooth dough. At first, the mixture may look slightly crumbly, but it should gradually become cohesive as the egg distributes throughout the ingredients. Continue mixing just until everything is evenly combined.
The finished dough should feel soft enough to roll without cracking but firm enough that it does not stick excessively to your hands. If the mixture looks uneven, gently bring it together with your hands. Avoid adding unnecessary extra ingredients, as the original proportions are important for achieving the correct consistency and preventing the cookies from spreading.
How to Make Royal Icing for Christmas Cookies
Royal icing is a wonderful decorating option because it creates a smooth finish that hardens after setting. It is especially useful for detailed Christmas cookie designs, allowing you to add outlines, patterns, and colorful decorative elements. The combination of powdered sugar, egg white powder, water, and lemon juice produces an icing that can be adjusted depending on whether you want to pipe fine details or cover larger areas.
To prepare it, combine the sifted powdered sugar and egg white powder in a large bowl. Add the room-temperature water and lemon juice. Whisk everything together using a stand mixer with the whisk attachment or a hand mixer with double beaters. Mix on high speed for approximately 2–3 minutes until the icing becomes thicker and turns white.
Check the consistency using the figure-eight method. Lift the whisk and allow some icing to fall back into the bowl while drawing a figure-eight shape. If the pattern disappears into the remaining icing within approximately 8–10 seconds, the consistency is ready for decorating. This simple test helps you judge whether the icing is suitable for your preferred decorating technique.
If the icing is too thin, gradually mix in a little more powdered sugar. If it is too thick, add a small amount of water. Make adjustments slowly because even a small quantity can change the consistency noticeably. You can also divide the icing into separate bowls and add your preferred gel food coloring to create different festive shades.
Decorating Ideas for Christmas Sugar Cookies
Once the cookies have cooled completely, they are ready for decorating. Royal icing can be piped onto the surface using a piping bag to create outlines, small patterns, and detailed designs. You can also dip the cookies directly into the icing, allowing the excess to drip away before adding sprinkles or other decorations.
For a traditional Christmas appearance, use festive shades such as red, green, white, and gold. Simple snowflake patterns, Christmas tree decorations, and star designs can make an attractive holiday cookie collection. You do not need complicated decorating equipment to get lovely results. A basic piping bag and a few different icing colors are enough to create attractive homemade treats.
If you prefer a simpler option, powdered sugar icing made with water can also be used. Another easy alternative is dipping the cooled cookies into melted chocolate and finishing them with colorful sprinkles. The cookies are also delicious without any decoration because their buttery vanilla flavor is enjoyable on its own.
After decorating, leave the cookies uncovered at room temperature for at least two hours so the royal icing can harden completely. Avoid stacking or covering them while the icing is still wet because this can damage the designs and make the surfaces sticky. Once the icing has set, the cookies are ready to serve, package, or store.
Helpful Tips for Perfect Gluten-Free Sugar Cookies
Measure Ingredients Accurately
Accurate measurements are essential for achieving consistent gluten-free baking results. Too much flour can make the dough crumbly, while an incorrect balance of butter and dry ingredients can affect how the cookies behave in the oven. Using a digital food scale is particularly helpful because flour measurements by volume can vary depending on how tightly it is packed into a measuring cup.
Avoid Creaming the Butter and Sugar
The preparation method is different from many traditional cookie recipes. Instead of beating butter and sugar together until fluffy, the butter is rubbed into the dry ingredients until the mixture resembles breadcrumbs. This reduces the amount of air incorporated into the dough, helping the cookies maintain their shape and preventing unnecessary expansion during baking.
Do Not Add Raising Agents
Baking powder and baking soda are not included in this recipe. Raising agents can cause the cookies to expand and change their shape during baking. Since the main goal is to create neat cut-out cookies with clean edges, the dough is prepared without these ingredients. Following the original ingredient list is important for achieving the intended result.
Keep the Dough Around ¼ Inch Thick
Rolling the dough to approximately 6–7 mm gives the cookies enough thickness to remain soft and sturdy. Consistent thickness also helps prevent some cookies from becoming overbaked while others remain undercooked. If the dough is too thin, the cookies may become brittle and harder to decorate, so take a little time to roll it evenly.
How to Store Gluten-Free Christmas Sugar Cookies
Undecorated cookies can be stored in an airtight container at room temperature for approximately one week. Allow them to cool completely before placing them in the container to prevent trapped moisture from affecting their texture. Keeping the container tightly closed helps preserve their buttery flavor and soft centers, making them convenient to prepare ahead of holiday gatherings.
Cookies decorated with royal icing can be stored in an airtight container at room temperature for up to five days. Make sure the icing has completely hardened before stacking or packing them. If you need to arrange multiple layers, placing parchment paper between the layers can help protect the decorations and prevent the cookies from sticking together.
Leftover royal icing can be transferred to an airtight container or a tightly sealed piping bag and refrigerated for up to two weeks. Before using refrigerated icing again, check its consistency and mix it gently until smooth. You may need to make a small adjustment to the texture before decorating another batch of cookies.
Frequently Asked Questions
Can I Make These Gluten-Free Sugar Cookies Without Chilling the Dough?
Yes. This recipe is specifically designed to be rolled and baked without refrigeration. The butter-to-flour ratio and reverse creaming preparation method help create dough that is firm enough to handle immediately after mixing. As long as you measure the ingredients accurately and follow the preparation instructions, you can cut out your cookies and bake them without waiting for the dough to chill.
Why Do Gluten-Free Sugar Cookies Spread During Baking?
Excessive spreading can happen when the ingredient proportions are incorrect, the butter is too warm, or too much air has been incorporated during mixing. Using the correct measurements, softened rather than melted butter, and the recommended preparation technique helps prevent this problem. Avoid adding raising agents because they can also cause the cookies to expand and lose their shape.
Can I Use Different Cookie Cutters?
Absolutely. You can use almost any cookie cutter you like, including stars, circles, Christmas trees, snowflakes, and other festive shapes. The dough is suitable for cut-out designs because it holds its edges during baking. Try to keep the thickness consistent so the cookies bake evenly, especially when using cutters of different sizes.
How Long Should I Bake These Cookies?
The recommended baking time is approximately 10–12 minutes at 350°F (180°C). Softer cookies should be removed when the edges are lightly golden, while crispier cookies can remain in the oven a little longer. Baking time can vary depending on your oven and the thickness of the dough, so checking the cookies near the end of baking is helpful.
Can I Decorate These Cookies Without Royal Icing?
Yes. Royal icing is optional, and there are several other ways to finish these cookies. You can prepare a simple icing using powdered sugar and water, dip the cookies in melted chocolate, or add sprinkles to the chocolate coating. You can also serve them plain because the buttery vanilla flavor makes them delicious without additional decoration.
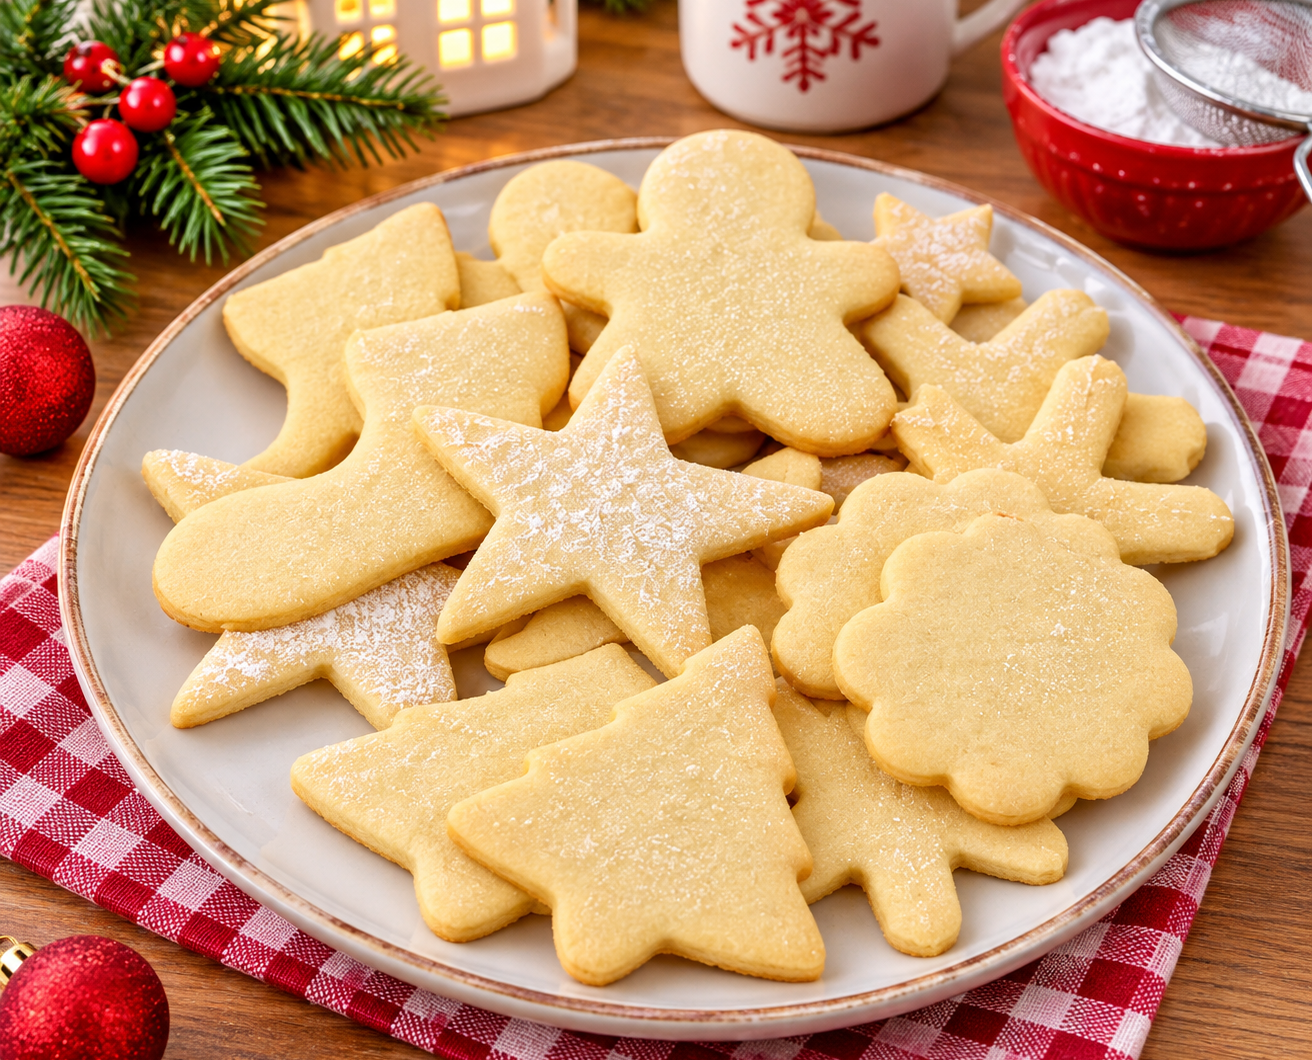
Gluten-Free Christmas Sugar Cookies
These easy Gluten-Free Christmas Sugar Cookies are buttery, soft in the middle, and lightly crisp around the edges. Their no-spread, no-chill dough holds its shape beautifully, making them perfect for Christmas cookie cutters, royal icing, and festive decorations.
36
servings45
minutes10
minutes55
minutesIngredients
- For the Gluten-Free Sugar Cookies:
360 g (3 cups) plain gluten-free flour blend, plus extra for flouring the surface
200 g (1 cup) caster/superfine or granulated sugar
¾ tsp xanthan gum (omit if your gluten-free flour blend already contains xanthan gum)
½ tsp salt
180 g (1½ sticks + 1 tbsp) unsalted butter, softened
1 US large/UK medium egg, room temperature
1 tsp vanilla bean paste (or 2 tsp vanilla extract)
- For the Royal Icing:
240 g (2 cups) powdered/icing sugar, sifted, plus more as needed
15 g (2½ tbsp) egg white powder
80 g (⅓ cup) room-temperature water, plus more as needed
10 g (2 tsp) lemon juice
Gel food colouring of choice
Directions
- Prepare the Cookie Dough:
- Preheat the oven to 350°F (180°C). Position the oven rack in the middle and line two large baking sheets with parchment paper.
- In a large mixing bowl, whisk together the gluten-free flour blend, sugar, xanthan gum, and salt until evenly combined.
- Add the softened butter and work it into the dry ingredients until the mixture resembles breadcrumbs. Use your fingertips if preparing the dough by hand or a stand mixer fitted with the paddle attachment on low speed.
- Add the egg and vanilla bean paste. Mix until everything forms a smooth, workable dough that is soft enough to roll but not sticky.
- Roll and Cut the Cookies:
- Gently knead the dough until smooth and shape it into a ball.
- Lightly flour your work surface and roll the dough to approximately ¼ inch (6–7 mm) thick.
- Use your preferred cookie cutters to create individual shapes. Transfer the cookies to the prepared baking sheets, leaving approximately one inch (2.5 cm) between them.
- Gather the remaining dough scraps, knead them together, and roll them out again to make additional cookies.
- Bake the Cookies:
- Bake at 350°F (180°C) for approximately 10–12 minutes, or until the edges become lightly golden. Bake a little longer if you prefer crispier cookies.
- Allow the cookies to cool on the baking sheets for approximately 10 minutes before transferring them to a wire rack.
- Let the cookies cool completely before decorating.
- Prepare the Royal Icing:
- Combine the sifted powdered sugar and egg white powder in a large mixing bowl.
- Add the room-temperature water and lemon juice.
- Using a stand mixer with a whisk attachment or a hand mixer with double beaters, whisk on high speed for approximately 2–3 minutes until the icing becomes thick and white.
- Check the consistency using the figure-eight test. The icing should disappear back into the mixture within approximately 8–10 seconds.
- Add small amounts of extra powdered sugar if the icing is too thin or water if it is too thick. Divide the icing into separate bowls and add gel food coloring if desired.
- Keep the icing tightly covered whenever it is not being used to prevent it from drying out.